Hanging Wall Basket Crochet Pattern
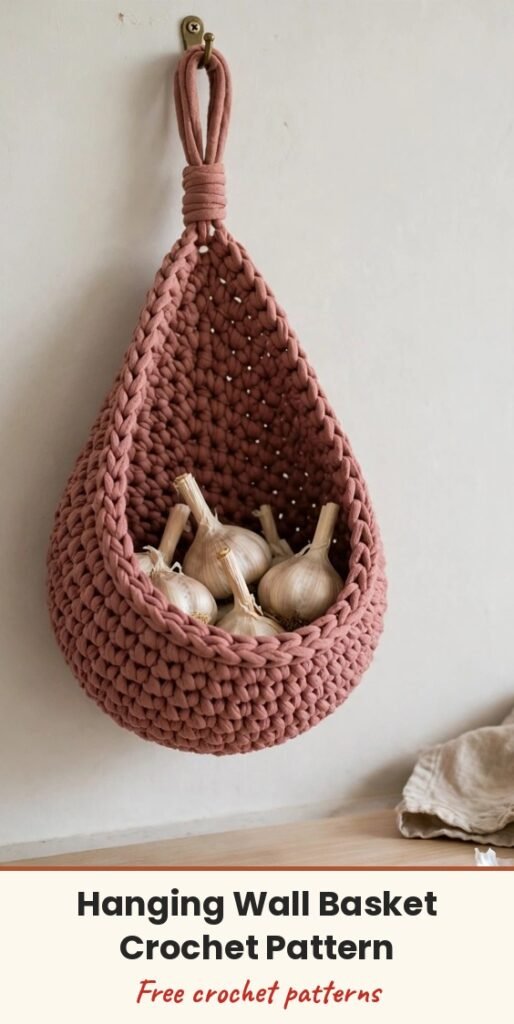
Table of Contents
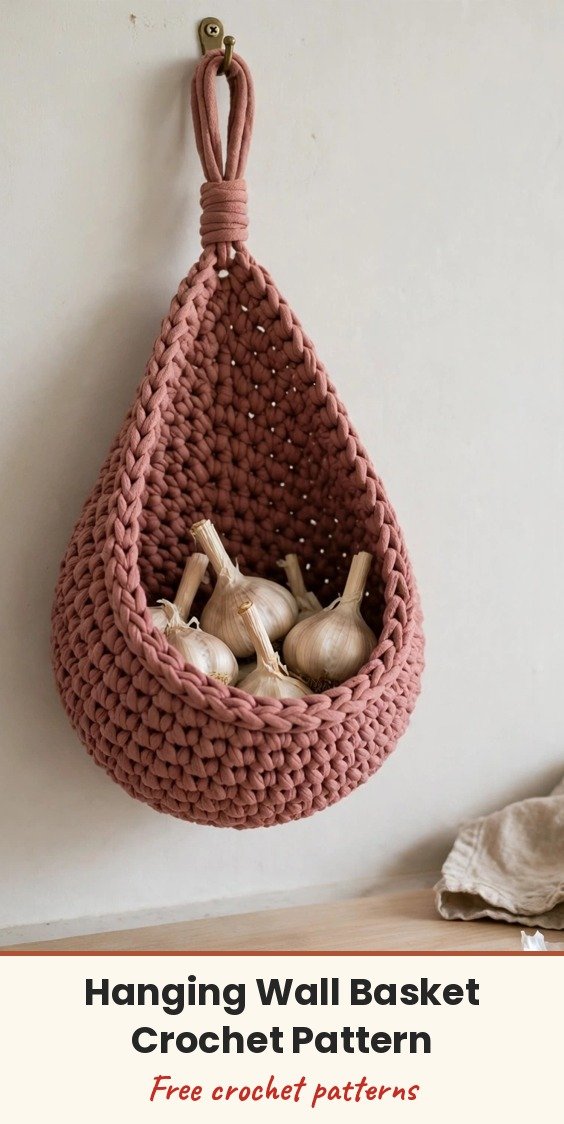
Part storage, part sculpture, this teardrop hanging wall basket is one of my favourite quick home makes! We will work it in chunky cotton cord: a flat round base grows into a rounded belly, and then comes the one clever trick that makes the whole shape, where the back keeps rising into a tall scooped wall while the front stays low, leaving that pretty open teardrop mouth.
I love these baskets in dusty rose or warm natural, hung in a little cluster. They hold garlic and walnuts in the kitchen, keys and sunglasses by the door, cotton rounds in the bathroom, or a small plant in a liner, and an empty wall suddenly earns its keep.
It is all single crochet and simple increases, so I rate it adventurous beginner friendly. The base and belly are worked in continuous spiral rounds, the opening is shaped with partial rows across the back only, and a wrapped chain loop finishes it off. Let us make one together.
Materials
- 120 to 140 yards super bulky (number 6) cotton cord, about 5mm thick, in dusty rose or natural beige
- US L-11 (8mm) crochet hook, or 9mm for looser cord
- Large-eye tapestry needle for cord
- Scissors
- Stitch marker
Abbreviations
- MR: magic ring
- ch: chain
- sc: single crochet
- inc: increase, 2 sc in the same stitch
- dec: invisible decrease, single crochet 2 stitches together
- BLO: back loop only
- sl st: slip stitch
- st/sts: stitch / stitches
- Rnd: round
Special Stitches
- Invisible decrease: insert your hook into the front loop only of the next stitch and then into the front loop only of the following stitch, yarn over and draw through both front loops, then yarn over and draw through both loops to complete the decrease with a smooth, nearly invisible finish.
Gauge & Size
- Finished size: about 6 inches wide by 8 inches tall, plus a 5 inch hanging loop
- Gauge: 9 sc by 10 rounds equal 4 inches in the cord; gauge is not critical, but firm tension is what holds the teardrop shape
- Construction: spiral rounds for the base and belly, partial back rows for the teardrop opening, rim rounds, and a wrapped chain hanging loop
- Skill level: Easy (adventurous beginner)
Basket Base Pattern
Work in continuous spiral rounds and use a stitch marker. Stitch counts appear at the end of each round.
Round 1: 6 sc in a MR. (6 sts)
Round 2: Inc in each st around. (12 sts)
Round 3: (1 sc, inc) 6 times. (18 sts)
Round 4: (2 sc, inc) 6 times. (24 sts)
Round 5: (3 sc, inc) 6 times. (30 sts)
You will have a flat-ish round disc; it will cup as the walls begin.
Basket Belly Pattern
Round 6: Working in BLO, sc in each st around. (30 sts)
Rounds 7 to 14: Sc in each st around. (30 sts)
These 8 rounds deepen the belly into a bowl that curves inward slightly at the top, like a little pot. At the end of Round 14, sl st in the next st to level off.
Teardrop Opening Pattern
Now we stop working in the round. Work back-and-forth rows across the back portion of the stitches only, leaving the front stitches unworked as the low lip. Mark the split points with two stitch markers before Row 1 so the opening sits symmetrically.
Row 1: Ch 1, turn. Sc in the next 16 sts (the back portion). Leave the remaining 14 sts unworked (the front lip). (16 sts)
Row 2: Ch 1, turn. Sc in each of the 16 sts. (16 sts)
Row 3: Ch 1, turn. Dec, sc 12, dec. (14 sts)
Row 4: Ch 1, turn. Sc in each st. (14 sts)
Row 5: Ch 1, turn. Dec, sc 10, dec. (12 sts)
Row 6: Ch 1, turn. Sc in each st. (12 sts)
Row 7: Ch 1, turn. Dec, sc 8, dec. (10 sts)
The back wall now rises in a tapering scoop above the low front lip, and that difference is the teardrop silhouette.
Rim & Hanging Loop
Rim Round 1: Do not fasten off. Ch 1 and work sc evenly around the entire opening: across the top of the scooped back (10 sts), down each angled side edge of the rows (about 7 sc per side), and across the front lip (the 14 unworked sts). Join with a sl st. (Approximately 38 sc)
Rim Rounds 2 to 3: Sc in each st around the opening, joining each round. (Approximately 38 sc)
These firm rim rounds give the crisp, sturdy edge and keep the mouth from flopping. Sl st in the next st and fasten off, then weave in the end.
Hanging loop: Join the cord at the top centre of the rim of the scooped back. Ch 30. Sl st into the rim about 2 inches (5 cm) to the side of where you started, forming a large loop. Do not fasten off.
Wrap the neck: guide both legs where the loop meets the basket together, and with the working cord wrap tightly around them 6 to 8 times to bind them into a cinched neck. Secure with a sl st through the wraps, fasten off, and weave the end down inside. For a doubled loop, ch 30 and sl st to the rim, then ch 30 again back to near the start, and wrap both legs together.
Finishing & Assembly
Weave in all ends by splitting the cord plies and burying the tails along the stitches, then trim close. Shape the basket with your hands: round the belly, open the mouth, and straighten the loop. Hang it on a sturdy wall hook and fill it up!
Tips
Work the cotton cord firmly. It wants to be loose, and a loose basket sags, so keep your stitches snug and use a slightly smaller hook than the cord wants if your fabric flops.
Count the front and back split carefully before the teardrop rows. The shape depends on leaving the front 14 stitches untouched while the back 16 grow.
Keep even, firm tension on the rim rounds so the mouth holds open. If the front lip flops forward, add one more rim round to stiffen it.
Pull each neck wrap firm and hide the tail inside. Those 6 to 8 snug wraps are what give the hanger its neat, boutique finish.
Hanging Wall Basket Crochet Pattern
Materials
Steps
- Work the flat base in spiral sc rounds from 6 to 30 sts
- Work the BLO round and 8 belly rounds to form the bowl
- Shape the teardrop opening with 7 partial rows across the back only
- Work 3 firm rim rounds around the whole opening
- Make the ch 30 hanging loop and wrap the neck 6 to 8 times
- Weave in ends, shape the basket by hand and hang it
- Work the cord firmly with snug stitches so the basket holds its shape
- Mark the front and back split with two stitch markers before Row 1
- Add an extra rim round if the front lip flops forward
- Use a plastic liner before putting a real plant inside