Ocean Waves Granny Square Tote Bag Free Crochet Pattern
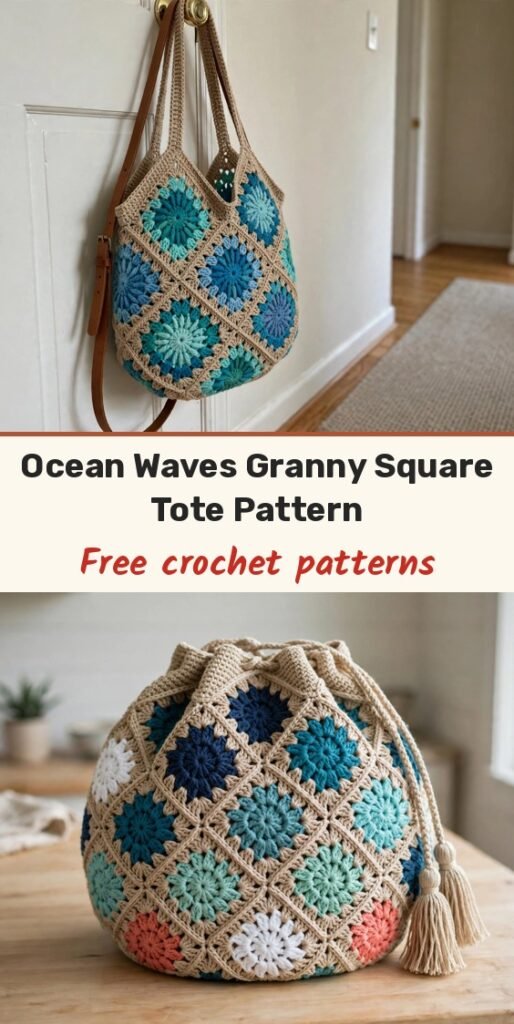
Table of Contents
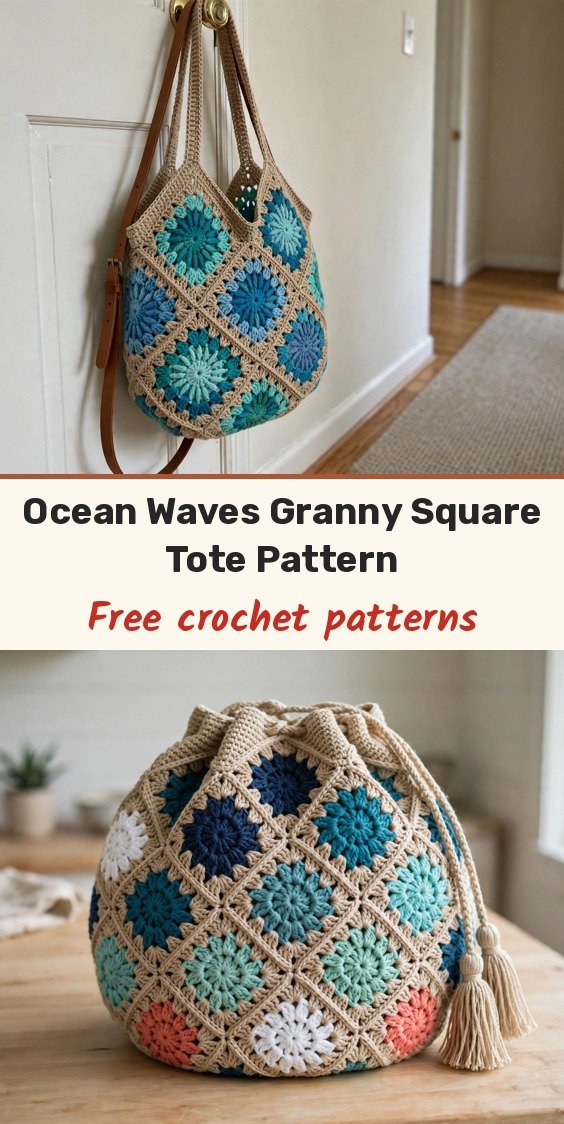
I fell for this tote the moment I saw those sunburst squares! We will crochet twelve colorful wheel-in-square motifs, join them six around and two high into a soft cylindrical body, anchor it with a solid round base, and gather the top with a single crochet yoke and a drawstring.
Each square uses three accent colors at its center plus a sandy main color for the squaring round, so you can rotate navy, teal, aqua, mint, coral and white across the twelve squares for that relaxed ocean look. Two tassels, wood beads, and a leather crossbody strap finish it off, or you can crochet a strap instead.
The finished bag is approximately 7.5 inches across and 11 inches tall, at an intermediate level, in about 15 to 20 hours. It holds far more than you would expect, and the drawstring keeps everything secure.
Materials
- Approximately 440 yards (400 m) worsted / aran weight cotton yarn in sand or natural (Main Color)
- Approximately 45 to 75 yards (40 to 70 m) each of worsted cotton yarn in navy, teal, aqua, mint, coral, and white
- 4.0mm crochet hook (US G/6)
- Tapestry needle
- Scissors
- Stitch markers
- Leather strap with 2 swivel clasps (or yarn for a crocheted strap)
- 2 D-ring loops
- 4 wood beads, approximately 16mm
- Scrap teal and coral yarn for tassels
- Small piece of cardboard for making tassels
Abbreviations
- ch: chain
- sl st: slip stitch
- sc: single crochet
- hdc: half double crochet
- dc: double crochet
- MR: magic ring
- MC: main color (sand)
- sp/sps: space / spaces
- st/sts: stitch / stitches
- rep: repeat
Special Stitches
- Puff Stitch: yarn over, insert hook in the stitch or space, yarn over and pull up a loop to the height of the round. Repeat this sequence 3 times in the same place (7 loops on hook). Yarn over and draw through all 7 loops, then ch 1 to close. Keep the loops loose and even for a nice puffy result.
Gauge & Size
- Finished size: approximately 7.5 inches diameter by 11 inches tall; strap approximately 44 inches, a drop of about 22 inches
- Gauge: one finished sunburst square = 4 inches square with a 4.0mm hook; in single crochet, 16 stitches by 18 rows = 4 inches
- Construction: 12 sunburst squares joined into a tube, round single crochet base sewn in, drawstring yoke worked around the top
- Skill level: Intermediate
Sunburst Square Pattern
Make 12 squares total. In these instructions, Colors A, B, and C are your chosen accents for each square, and Color D is the MC (sand). Begin each new color by joining with a slip stitch, finish each round with a slip stitch to the first stitch, and remember the starting ch 3 counts as the first dc while ch 1 and ch 2 turning chains do not count as stitches. Keep MC as every square’s border so the colorful wheels float on a calm sandy ground, and rotate the six accent colors so no two neighboring squares share a center color.
Round 1 (Color A): Make a magic ring. Ch 3 (counts as first dc), work 11 dc into the ring. Pull the ring closed, sl st to the top of ch 3. (12 dc)
Round 2 (Color B): Join in any stitch. Ch 2, work a puff stitch in the same stitch, ch 1. (Puff stitch in next stitch, ch 1) around. Sl st to the top of the first puff. (12 puffs, 12 ch-1 spaces)
Round 3 (Color C): Join in any ch-1 space. Ch 3, dc in the same space. Work 2 dc in each ch-1 space around. Sl st to the top of ch 3. (24 dc)
Round 4 (Color D / MC): Join in any dc. Ch 3, dc in the same stitch (corner start). Dc in the next 5 sts, then in the next st work (2 dc, ch 2, 2 dc) for the corner. Repeat around, ending with dc in the last 5 sts, then work (2 dc, ch 2) in the same stitch as the first. Sl st to the top of ch 3. (36 dc, 4 corner ch-2 spaces)
That places a corner on every 6th stitch of the 24 dc, with 5 dc along each side, so each finished side has 9 dc plus a corner space and your squares will join edge to edge with matching counts. Block all 12 squares lightly to 4 inches before joining, and weave in ends as you go because there are many color changes.
Joining the Squares
Arrange your squares in a grid 6 wide by 2 tall, balancing the colors so the brightest centers spread evenly around the bag.
Using MC and your tapestry needle (or a slip stitch / single crochet seam), join the squares side by side into two long strips of 6 squares each, working through the back loops of matching stitches and placing a corner-to-corner stitch at each ch-2 space. (2 strips)
Join the two strips along one long edge to make a panel of 6 squares by 2 squares. (12 squares joined)
Fold the panel into a tube and join the two short ends together. You now have a body ring 6 squares around and 2 squares high. (1 tube)
A whip stitch through the back loops gives a flat, nearly invisible join, while a single crochet seam on the right side adds a subtle raised grout line. Pick one method and use it throughout. Set the tube aside.
Round Base Pattern
Work in spiral or joined rounds with MC. Mark the first stitch of each round. The base increases by 6 sc evenly each round, adding one more plain sc between increases each round.
Round 1: Make a magic ring, work 6 sc into the ring. (6 sc)
Round 2: Work 2 sc in each stitch around. (12 sc)
Round 3: (Sc in next st, 2 sc in next st) repeat around. (18 sc)
Round 4: (Sc in next 2 sts, 2 sc in next st) repeat around. (24 sc)
Round 5: (Sc in next 3 sts, 2 sc in next st) repeat around. (30 sc)
Round 6: (Sc in next 4 sts, 2 sc in next st) repeat around. (36 sc)
Round 7: (Sc in next 5 sts, 2 sc in next st) repeat around. (42 sc)
Round 8: (Sc in next 6 sts, 2 sc in next st) repeat around. (48 sc)
Round 9: (Sc in next 7 sts, 2 sc in next st) repeat around. (54 sc)
Round 10: (Sc in next 8 sts, 2 sc in next st) repeat around. (60 sc)
Round 11: (Sc in next 9 sts, 2 sc in next st) repeat around. (66 sc)
Round 12: (Sc in next 10 sts, 2 sc in next st) repeat around. (72 sc)
Round 13: (Sc in next 11 sts, 2 sc in next st) repeat around. (78 sc)
Round 14: (Sc in next 12 sts, 2 sc in next st) repeat around. (84 sc)
Round 15: (Sc in next 13 sts, 2 sc in next st) repeat around. (90 sc)
Round 16: (Sc in next 14 sts, 2 sc in next st) repeat around. (96 sc)
Round 17: (Sc in next 15 sts, 2 sc in next st) repeat around. (102 sc)
Round 18: (Sc in next 16 sts, 2 sc in next st) repeat around. (108 sc)
Round 19: (Sc in next 17 sts, 2 sc in next st) repeat around. (114 sc)
Round 20: (Sc in next 18 sts, 2 sc in next st) repeat around. (120 sc)
Your finished base should measure approximately 7.5 inches across, a flat, firm disc. With the body tube right side out, pin the base into the lower opening, easing evenly, and sew or single crochet all the way around through both layers. Fasten off and weave in the ends.
Drawstring Yoke Pattern
Work in joined rounds in MC, picked up around the top opening of the body.
Setup Round: Join MC at the top edge. Work sc evenly around the top of the squares, adjusting to a multiple of 8, aiming for 96 sc. Sl st to join. (96 sc)
Round 1: Ch 1, sc in each stitch around. Sl st to join. (96 sc)
Round 2: Ch 1, sc in each stitch around. Sl st to join. (96 sc)
Round 3: Ch 1, sc in each stitch around. Sl st to join. (96 sc)
Round 4: Ch 1, sc in each stitch around. Sl st to join. (96 sc)
Round 5 (eyelet round): Ch 1. (Sc in next 6 sts, ch 2, sk 2 sts) repeat 12 times. Sl st to join. (72 sc, 12 ch-2 spaces)
Round 6: Ch 1, sc in each sc and 2 sc in each ch-2 space around. Sl st to join. (96 sc)
Round 7: Ch 1, sc in each stitch around. Sl st to join. (96 sc)
Round 8: Ch 1, sc in each stitch around. Sl st to join. Fasten off and weave in the ends. (96 sc)
Sew a small D-ring loop (or make a 6-chain MC loop) at each side seam just below the yoke to hold the strap clasps.
Finishing & Assembly
Drawstring Cord: With MC, make a cord approximately 44 inches long, either by chaining 150 and slip stitching back along the chain, or by twisting a 3-strand cord. Thread it in and out through the 12 eyelets all the way around, bringing both ends out at the front.
Tassels (make 2): Wrap teal yarn approximately 30 times around a 3.5 inch piece of cardboard. Tie the top, cut the bottom, wrap a neck about 1 cm down from the top, and trim even. Make the second tassel in coral. Tie one tassel to each cord end at the front, and slide a wood bead onto each end above the tassel if you like.
Leather Strap: Clip the swivel clasps of the leather strap to the two side loops, threading a wood bead onto each clasp tab for the accent, and adjust for a comfortable crossbody hang of approximately 22 inches drop.
No leather? Crochet the strap instead: ch 8 and work sc rows until the strap measures 40 to 44 inches long, then sew or clasp it to the loops.
Tips
Gauge is not critical for fit here, but matching it keeps the base meeting the body neatly. If your fabric feels loose, go down a hook size; a firm fabric helps the bag hold its shape.
Block all 12 squares lightly to 4 inches before joining. Flat squares make a tidy body and an even drawstring top.
For a taller bag, add a third row of squares (18 total) and grow the base to match the new circumference. For a wider bag, work 8 squares around and grow the base to 160 sc.
For care, hand wash cool with mild soap, reshape while damp, lay flat to dry, and store the bag stuffed with tissue so the base stays flat. Remove the leather strap before washing and wipe it with a dry cloth only.
Ocean Waves Granny Square Tote Bag Free Crochet Pattern
Materials
Steps
- Crochet 12 sunburst squares through 4 rounds each
- Block the squares to 4 inches and join them into a 6 by 2 tube
- Work the round sc base up to 120 sts and sew it into the bottom
- Work the drawstring yoke with its eyelet round at 96 sts
- Make the drawstring cord and thread it through the eyelets
- Make two tassels and attach them to the cord ends
- Add the D-ring loops and clip on the leather strap
- Keep the sand main color as every square border to unify the design
- Rotate accent colors so no two neighboring squares share a center color
- Weave in ends as you go because there are many color changes
- Block the squares before joining for an even drawstring top


