Lavender Fields Granny Tote Bag Free Crochet Pattern
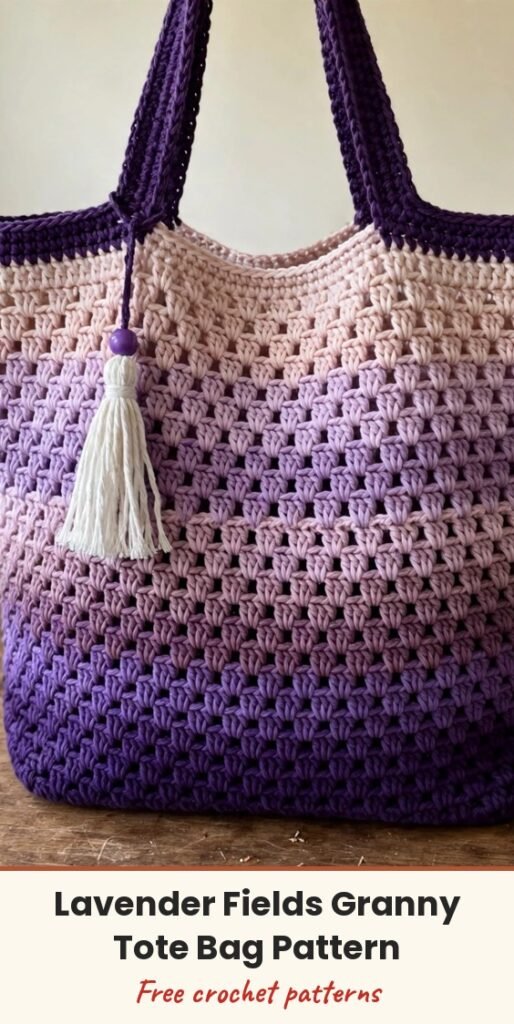
Table of Contents
I am so excited to share this one with you, because it looks incredibly impressive but the construction is way more straightforward than you might think! We start with a firm flat base, pick up stitches around all four sides, and then let the classic granny stripe rounds do all the beautiful work in a gradient of purple tones.
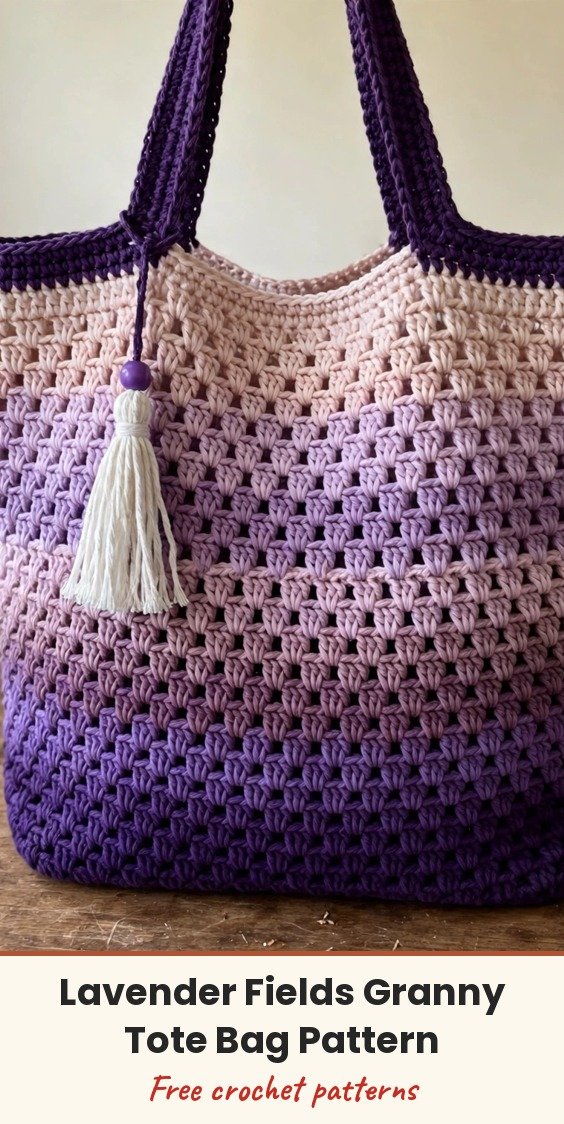
The finished bag measures approximately 14.5 inches wide, 13 inches tall, and 4 inches deep, with a handle drop of about 10 inches. It starts in deep violet at the base and transitions through medium purple, mauve, dusty lavender and soft lilac toward the top, and we finish with a sweet white tassel with a crocheted bead cap.
This pattern is rated intermediate. You should be comfortable working in joined rounds, managing multiple yarn colours, and following stitch counts carefully. Plan for 12 to 18 hours of happy stitching, including the base, body, handles, tassel and all finishing work.
Materials
- About 200 yards worsted weight (category 4) cotton or cotton-blend yarn in deep violet (Colour A)
- About 150 yards worsted weight yarn in medium purple (Colour B)
- About 150 yards worsted weight yarn in mauve or dusty rose-purple (Colour C)
- About 150 yards worsted weight yarn in soft lilac (Colour D)
- About 150 yards worsted weight yarn in pale blush, the lightest shade (Colour E)
- About 30 yards white or cream yarn for the tassel
- US Size J or 6.0mm crochet hook
- Tapestry needle for weaving ends
- Scissors
- 4 stitch markers
- Optional: thin fabric lining, rigid bag base insert 14 x 4 inches, decorative bag label, and a small amount of polyfill or yarn scraps for the tassel bead
Abbreviations
- ch: chain
- sl st: slip stitch
- sc: single crochet
- dc: double crochet
- ch-sp: chain space
- st(s): stitch or stitches
- rep: repeat
- sk: skip
- pm: place marker
- rm: remove marker
- RS: right side
- WS: wrong side
- RND: round
- sp: space
- yo: yarn over
- approx: approximately
- beg: beginning
- cont: continue
- rem: remaining
- sc2tog: single crochet two together
Special Stitches
- Granny cluster (GC): 3 double crochets worked into the same space. To work one: yarn over, insert hook into the designated chain space or stitch, yarn over and pull up a loop, yarn over and pull through 2 loops; repeat twice more in the same space so you have 3 completed dc sitting together as one neat bundle in that space.
- Crocheted tassel bead: worked in the round in Colours A or B. Round 1: magic ring, 6 sc into ring. (6 sc) Round 2: 2 sc in each st around. (12 sc) Round 3: (sc in next st, 2 sc in next st) 6 times. (18 sc) Rounds 4-6: sc in each st around. (18 sc) Round 7: (sc2tog, sc in next st) 6 times. (12 sc) Stuff lightly. Round 8: (sc2tog) 6 times. (6 sc) Fasten off, leaving a long tail for sewing closed and attaching to the tassel.
Gauge & Size
- Finished size: about 14.5 inches wide, 13 inches tall and 4 inches deep, handle drop about 10 inches
- Gauge: in granny stripe pattern, one cluster group (3 dc plus a ch 1 space) = about 1 inch wide and 6 rows = about 4 inches tall; in single crochet, 14 sc by 16 rows = 4 inch by 4 inch square
- Construction: rectangular base worked flat, setup round around all four edges, granny stripe body in rounds, double-layer handles sewn on, tassel added at the end
- Skill level: Intermediate
Base Pattern
Using Colour A and your 6.0mm hook, chain 53.
Row 1 (RS): Sc in 2nd ch from hook and in each ch across. Turn. (52 sc)
Rows 2-16: Ch 1, which does not count as a stitch, sc in each st across. Turn. (52 sc)
After Row 16, do not fasten off. Your base should measure approximately 14.5 inches long and 4 inches wide.
Setup Round: With Colour A still attached at the end of Row 16, do not turn. Work along the long top edge: ch 1, sc evenly across the top, placing sc into each of the 52 row-edge stitches. (52 sc along top)
At the corner, work 3 sc into the corner stitch. Place a stitch marker in the center sc of this corner group.
Work 16 sc evenly down the short right side, one sc per row end. (16 sc)
At the corner, work 3 sc into the corner stitch. Place marker in center sc.
Work 52 sc along the bottom long edge, working into the unused loops of the foundation chain. (52 sc)
At the corner, work 3 sc into the corner stitch. Place marker in center sc.
Work 16 sc evenly up the short left side. (16 sc)
At the corner, work 3 sc into the corner stitch. Place marker in center sc.
Sl st to join to first sc of the round. (148 sc total)
Granny Stripe Setup Pattern
With Colour A, join to any corner marker stitch.
Ch 3, which counts as dc. Work 2 more dc in same corner st to complete your first corner cluster. Ch 1.
Along the long side: (sk 2 sts, GC in next st, ch 1) 17 times. (17 clusters)
At next corner: GC in corner st, ch 1.
Along the short side: (sk 2 sts, GC in next st, ch 1) 5 times. (5 clusters)
At next corner: GC in corner st, ch 1.
Along the next long side: (sk 2 sts, GC in next st, ch 1) 17 times.
At next corner: GC in corner st, ch 1.
Along the last short side: (sk 2 sts, GC in next st, ch 1) 5 times.
Sl st to join to top of first ch-3 cluster. (48 cluster-spaces total)
Remove stitch markers from corners.
Body Pattern
Each round follows this pattern: ch 3, which counts as first dc of first cluster. Work 2 dc in same ch-1 space to complete first GC. Ch 1. (GC in next ch-1 sp, ch 1) around. Sl st to join to top of beginning ch-3. All rounds produce 48 cluster-spaces.
Round 1 (Colour A): Ch 3, 2 dc in same ch-1 sp, ch 1, (GC in next ch-1 sp, ch 1) 47 times, sl st to join. (48 cluster-spaces)
Rounds 2-3: Colour A (Deep Violet), work as Round 1. (48 cluster-spaces each)
Rounds 4-5: Colour B (Medium Purple), work as Round 1. (48 cluster-spaces each)
Round 6: Colour A, work as Round 1. (48 cluster-spaces)
Round 7: Colour B, work as Round 1. (48 cluster-spaces)
Rounds 8-9: Colour C (Mauve), work as Round 1. (48 cluster-spaces each)
Round 10: Colour B, work as Round 1. (48 cluster-spaces)
Round 11: Colour C, work as Round 1. (48 cluster-spaces)
Rounds 12-13: Colour D (Soft Lilac), work as Round 1. (48 cluster-spaces each)
Round 14: Colour C, work as Round 1. (48 cluster-spaces)
Round 15: Colour D, work as Round 1. (48 cluster-spaces)
Rounds 16-17: Colour E (Pale Blush), work as Round 1. (48 cluster-spaces each)
Round 18: Colour D, work as Round 1. (48 cluster-spaces)
Rounds 19-22: Colour E, work as Round 1. (48 cluster-spaces each)
When changing colours, fasten off the old colour at the end of the round and join the new colour. After Round 22, do not fasten off. Continue to the top edging.
Edging Round 1: Ch 1, sc in the top of each dc and into each ch-1 sp around. Sl st to join. (192 sc)
Edging Rounds 2-3: Ch 1, sc in each sc around. Sl st to join. (192 sc)
Fasten off and weave in end.
Handles Pattern
Make 2 handles. Using Colour A and your 6.0mm hook, chain 5.
Row 1: Sc in 2nd ch from hook and in each ch across. Turn. (4 sc)
Rows 2-85: Ch 1, sc in each st across. Turn. (4 sc)
Fold the strip in half lengthwise. Using matching yarn, slip stitch along the open long edge to seam the handle closed into a tube. Fasten off. Repeat for the second handle.
Position the handles on the front and back of the bag, centered on the long sides. Pin each handle so its two ends are approximately 4 inches from the center of the panel and about 2 inches inward from the side seam, with the handle ends overlapping the top edging by 1 inch on the inside. Using a tapestry needle and matching yarn, sew each handle end firmly to the inside of the top edging in a square stitch pattern and reinforce with an X through the center for durability.
Finishing & Assembly
For the tassel, first make the crocheted tassel bead from the Special Stitches section, using Colour B for most of the bead with one round of Colour D in the middle for an accent stripe. Cut 30 to 40 strands of white or cream yarn, each measuring 12 inches long. Hold all strands together and fold in half, thread the folded loop end through the bottom opening of the tassel bead, and pull snugly so the bead sits at the top. Cut an 18-inch strand of Colour D and wrap it tightly around the tassel approximately 1.5 inches below the bead, then knot firmly. Trim the tassel ends evenly to approximately 5 inches below the bead, and attach the tassel to the base of the front left handle, wrapping around the handle and knotting on the inside.
If you like, sew a small decorative label to the lower front of the bag, centered just above the bottom edge.
Weave in all yarn ends securely using a tapestry needle. For cotton yarn, wet block the bag by submerging it in cool water, gently pressing out excess water in a towel, and shaping it over a box matching your target dimensions. Allow to dry completely. Insert an optional rigid base into the bottom of the finished bag to maintain structure, and hand-sew a fabric lining to the inside top edge if desired.
Tips
Cotton or cotton-blend yarns are strongly recommended over pure acrylic for this project, because they give the bag structure and prevent slouching.
Read through the entire pattern first and keep track of the colour sequence as you go. The challenge here is colour changes and consistent tension, not complicated stitches.
Machine wash on gentle cycle in cold water if using cotton yarn, lay flat to dry, and reshape while damp. Do not tumble dry. Hand wash is recommended if you have added a fabric lining.
Lavender Fields Granny Tote Bag Free Crochet Pattern
Materials
Steps
- Work the rectangular base in 16 rows of 52 sc
- Work the setup round of 148 sc around all four edges
- Work the granny stripe setup round of 48 cluster-spaces
- Work body Rounds 1 to 22 following the colour sequence
- Work 3 top edging rounds of 192 sc
- Make 2 double-layer handles and sew them inside the top edge
- Make the tassel bead and tassel and attach to the front handle
- Block the bag over a box to set its shape
- Use cotton or a cotton blend so the bag holds its shape
- Fasten off and rejoin at every colour change as written
- Sew handle ends in a square with an X for durability
- Wet block over a box matching the finished dimensions


