Mint Green Granny Square Baby Cardigan Free Crochet Pattern
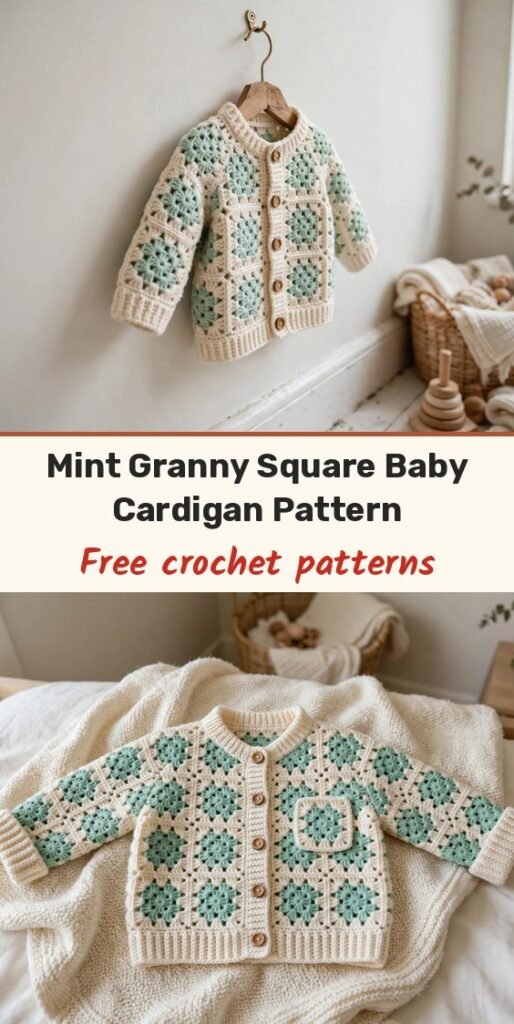
Table of Contents
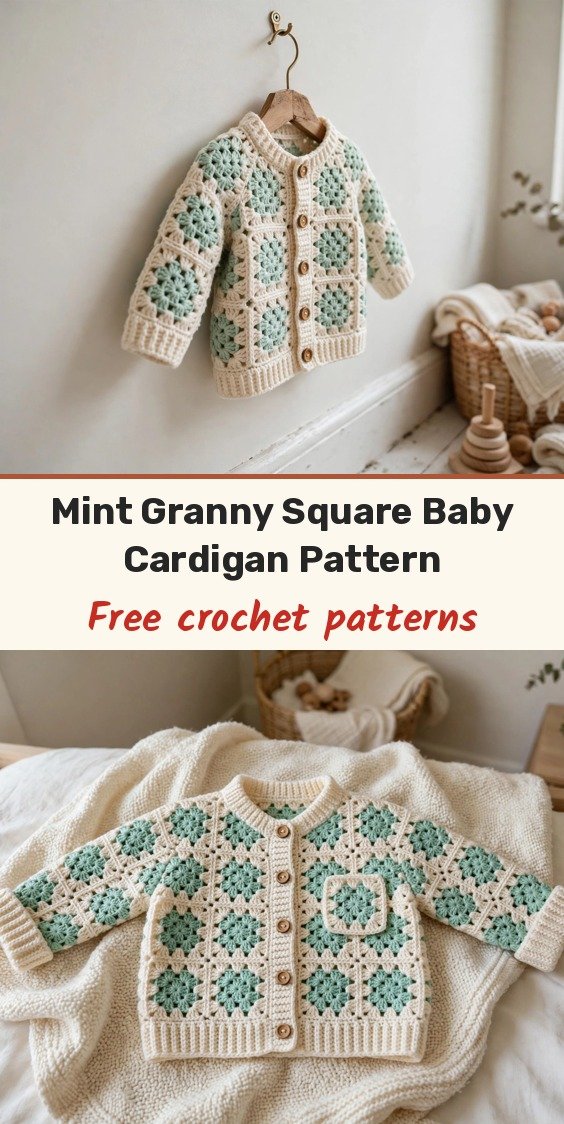
This little cardigan is the sweetest way I know to turn the classic granny square into a real garment! We make 37 small squares in fresh mint green and cream, join them into panels, and finish with soft ribbed borders and wooden buttons. It looks like a polished boutique gift, but the construction is wonderfully simple: make squares, join squares, add borders.
The two-tone effect comes from switching colours partway through each square — mint forms the centre clusters and cream makes the outer rounds, so every square matches and the joined panels get that lovely lattice look. I designed it for the 12 to 18 month size, which is perfect for baby shower gifts because little ones get a nice long window of wear from it.
If you have ever made a granny square blanket, you already have the main skill. Let me walk you through turning those squares into a cardigan, step by step.
Materials
- 200 yards of DK weight yarn in mint green (Colour A)
- 350 yards of DK weight yarn in cream / off-white (Colour B)
- 4.0mm (US G-6) crochet hook
- Yarn needle for weaving ends and seaming
- 5 wooden buttons, 5/8 inch / 15 mm diameter
- Sewing needle and thread to match Colour B
- Stitch markers
- Blocking mats and rust-proof pins
Abbreviations
- beg: beginning
- BLO / tbl: back loop only / through back loop only
- ch: chain
- ch-sp: chain space
- dc: double crochet
- rep: repeat
- rnd: round
- RS/WS: right side / wrong side
- sc: single crochet
- sl st: slip stitch
- sp: space
- st(s): stitch(es)
- yo: yarn over
Special Stitches
- Granny cluster: 3 dc worked into the same chain space. Wherever this pattern says cluster, it means a 3-dc cluster.
- Flat slip stitch join: hold two squares with wrong sides together and sl st through the back loop of the stitch on the front square and the back loop of the corresponding stitch on the back square at the same time, continuing across all edge stitches. It leaves a pretty visible ridge on the right side.
- Sc through back loop only: insert the hook into the back loop only of the stitch and work a normal sc. This makes the horizontal ridge texture used for all the ribbing borders.
Gauge & Size
- Finished size: 12 to 18 months; chest 20 inches / 51 cm blocked and buttoned, length 11 inches / 28 cm, sleeve length 7 inches / 18 cm from underarm to cuff
- Gauge: 1 blocked granny square = 3 x 3 inches / 7.5 x 7.5 cm; ribbing at 20 sc x 24 rows = 4 inches in sc through back loop only
- Construction: 37 squares joined into a back panel (12), two front panels (6 each), two sleeves (6 each) and 1 pocket, finished with ribbed hem, cuffs and button bands
- Skill level: Intermediate
Ch 3 at the beginning of each round counts as one dc throughout the square pattern. Join new rounds and colours with a standing stitch rather than slip-stitching into a chain — it keeps the joins neat. Weave in the ends of each square before joining the panels; it is so much easier than doing it afterwards!
Granny Square (Make 37)
Using Colour A, make a magic ring, or ch 4 and join with a sl st to form a ring.
Round 1 (Colour A): Ch 3 (counts as dc), work 2 dc into the ring, ch 2, (work 3 dc into the ring, ch 2) 3 times, join with a sl st to the top of the beg ch-3, fasten off Colour A. (12 dc, 4 corner ch-2 spaces)
Round 2 (Colour A): Join Colour A with a standing dc into any corner ch-2 space, work (2 dc, ch 2, 3 dc) into the same corner space, ch 1, work (3 dc, ch 2, 3 dc) into each remaining corner ch-2 space with ch 1 between each corner group, ending with ch 1, join with a sl st to the top of the first dc, fasten off Colour A. (24 dc, 4 ch-2 spaces, 4 ch-1 spaces)
Round 3 (Colour B): Join Colour B with a standing dc into any corner ch-2 space, work (2 dc, ch 2, 3 dc) into the same corner space, ch 1, work 3 dc into the next ch-1 space, ch 1, work (3 dc, ch 2, 3 dc) into the next corner ch-2 space, ch 1, work 3 dc into the next ch-1 space, ch 1, repeat from corner to corner around, join with a sl st to the top of the first dc, do not fasten off. (36 dc, 4 ch-2 spaces, 8 ch-1 spaces)
Round 4 (Colour B): Sl st into the next 2 dc and into the corner ch-2 space, ch 3 (counts as dc), work (2 dc, ch 2, 3 dc) into the same corner space, ch 1, (work 3 dc into the next ch-1 space, ch 1) twice, work (3 dc, ch 2, 3 dc) into the corner ch-2 space, ch 1, (work 3 dc into the next ch-1 space, ch 1) twice, repeat from corner to corner around, join with a sl st to the top of the beg ch-3, fasten off Colour B. (48 dc, 4 ch-2 spaces, 12 ch-1 spaces)
Weave in all ends and block each square to exactly 3 x 3 inches. All 37 squares should be uniform before you go on — even a small difference per square multiplies across the joined panels.
Joining the Panels
Join all panels with the flat slip stitch join in Colour B, joining squares into rows first and then joining the rows together, always with wrong sides held together so the ridge sits on the right side. Each edge join works through 11 points: ch-2 corner space, 3 dc tops, ch-1 space, 3 dc tops, ch-1 space, 3 dc tops, ch-2 corner space.
Back panel: join 4 squares across by 3 squares tall (12 squares). The back measures 12 inches wide x 9 inches tall before borders.
Left front panel: join 2 squares across by 3 squares tall (6 squares), measuring 6 inches wide x 9 inches tall.
Right front panel: join 2 squares across by 3 squares tall (6 squares), measuring 6 inches wide x 9 inches tall.
Sleeve panels (make 2): join 2 squares across by 3 squares tall (6 squares each), making a flat rectangle 6 inches wide x 9 inches tall.
Shoulder & Side Seams
Lay the back panel flat, right side up. Place the right front panel alongside it, right sides together, aligning at the top right corner, and seam the outer top edge on each side (approximately 3.5 to 4 inches per shoulder) with the flat sl st join. Leave approximately 4 to 5 inches of the back top centre and the inner edge of each front top open for the neckline. Repeat for the left front panel.
For the side seams, hold the panels with wrong sides together, align the side edges of the back with the side edges of the fronts, and join from the hem edge upward, stopping approximately 3.5 inches from the top edge to leave the armhole opening. The armhole should measure about 3 to 3.5 inches on each side, and the buttoned chest circumference about 20 inches.
Attaching the Sleeves
Fold each sleeve panel in half along its long edge and seam the side edges together with the flat sl st join to form a tube.
With wrong sides facing, pin the top edge of the sleeve tube into the armhole opening of the body, easing evenly, and seam it in with the flat sl st join all the way around the armhole. Repeat for the second sleeve.
Hem Ribbing
Row 1 (pickup row, RS facing): With Colour B, begin at the lower right front corner and work 1 sc into each dc top, 1 sc into each ch-1 space and 1 sc into each corner ch-2 space along the bottom edge — 10 sc across each of the 8 square bottom edges — turn. (80 sc)
Row 2 (WS): Ch 1, sc tbl in each st across, turn. (80 sc)
Row 3 (RS): Ch 1, sc tbl in each st across, turn. (80 sc)
Row 4 (WS): Ch 1, sc tbl in each st across, turn. (80 sc)
Row 5 (RS): Ch 1, sc tbl in each st across, turn. (80 sc)
Row 6 (WS): Ch 1, sc tbl in each st across. (80 sc)
Fasten off and weave in ends. The hem ribbing should be approximately 1 inch deep.
Cuff Ribbing (Both Sleeves)
Round 1 (pickup round, RS): With Colour B, join yarn at the sleeve seam at the lower edge and work 1 sc into each working point around the lower edge of the sleeve tube — 10 sc per square edge — join with a sl st to the first sc. (20 sc)
Round 2: Ch 1, sc tbl in each st around, join with a sl st to the first sc. (20 sc)
Round 3: Ch 1, sc tbl in each st around, join with a sl st to the first sc. (20 sc)
Round 4: Ch 1, sc tbl in each st around, join with a sl st to the first sc. (20 sc)
Round 5: Ch 1, sc tbl in each st around, join with a sl st to the first sc. (20 sc)
Round 6: Ch 1, sc tbl in each st around, join with a sl st to the first sc. (20 sc)
Fasten off and weave in ends. Repeat for the second sleeve. Each cuff should measure approximately 1 inch deep.
Button Bands & Neckband
Setup row: With Colour B and the right side facing, join yarn at the lower right corner of the right front panel. Work 42 sc evenly up the right front edge from hem to neckline, approximately 36 sc across the back and front neckline, and 42 sc downward along the left front edge. Do not join — we work in rows from here. (120 sc)
Row 1 (WS): Ch 1, turn, sc tbl in each st across the entire band. (120 sc)
Row 2 (RS, buttonhole row): Ch 1, turn, work sc tbl across the left front band section (sts 1 to 42) and across the neckline section (sts 43 to 78). For the right front band section (sts 79 to 120), work: sc tbl in 3 sts, ch 2, skip 2 sts, (sc tbl in 6 sts, ch 2, skip 2 sts) 4 times, sc tbl in 5 sts.
Row 3 (WS): Ch 1, turn, sc tbl across, working 2 sc into each ch-2 buttonhole space. (120 sc)
Row 4 (RS): Ch 1, turn, sc tbl across. (120 sc)
Fasten off and weave in ends.
Pocket & Buttons
Take the one remaining granny square. Join Colour B with a sl st at the top left corner, ch 1, and work approximately 10 sc across the top edge, then fasten off. (10 sc)
Pin the pocket to the lower right area of the left front panel (as worn), with its bottom aligned to the top edge of the hem ribbing. With a yarn needle and Colour B, whipstitch the pocket to the body along the bottom and both side edges, leaving the top edge open.
Mark the button positions on the left front band to match each buttonhole on the right front band. Sew each wooden button securely through both band layers with matching thread, making a small thread shank so the button passes easily through its buttonhole, and knot securely on the wrong side.
Finishing & Assembly
Wet block the finished cardigan: soak it in cool water for 15 minutes, press the water out gently without wringing, lay it flat on blocking mats, pin it to the finished measurements, and let it dry completely (12 to 24 hours). For acrylic yarns, steam blocking with a damp cloth and a warm iron held above the fabric works well too.
Weave in all remaining ends on the wrong side, working each end in at least two directions through the back loops of the stitches.
To size up to 2T (about a 22 inch chest), add one square to the width of the back panel (5 wide by 3 tall) and a fourth row of squares to all panels for length. To size down to 6 to 12 months, use a 3.75mm hook and sport weight yarn so each square measures about 2.75 inches, and recheck the border counts — every square adds 3 inches at the main gauge, so plan dimensions in multiples of 3 inches.
Tips
Choose a machine-washable yarn — baby clothes need frequent washing, and a washable DK keeps this gift practical as well as pretty.
Block every square before joining. Uniform 3-inch squares are the whole secret to panels that line up without a fight.
Weave in each square’s ends as you finish it. Thirty-seven squares’ worth of ends at the end is nobody’s idea of fun!
Store the cardigan folded rather than on a hanger, and lay it flat to dry after washing so the wet weight does not stretch it out of shape.
Mint Green Granny Square Baby Cardigan Free Crochet Pattern
Materials
Steps
- Crochet 37 granny squares in 4 rounds each and block to 3 inches
- Join squares into back, front and sleeve panels with flat sl st joins
- Seam the shoulders and sides, leaving armhole openings
- Seam each sleeve into a tube and join it into the armhole
- Work the 80-stitch hem ribbing and 20-stitch cuff ribbing in sc tbl
- Work the 120-stitch button band with 5 buttonholes
- Add the pocket square and sew on the 5 wooden buttons
- Wet block to the finished measurements
- Block all 37 squares to exactly 3 inches before joining
- Weave in each square's ends as you finish it, not at the end
- Use machine-washable DK yarn so the cardigan survives frequent washing
- Join with a standing stitch instead of a chain for neater colour changes