Navy Sunflower Drawstring Pouch Free Crochet Pattern
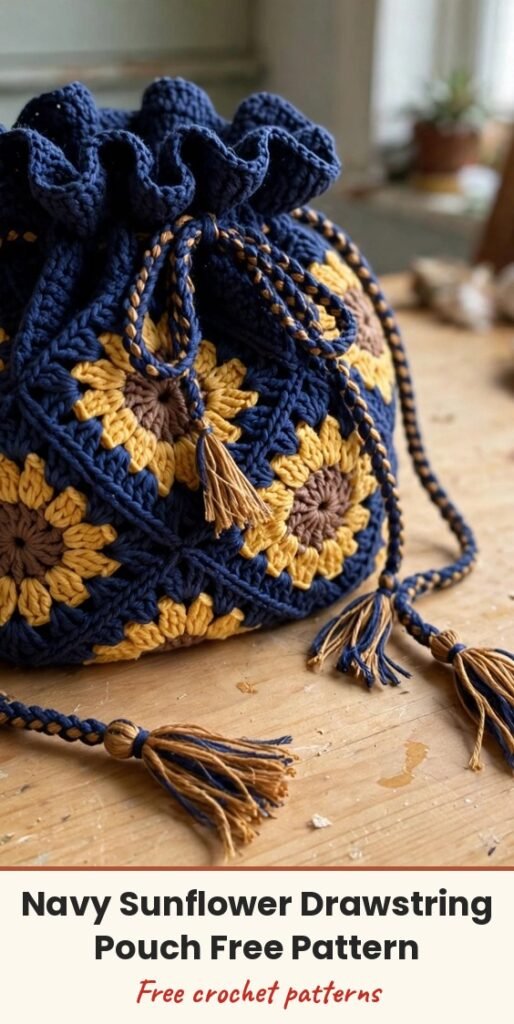
Table of Contents
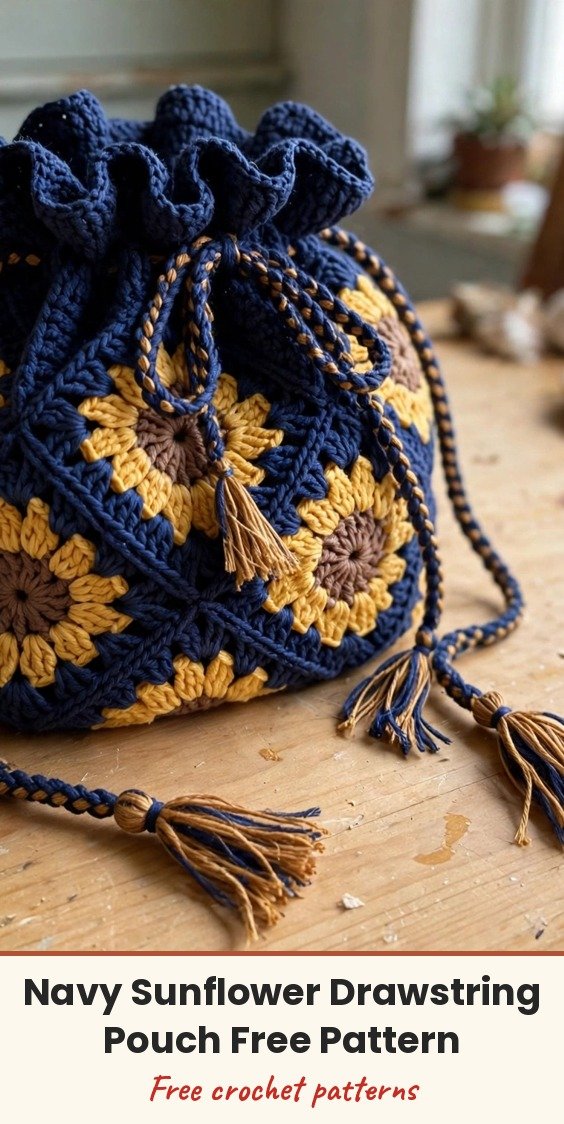
Granny squares have a reputation for being fiddly, but here is the truth: if you can double crochet and work in a circle, you can make this pouch. We make 18 identical sunflower squares, join them into a tube, add a round base, a drawstring channel and a ruffle, and suddenly you have a boutique-worthy bag with golden petals popping against deep navy.
The raised petals are simply treble clusters worked around the posts of the first round, and once the rhythm clicks on your first square, the other seventeen fly by. The slip stitch join even creates a pretty textured ridge between the flowers for free.
Your finished pouch measures about 11 inches wide and 10 inches tall, not counting the ruffle, and the braided drawstring cords wear their tassels about 10 inches below the opening when fully extended. Each square takes roughly 30 to 45 minutes once you are in the groove.
Materials
- 400 yards worsted weight cotton yarn in navy blue (colour A)
- 250 yards worsted weight cotton yarn in golden yellow / mustard (colour B)
- 60 yards worsted weight cotton yarn in warm brown / mocha (colour C)
- 4.0mm (US G-6) crochet hook for squares and body
- 5.0mm (US H-8) crochet hook for the drawstring braid
- Tapestry needle for weaving in ends
- Scissors
- 4 to 6 locking stitch markers
- Small safety pins for threading the drawstring (optional)
Abbreviations
- ch: chain
- sl st: slip stitch
- sc: single crochet
- hdc: half double crochet
- dc: double crochet
- tr: treble crochet
- sp: space
- ch-sp: chain space
- st/sts: stitch / stitches
- MR: magic ring
- RS: right side
- WS: wrong side
- BLO: back loop only
- FLO: front loop only
- sk: skip
- rnd: round
Special Stitches
- Sunflower Petal (raised front-post treble cluster): yarn over twice, insert hook from front to back to front around the post of the indicated stitch, yarn over and pull up a loop (4 loops on hook), yarn over and pull through 2 loops (3 loops), yarn over and pull through 2 loops (2 loops). Work a second treble in the same post so 3 loops remain on the hook, then yarn over and pull through all 3 loops to close the cluster. That is one petal.
- Flat Square Join (slip stitch join on wrong side): hold two squares with wrong sides facing and edges aligned, insert the hook through the back loop of the corresponding stitch on both squares, draw up a loop of colour A and slip stitch through. Continue across the whole edge; the ridge shows on the right side.
Gauge & Size
- Finished size: about 11 inches wide x 10 inches tall, excluding ruffle and tassels
- Gauge: one completed sunflower square measures 3.5 x 3.5 inches (9 x 9 cm) blocked; in sc, 18 sts and 20 rows = 4 inches
- Construction: 18 identical squares joined into a 3 x 6 panel, seamed into a cylinder, with a separate sc base circle, drawstring channel, ruffle, braided cords and tassels
- Skill level: Intermediate
Sunflower Granny Square (Make 18)
Round 1 (colour C, brown centre): Make a magic ring. Ch 3 (counts as first dc), work 11 more dc into the ring. Join to the top of the beginning ch-3 with a sl st and pull the ring tight. (12 dc)
Round 2 (colour B, yellow): Join colour B to any stitch with a sl st. Ch 1, sc in the same stitch, sc in each remaining stitch around. Join to the first sc with a sl st. (12 sc) Do not fasten off colour B.
Round 3 (colour B, petals): Ch 1. Working into the post of each Round 1 dc stitch, below the Round 2 stitches, work one sunflower petal cluster per post, with ch 1 between each cluster. After the 12th cluster, join to the top of the first cluster with a sl st. (12 petal clusters, 12 ch-1 spaces)
Round 4 (colour A, navy, squaring off): Join colour A to any ch-1 space between petals. Ch 3 (counts as first dc). In the first sp: 2 dc, ch 2 (corner). Then repeat this sequence around: 2 dc in the next sp, ch 1, 2 dc in the next sp, ch 2 (corner), working through all four sides. Join to the top of the beginning ch-3 with a sl st. (8 groups of 2-dc, 4 ch-2 corner spaces, 4 ch-1 side spaces)
Round 5 (colour A, border): Sl st into the next dc and into the ch-2 corner space. Ch 3 (counts as first dc), work 2 more dc in the corner sp, ch 2, work 3 dc in the same corner sp. Ch 1, work 3 dc in the ch-1 side sp. Ch 1, work (3 dc, ch 2, 3 dc) in the next corner ch-2 sp. Ch 1, work 3 dc in the ch-1 side sp. Ch 1. Repeat for the remaining 2 corners and their side groups. Join to the top of the beginning ch-3 with a sl st. (Four corners of 3 dc, ch 2, 3 dc; 3-dc groups on each side; 8 ch-1 side spaces; 4 ch-2 corner spaces)
Fasten off colour A and weave in ends. Checkpoint: each square should measure 3.5 inches per side; block lightly if needed before joining.
Joining & Body
Arrange all 18 squares in a 3-wide by 6-tall grid with right sides facing up and all sunflowers facing the same direction. Using the Flat Square Join and colour A, first join the squares into horizontal rows of 3, then join the rows vertically into the full panel, about 10.5 inches wide by 21 inches tall.
Forming the cylinder: fold the panel with the right side facing out, align the two short vertical edges (the 10.5 inch edges), and seam them together with colour A and the Flat Square Join. Your tube should stand upright, showing 3 sunflowers around and 6 sunflowers tall.
Base Round 1: With colour A, make a magic ring and work 6 sc into the ring. Pull tight. (6 sc)
Base Round 2: 2 sc in each st around. (12 sc)
Base Round 3: (2 sc in next st, sc in next st) repeat 6 times. (18 sc)
Base Round 4: (2 sc in next st, sc in next 2 sts) repeat 6 times. (24 sc)
Base Round 5: (2 sc in next st, sc in next 3 sts) repeat 6 times. (30 sc)
Base Round 6: (2 sc in next st, sc in next 4 sts) repeat 6 times. (36 sc)
Base Round 7: (2 sc in next st, sc in next 5 sts) repeat 6 times. (42 sc)
Base Round 8: (2 sc in next st, sc in next 6 sts) repeat 6 times. (48 sc)
Base Round 9: (2 sc in next st, sc in next 7 sts) repeat 6 times. (54 sc)
Base Round 10: (2 sc in next st, sc in next 8 sts) repeat 6 times. (60 sc)
Base Round 11: (2 sc in next st, sc in next 9 sts) repeat 6 times. (66 sc)
Base Round 12: (2 sc in next st, sc in next 10 sts) repeat 6 times. (72 sc)
Sl st to close; do not fasten off. The base should measure about 10 to 10.5 inches in diameter. Hold the base and the bottom edge of the cylinder with wrong sides together and whipstitch around the entire circumference with colour A and a tapestry needle. The bag should now stand upright with no puckering.
Top, Channel & Ruffle
Round 1 (stabilising): Join colour A to any stitch around the top opening. Sc evenly around, working 11 sc across each square’s top edge. (33 sc) Join with sl st.
Round 2 (increase): 2 sc in each st around. Join. (66 sc)
Round 3: Sc in each st around. Join. (66 sc)
Round 4 (drawstring channel): Ch 3, skip 1 sc. (Dc in next sc, ch 1, skip 1 sc) repeat around. Sl st to the 2nd ch of the beginning ch-3. (33 dc, 33 ch-1 spaces)
Round 5: Sc in each dc and each ch-1 space around. Join. (66 sc)
Round 6 (BLO ridge): Sc in the back loop only of each st around. Join. (66 sc)
Ruffle Round 7: Working into the front loops left unused in Round 6, work 3 dc in each front loop around. Join. (198 dc)
Ruffle Round 8: Sc in each dc around. Join. (198 sc)
Ruffle Round 9: Hdc in each sc around. Join. (198 hdc)
Fasten off and weave in ends.
Drawstrings & Tassels
Drawstring cords (make 2): cut 12 strands of colour B, each 36 inches long. Divide into 3 groups of 4 strands and braid for about 22 inches, securing the end temporarily. Thread the first braid through every other eyelet in Round 4, starting and ending at the front. Thread the second braid through the remaining eyelets, starting and ending at the back.
Tassels (make 4): cut 20 strands of colour B, each 8 inches long, and fold in half. Hold the folded centre against the drawstring end, wrap a 12 inch strand tightly around the bundle about 0.5 inch below the fold, wrapping 6 to 8 times, tie securely and bury the ends. Trim to about 3 inches and attach with a lark’s head knot.
Finishing & Assembly
Weave in all remaining ends. Mist the exterior with water, stuff the pouch loosely with plastic bags or a towel, and let it dry completely to set the shape.
Care: machine wash gentle and cold in a mesh bag, lay flat or hang to dry. A low-heat tumble dry is acceptable. Do not bleach; iron on low with a pressing cloth if needed.
Tips
Make one test square before committing to all 18. If it is too big, go down a hook size; too small, go up.
Use smooth cotton or cotton blend yarn only. Anything fuzzy or textured makes the sunflower petal definition disappear.
Keep all the sunflowers facing the same direction when you lay out the grid; the bag looks so much tidier for it.
Batch your squares: centres one evening, petals the next, squaring off on the weekend. Eighteen squares feels much smaller in stages.
Navy Sunflower Drawstring Pouch Free Crochet Pattern
Materials
Steps
- Crochet 18 sunflower granny squares with raised front-post treble petals
- Join the squares into a 3 x 6 panel with the flat slip stitch join
- Seam the panel into a cylinder
- Crochet the base circle to 72 sc and whipstitch it to the cylinder
- Work the top rounds, drawstring channel and 3-round ruffle
- Braid 2 drawstring cords and thread them through the channel eyelets
- Make 4 tassels and attach them to the cord ends
- Make one test square first and check it measures 3.5 inches
- Keep all sunflowers facing the same direction in the grid
- Smooth cotton only - fuzzy yarn hides the petal definition
- Batch the squares in stages so 18 does not feel overwhelming


