Sunset Ombre Seashell Clutch Free Crochet Pattern
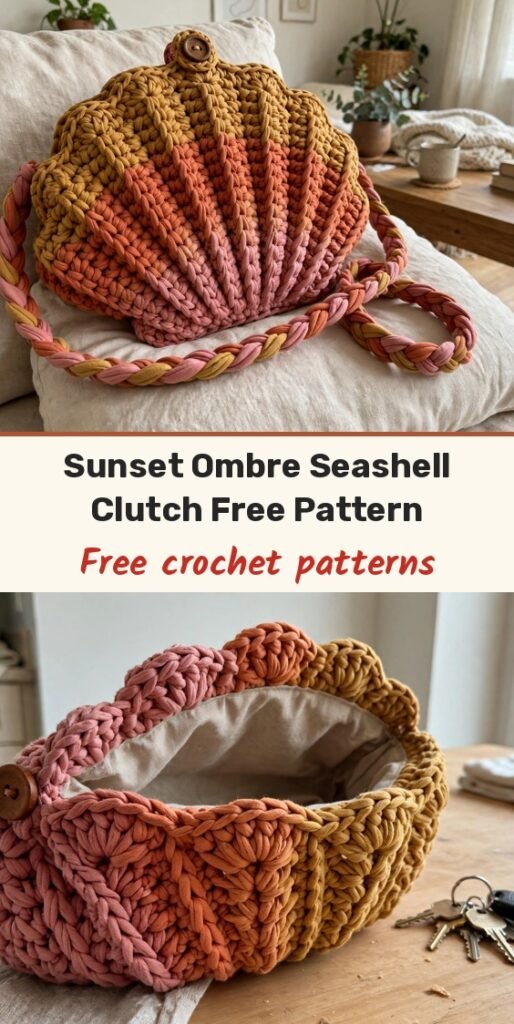
Table of Contents
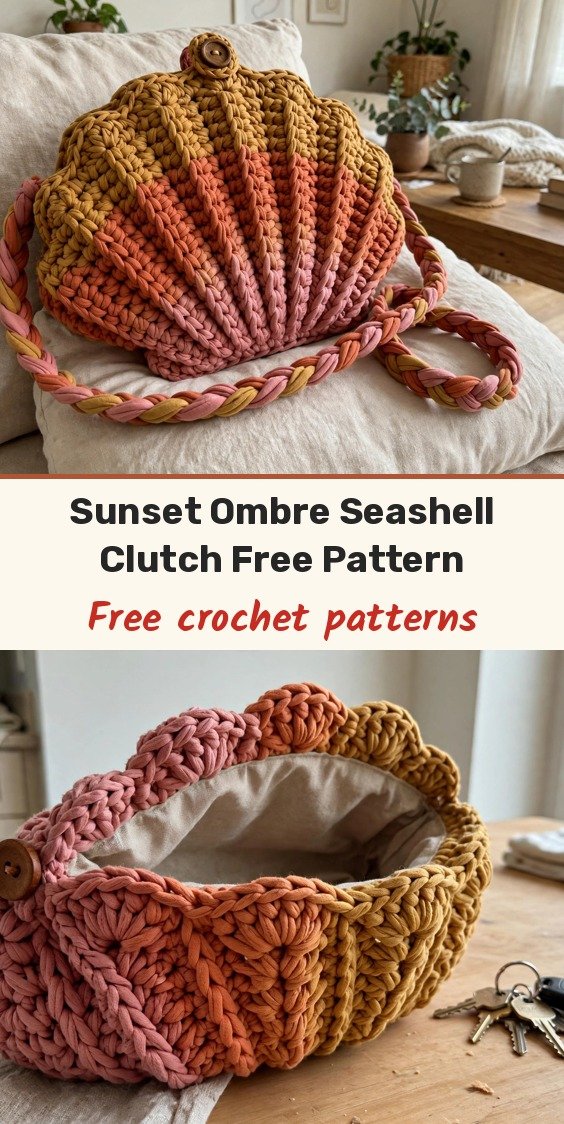
This sunset ombre seashell clutch looks so impressive, but I promise it is much more achievable than it looks! Raised ridges, a gentle curved bottom, and colours that melt from dusty rose through burnt orange into mustard gold. It is a real statement piece, and you can absolutely make it.
We work the clutch in two identical panels, starting at the curved bottom edge and working upward. The magic is in the front post double crochet rows: those posts pull forward and create the beautiful raised vertical ridges of the shell. Then we join the panels, add a sturdy top band, and clip on the hardware and strap.
This pattern uses T-shirt yarn, which works up fast, creates a sturdy fabric perfect for bags, and gives the clutch its lovely sculptural shape. If you can crochet in rows and rounds and you know your basic stitches, you have everything you need.
Materials
- Approximately 150g of T-shirt yarn or super bulky cotton tape yarn: one skein each in dusty rose, burnt orange or terracotta, and mustard gold (roughly 50g each), or one skein of gradient T-shirt yarn in sunset tones
- 8mm or 9mm crochet hook, depending on your tension with T-shirt yarn
- 2 D-ring bag hardware pieces or swivel lobster clasps
- 1 decorative button or medallion, approximately 25mm diameter
- Leather cord or suede lace, about 12 inches, for decorative ties
- Braided leather crossbody strap with lobster clasp ends
- Optional: wooden or metal beads, leaf charm for embellishment
- Tapestry needle
- Scissors
- Stitch markers
Abbreviations
- ch: chain
- sl st: slip stitch
- sc: single crochet
- dc: double crochet
- fpdc: front post double crochet
- sc2tog: single crochet two together
- inc: increase, work 2 stitches into the same stitch
- st/sts: stitch / stitches
Special Stitches
- Front post double crochet (fpdc): yarn over, insert your hook from front to back to front around the post (the vertical part) of the stitch below, and complete as a regular double crochet. This pushes the stitch forward, creating a raised ridge.
Gauge & Size
- Finished size: approximately 9 inches wide at the widest point and 7 inches tall, not including the strap
- Construction: two identical shaped panels worked in rows, joined around the curved bottom and sides, finished with a top band, hardware and a button closure
- Skill level: Confident Beginner to Intermediate
- Gauge: 8 sc = approximately 4 inches and 8 rows = approximately 4 inches with T-shirt yarn and an 8mm hook. Gauge is forgiving with bags, but check yours if your clutch is turning out much larger or smaller than expected
Panel Pattern (Make 2)
Each panel starts at the curved bottom edge and works upward toward the top opening. Start with dusty rose (Colour A).
Foundation: Ch 6.
Row 1: Sc in the 2nd ch from hook and in each ch across. Turn. (5 sts)
Row 2: Ch 1, 2 sc in the first st, sc in the next 3 sts, 2 sc in the last st. Turn. (7 sts)
Row 3: Ch 1, 2 sc in the first st, sc in the next 5 sts, 2 sc in the last st. Turn. (9 sts)
Row 4: Ch 1, 2 sc in the first st, sc in the next 7 sts, 2 sc in the last st. Turn. (11 sts)
Row 5: Ch 1, 2 sc in the first st, sc in the next 9 sts, 2 sc in the last st. Turn. (13 sts)
Row 6: Ch 1, 2 sc in the first st, sc in the next 11 sts, 2 sc in the last st. Turn. (15 sts)
Row 7: Ch 1, 2 sc in the first st, sc in the next 13 sts, 2 sc in the last st. Turn. (17 sts)
You should now have a gentle curved triangle shape forming. This is the scalloped bottom curve of your shell.
Row 8: Ch 1, 2 sc in the first st, sc in the next 15 sts, 2 sc in the last st. Turn. (19 sts)
Row 9 (ridge setup row): Ch 1, sc in the first st, (dc in next st, sc in next st) repeat across. Turn. (19 sts, alternating sc and dc)
This row sets up the posts that you will work around to create the raised ridges. Change to burnt orange (Colour B) at the end of Row 9: complete your last stitch until you have the final yarn over remaining, then yarn over with the new colour and pull through. Snip your old colour, leaving a 4-inch tail to weave in later.
Row 10 (first ridge row): Ch 1, sc in the first sc, (fpdc around the dc from the row below, sc in next sc) repeat across. Turn. (19 sts)
Row 11: Ch 1, sc in the first st, (dc in next st, which is the fpdc from below, sc in next st) repeat across. Turn. (19 sts)
Row 12: Repeat Row 10. (19 sts)
Row 13: Repeat Row 11. (19 sts)
Change to mustard gold (Colour C) at the end of Row 13.
Row 14: Repeat Row 10. (19 sts)
Row 15: Repeat Row 11. (19 sts)
Row 16: Repeat Row 10. (19 sts)
Row 17: Repeat Row 11. (19 sts)
Row 18 (top edge): Ch 1, sc in each st across. (19 sts)
Fasten off and weave in ends. Make a second panel identical to the first.
Joining the Panels
Place both panels together with wrong sides facing, so the raised ridges are on the outside. Using mustard gold yarn and your hook, join with slip stitches or single crochet through both layers along the curved bottom edge and up both sides, stopping about 1 inch from the top on each side.
Leave the top open for your bag opening. If you prefer an invisible seam, you can use a tapestry needle and whip stitch the panels together instead.
Top Band
With the bag joined and mustard gold still attached:
Round 1: Ch 1, sc evenly around the entire top opening, working approximately 38 to 42 sts total (19 to 21 across each side of the opening). Join with sl st to the first sc. (approximately 40 sts)
Round 2: Ch 1, sc in each st around. Join. (40 sts)
Round 3: Ch 1, sc in each st around. Join. (40 sts)
Fasten off and weave in ends. This creates a clean, slightly sturdier edge at the top of your clutch.
Finishing & Assembly
To attach the hardware, on each side seam at the top corners: cut two small rectangles of leather or use ribbon, approximately 1 inch by 3 inches. Fold each piece through the hardware ring, then stitch or glue securely to the inside of the bag at the side seams.
Alternatively, crochet two small tabs: ch 8, sl st to join into a loop, sc 12 sts around the loop, fasten off. Thread through your hardware and stitch to the bag.
Clip your braided leather strap to the hardware and you are ready to wear it crossbody.
For the decorative button closure, centre your medallion or decorative button on the front panel, about 1 inch down from the top edge, and stitch securely in place with a needle and thread or yarn.
Cut two pieces of leather cord approximately 6 inches each. Fold them in half and attach to the back panel at the top edge, centred above the button. Thread beads and charms onto the cord ends if desired, then knot to secure. To close the bag, wrap the leather cords around the button in a figure eight pattern.
Weave in all yarn tails securely with your tapestry needle. T-shirt yarn can be bulky, so split the yarn if needed to reduce lumps. Block lightly if your panels are curling, and check all hardware is secure before using.
Tips
If your ridges are not popping forward, make sure you are inserting your hook around the post (the vertical bar) of the stitch, not into the top of the stitch. The hook should go from front to back to front again.
If the ombre looks choppy, carry both colours for one row at the colour change point, alternating stitches, to create a softer blend.
Want a different mood? Try a solid colour version for a minimalist look, or turquoise, teal and seafoam for a coastal vibe. For a larger clutch, simply increase more rows at the bottom and continue the pattern longer.
Sunset Ombre Seashell Clutch Free Crochet Pattern
Materials
Steps
- Work panel one in rows, increasing from 5 to 19 sts
- Set up the ridge posts in Row 9 and change to burnt orange
- Work the fpdc ridge rows, changing to mustard gold after Row 13
- Finish the panel at Row 18 and make an identical second panel
- Join the panels around the curved bottom and sides
- Work the 3-round top band
- Attach the hardware tabs, strap and button closure with leather cords
- Work around the post of the stitch, not into its top, so ridges pop forward
- Alternate both colours for one row at each change for a softer ombre blend
- Block lightly if the panels curl before joining


