Crochet Rose Bracelet Free Pattern
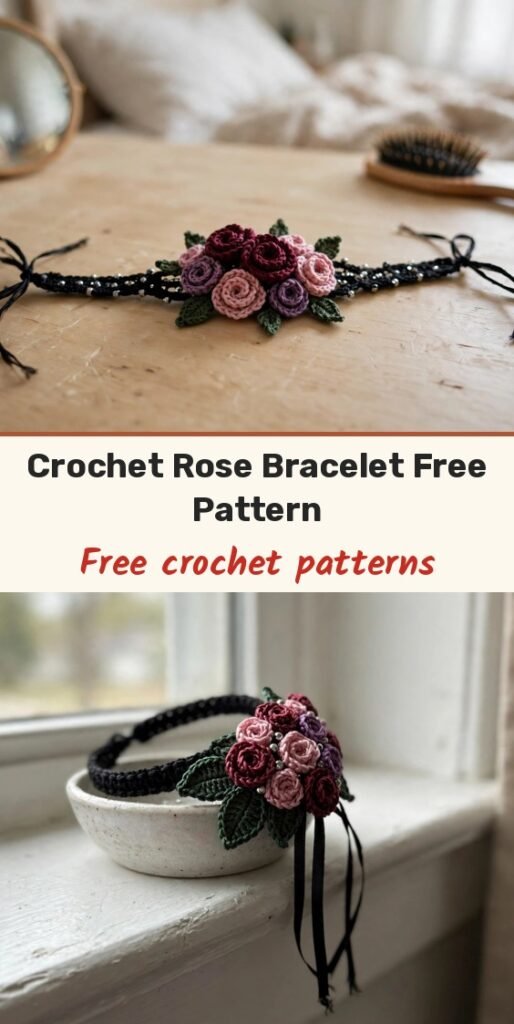
Table of Contents
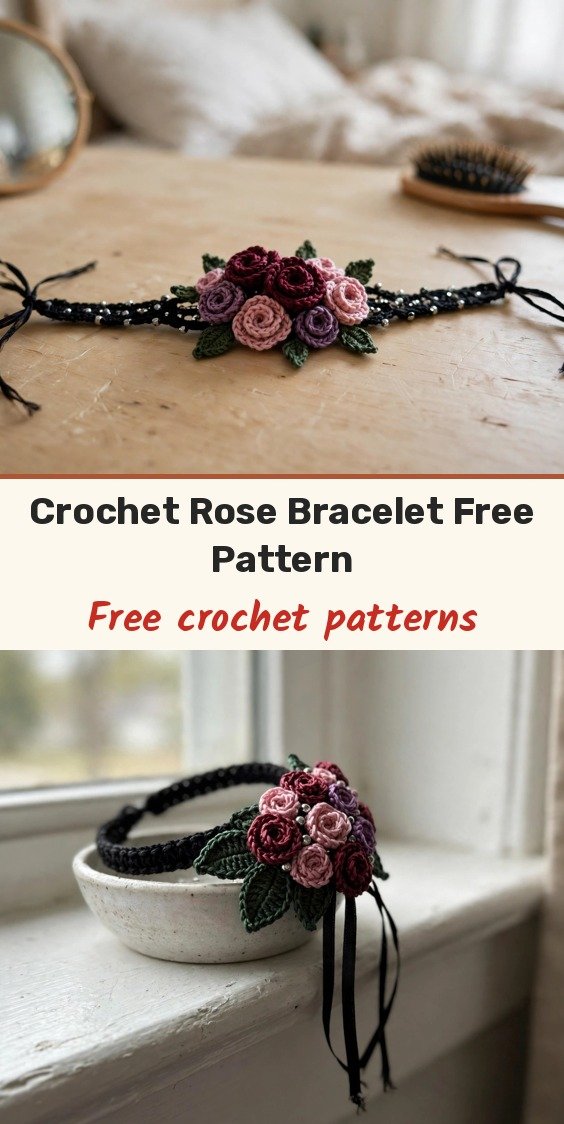
I have to be honest with you: when I finished assembling this bracelet and slipped it onto my wrist for the first time, I actually gasped. This is a crochet rose bracelet with a sleek black band, spiral roses in deep burgundy, dusty pink and purple, textured leaves, and tiny bead accents. It looks like it belongs in a boutique, and it is made entirely with a tiny hook, some thread, and a whole lot of patience.
The wonderful secret is that it breaks down into simple, repetitive steps. Each rose is just a long chain with single crochet stitches that you roll up; the natural curl of the stitches forms the petals automatically. The leaves use basic increases and decreases, the band is straight single crochet rows, and the adjustable ribbon closure makes sizing simple. If you can chain and single crochet, you can absolutely make this.
Fair warning: this is not a quick project. Fine thread and a small hook mean you will want good lighting and a few stretch breaks. But the payoff is absolutely worth it. Let me walk you through every step.
Materials
- Approximately 25 yards of size 10 crochet thread in black, for the band
- Approximately 10 yards of size 10 crochet thread in dusty pink
- Approximately 10 yards of size 10 crochet thread in deep burgundy
- Approximately 10 yards of size 10 crochet thread in purple
- Approximately 15 yards of size 10 crochet thread in dark green, for the leaves
- Steel crochet hook, size 7 (1.65mm), or size needed for a tight, firm fabric
- Tapestry needle with a small eye
- Sharp scissors
- Sewing needle and matching thread, for assembly
- 12 to 15 small silver or gunmetal beads, 4mm
- 12 inches of thin black satin or velvet ribbon, 3mm wide
- 2 larger beads for the ribbon ends (optional)
- Fabric glue or clear nail polish, for securing knots
Abbreviations
- ch: chain
- sl st: slip stitch
- sc: single crochet
- sc2tog: single crochet two together (decrease)
- inc: increase, 2 sc in the same stitch
Gauge & Size
- Finished size: band 1 inch wide and 6 inches long (not including ribbon ties), rose cluster about 2.5 inches wide by 2 inches tall, adjustable fit for a 6 to 8 inch wrist
- Gauge: 8 sc = 1 inch and 9 rows of sc = 1 inch with size 10 thread and a 1.65mm hook
- Construction: flat single crochet band, rolled spiral roses and leaves sewn on, ribbon tie closure
- Skill level: Intermediate
Bracelet Band Pattern
The band is worked flat in rows of single crochet. We add the ribbon closure at the very end.
Row 1: With black thread, ch 49. Sc in 2nd ch from hook and in each ch across. Turn. (48 sc)
Row 2: Ch 1 (does not count as a stitch here and throughout), sc in each sc across. Turn. (48 sc)
Row 3: Ch 1, sc in each sc across. Turn. (48 sc)
Row 4: Ch 1, sc in each sc across. Turn. (48 sc)
Row 5: Ch 1, sc in each sc across. Turn. (48 sc)
Row 6: Ch 1, sc in each sc across. Turn. (48 sc)
Row 7: Ch 1, sc in each sc across. Turn. (48 sc)
Row 8: Ch 1, sc in each sc across. Turn. (48 sc)
Row 9: Ch 1, sc in each sc across. Turn. (48 sc)
After Row 9, you should have a neat rectangle measuring approximately 6 inches long by 1 inch wide. Fasten off and weave in your ends carefully; the cleaner your finishing, the more professional your bracelet looks.
Spiral Rose Pattern (Make 5)
Each rose starts as a long strip that you roll into a spiral. Make 5 in total; I made 2 dusty pink, 2 burgundy and 1 purple, but feel free to adjust the mix.
Foundation: Ch 45.
Row 1: Working in the back bump of the chain, sc in 2nd ch from hook. (Work 2 sc in next ch, sc in next ch) repeat across. (66 sc)
This increase pattern creates the natural ruffle that forms your rose petals. Fasten off, leaving a 12 inch tail for sewing.
To form the rose, start at one end of the strip and begin rolling tightly, keeping the bottom edge aligned. As you roll, the top edge will naturally ruffle outward like petals. Use your long tail to stitch through the base every few rolls, securing the spiral in place, and stitch firmly several times at the end to lock everything down. The tighter you roll the center, the more bud-like your rose; a looser roll gives a more open, bloomed look. I like mixing both styles in one bracelet.
Leaf Pattern (Make 8 to 10)
These leaves use simple increases and decreases to create a pointed oval shape, and the texture comes from working in the back loop only. Ch 10.
Row 1: Sc in 2nd ch from hook, sc in next 7 ch, 3 sc in last ch. Rotate to work along the other side of the foundation chain. Sc in next 7 stitches, 2 sc in last stitch. Join with sl st to first sc. (20 sc)
Row 2: Ch 1, working in back loops only, sc in first 8 sts, 3 sc in next st (this is the tip), sc in next 8 sts, sc2tog over last 2 sts. Join with sl st. (21 sc)
Row 3: Ch 1, working in back loops only, sc in first 9 sts, 3 sc in next st, sc in next 9 sts, sc2tog. Join with sl st. (22 sc)
Fasten off, leaving a tail for sewing. The back loop only technique creates those beautiful ridges that mimic the veins of a real leaf.
Rosebuds (Make 2 to 3, Optional)
For the smaller buds peeking out between the full roses: ch 25.
Row 1: Sc in 2nd ch from hook, 2 sc in each remaining ch across. (48 sc)
Fasten off with a long tail. Roll tightly into a small bud shape and secure with stitches. These stay more closed than the full roses.
Finishing & Assembly
First, the beads: thread your sewing needle with matching thread and stitch small silver beads onto several leaves, clustering 3 to 5 beads near the base of each leaf, like morning dew or tiny berries. You can also tuck a few beads between rose petals for extra sparkle.
Now position the band with the right side facing up, and arrange your roses in the center without attaching yet. Play with the placement: I like putting the largest or most open rose slightly off center, then clustering smaller roses around it. Tuck leaves behind and between the roses, letting some point outward and others peek out from underneath; odd numbers look more natural than even arrangements. Once you are satisfied, use your tapestry needle and matching thread to stitch each piece firmly to the band, working from the back whenever possible to hide your stitches. Add rosebuds in any gaps.
For the ribbon closure, cut your ribbon into two 6 inch pieces. Fold one short edge of each ribbon under about half an inch, and stitch the folded edge securely to one short end of the band, centered. Repeat on the other side. If you like, thread a larger bead onto each ribbon end and tie a knot below it to keep it in place. To wear, simply wrap the bracelet around your wrist and tie the ribbons in a bow.
Tips
Working with crochet thread can feel frustrating at first: the thread wants to split, the hook feels tiny, and everything takes forever. Work in bright natural light or use a craft lamp, take breaks every 20 minutes to rest your eyes and hands, and use a light coloured cloth on your lap so you can see black thread more easily. Keep your tension firm, but not a death grip.
If your roses look lumpy or uneven, you probably need to roll tighter. Unroll and try again; it takes a few attempts to get the feel for it, and that is completely normal.
Want a different mood? For a romantic version, use ivory thread for the band, soft pink and cream roses, pale green leaves, and tiny pearls instead of silver beads. For a gothic version, keep the black band, use deep red and black roses, and add more silver beads. A single large rose with a few leaves makes a simpler, quicker bracelet that still looks stunning.
Crochet Rose Bracelet Free Pattern
Materials
Steps
- Work the black band flat in 9 rows of single crochet (48 sc)
- Crochet 5 spiral rose strips and roll and stitch each into a rose
- Make 8 to 10 back-loop leaves and 2 to 3 small rosebuds
- Stitch silver beads onto several leaves and between petals
- Arrange the roses, leaves and buds on the band and sew each piece firmly from the back
- Attach a 6 inch ribbon tie to each short end of the band
- Work in bright light and rest your eyes and hands every 20 minutes with fine thread
- Roll roses tighter if they look lumpy; the center roll decides the whole shape
- Use a light coloured cloth on your lap to see black thread clearly
- The adjustable ribbon tie makes this an easy gift when you do not know the exact wrist size