Sage Green Boho Butterfly Earrings Free Crochet Pattern
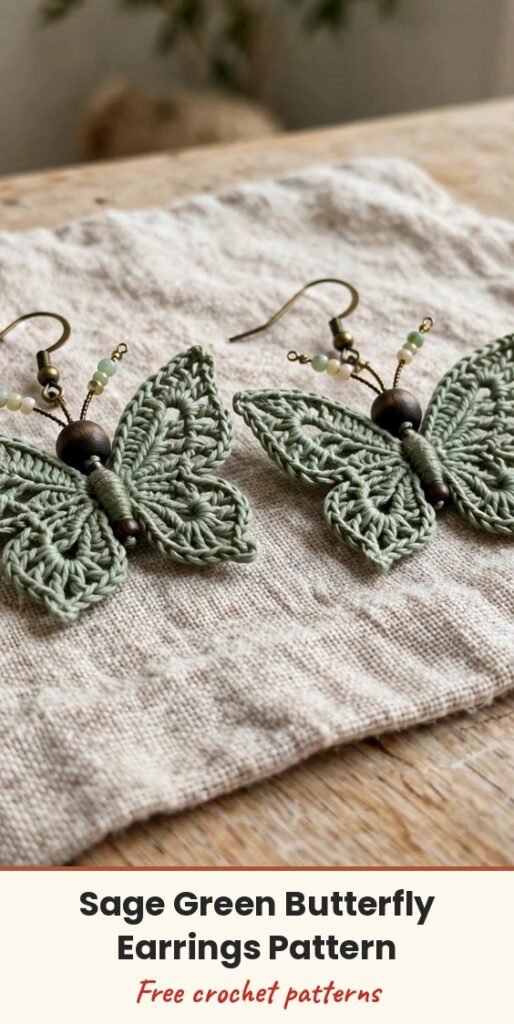
Table of Contents
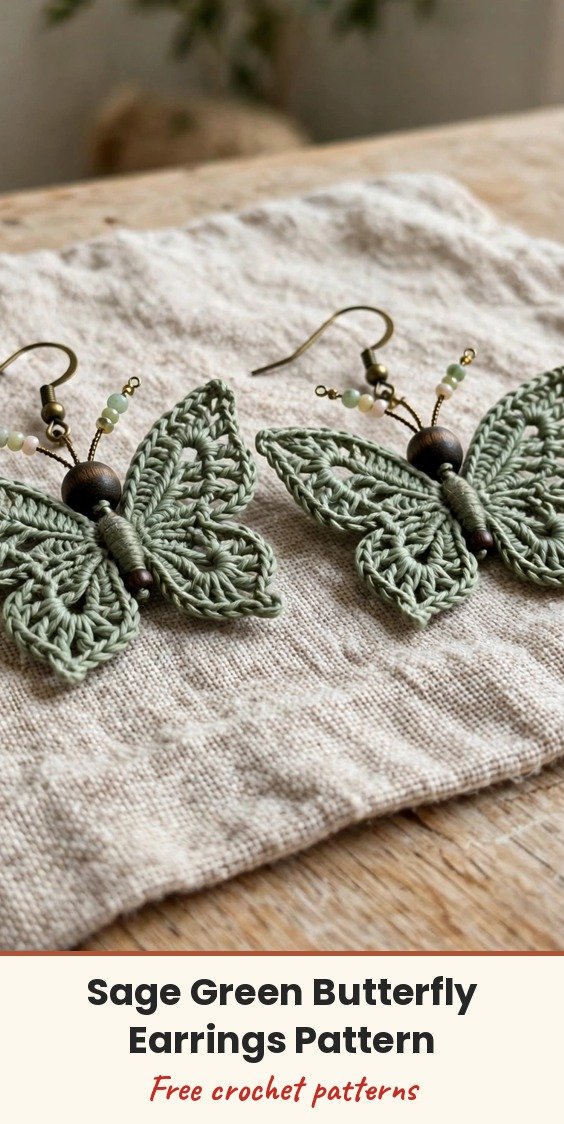
I fell head over heels for delicate crochet butterfly earrings the moment I first saw a pair, and I am so excited to share this sage green version with you! Each butterfly is built from four tiny wing motifs joined at the centre, with a little wooden bead for the body and beaded wire antennae that catch the light as you move.
The stitches themselves are wonderfully simple, mostly double crochet and single crochet worked in joined rounds. The only real challenge is the tiny scale of the size 10 thread and steel hook, so pour a cup of tea, settle in with good light, and enjoy some slow, meditative stitching.
Each earring measures approximately 1.75 inches wide by 1.5 inches tall, with a total drop of about 2.5 inches from the top of the ear wire. They are light as a feather for all-day wear and make the sweetest gift for a nature lover!
Materials
- Approximately 30 yards of size 10 crochet cotton thread in sage green
- Steel crochet hook size 7 (1.65 mm)
- 4 small round wooden beads, approximately 6 mm, dark brown (1 body bead used per earring)
- 20 to 24 green glass seed beads, size 11/0, for the antennae tips
- 2 antique brass French ear wire hooks
- 2 antique brass jump rings, 4 mm
- Approximately 8 inches of fine brass craft wire, 26 or 28 gauge
- Tapestry needle, size 13 or 14
- Small round-nose pliers and flat-nose pliers
- Wire cutters
- Scissors
- Fabric stiffener spray or diluted white glue (optional, for blocking)
- Rust-proof pins and a foam blocking board (optional)
Abbreviations
- ch: chain
- sl st: slip stitch
- sc: single crochet
- dc: double crochet
- MR: magic ring
- st/sts: stitch / stitches
- ch-sp: chain space
Special Stitches
Picot: Chain 3, then slip stitch into the first chain made. This creates a small decorative loop at the edge of the work, and we use it to finish the lower wings.
Shell Stitch: Work 5 double crochet stitches into the same stitch or space. This little fan forms the rounded, petal-like lobe of each wing section.
Gauge & Size
- Finished size: each earring approximately 1.75 inches wide x 1.5 inches tall, total drop approximately 2.5 inches from the top of the ear wire
- Gauge: one completed wing motif = approximately 0.85 inch wide x 0.85 inch tall after light blocking; make one lower wing first and measure before continuing
- Construction: four wing motifs per earring (2 upper, 2 lower) joined at the centre, wooden bead body, wire antennae, jump ring and ear wire
- Skill level: Intermediate
Lower Wing Motif
Make 2 per earring, 4 total per pair. All motifs are worked in joined rounds, joining with a slip stitch to the first stitch of the round and not turning. Begin with a magic ring, and fasten off each motif leaving a tail of at least 6 inches for joining.
Round 1: Ch 3 (counts as first dc here and throughout), work 11 dc into the MR, pull the ring closed, join with sl st to top of beg ch-3. (12 dc)
Round 2: Ch 1, sc in same st as join. Ch 5, skip 1 st, sc in next st. Ch 3, skip 1 st, sc in next st. Ch 5, skip 1 st, sc in next st. Ch 3, skip 1 st, sc in next st. Ch 5, skip 1 st, sc in next st. Ch 3, skip 1 st, join with sl st to first sc. (3 ch-5 sps, 3 ch-3 sps, 6 sc)
Round 3: Sl st into first ch-5 sp. Ch 3, work 4 more dc into the same ch-5 sp (shell made). Ch 2, sc into next ch-3 sp. Ch 2, work 5 dc into next ch-5 sp (shell made). Ch 2, sc into next ch-3 sp. Ch 2, work 5 dc into next ch-5 sp (shell made). Ch 2, sc into next ch-3 sp. Ch 2, join with sl st to top of beg ch-3. (3 shells of 5 dc, 3 sc, 6 ch-2 sps)
Round 4: Sl st across to the centre dc of the first shell. Ch 1, sc in centre dc of shell. Ch 4, picot, ch 4, sc in centre dc of next shell. Ch 4, picot, ch 4, sc in centre dc of next shell. Ch 4, picot, ch 4, join with sl st to first sc. (3 sc, 3 picots, 6 ch-4 sps)
Fasten off, leaving a 6-inch tail. Each lower wing should measure approximately 0.9 inch across at its widest point.
Upper Wing Motif
Make 2 per earring, 4 total per pair. The upper wings are slightly smaller than the lower wings because they stop after Round 3, without the picot round. Begin with a magic ring.
Round 1: Ch 3 (counts as first dc), work 11 dc into the MR, pull the ring closed, join with sl st to top of beg ch-3. (12 dc)
Round 2: Ch 1, sc in same st as join. Ch 4, skip 1 st, sc in next st. Ch 2, skip 1 st, sc in next st. Ch 4, skip 1 st, sc in next st. Ch 2, skip 1 st, sc in next st. Ch 4, skip 1 st, sc in next st. Ch 2, skip 1 st, join with sl st to first sc. (3 ch-4 sps, 3 ch-2 sps, 6 sc)
Round 3: Sl st into first ch-4 sp. Ch 3, work 3 more dc into the same ch-4 sp (4 dc shell made). Ch 1, sc into next ch-2 sp. Ch 1, work 4 dc into next ch-4 sp (4 dc shell made). Ch 1, sc into next ch-2 sp. Ch 1, work 4 dc into next ch-4 sp (4 dc shell made). Ch 1, sc into next ch-2 sp. Ch 1, join with sl st to top of beg ch-3. (3 shells of 4 dc, 3 sc, 6 ch-1 sps)
Fasten off, leaving a 6-inch tail. Each upper wing should measure approximately 0.75 inch across. Before you assemble, pause and count your pieces: you should have 2 lower wings and 2 upper wings for each earring.
Finishing & Assembly
Lay the four motifs on a flat surface in butterfly formation, with the two upper wings side by side at the top and the two lower wings below them, flattest edges facing inward toward the centre.
Thread a tapestry needle with a 12-inch length of sage green thread. Hold one upper wing against one lower wing, aligning their inner edges, and whipstitch them together at 2 to 3 stitches along the shared edge. Repeat for the second pair, then hold both assembled pairs together, mirroring each other, and whipstitch them together at the centre join point with 3 to 4 stitches so all four wings meet at a single centre. Weave in the joining tails except for one 6-inch tail.
Attach the body bead by threading that remaining tail through your needle, passing it through the centre of a wooden bead, then back down through the centre join of the wings, pulling the bead snugly against the front centre. Pass through the wings and bead once more to secure, then knot firmly at the back and weave in the tail.
For the antennae, cut one piece of brass wire approximately 4 inches long and bend it in half into a narrow V, keeping the folded tip as a loop for the jump ring. Thread 2 to 3 green seed beads onto each wire end and bend each tip into a tiny closed loop with round-nose pliers to hold the beads. Insert the folded tip down through the top centre of the wing assembly to the back, open it slightly flat against the back to anchor it, and secure with a small dab of jewellery adhesive or a few thread stitches if needed.
Open a 4 mm jump ring by twisting it sideways, never pulling it apart. Loop it through the folded wire tip at the top of the antenna assembly, attach the ear wire hook, and close the ring securely. Repeat all the assembly steps for the second earring, mirroring the antenna spread so your pair looks symmetrical.
To block, place each earring right side up on a foam board, mist lightly with water or brush on diluted fabric stiffener (1 part white glue to 3 parts water), and pin each wing open to its fullest width. Allow 2 to 4 hours to dry completely before removing the pins.
Tips
Work one lower wing motif first and measure it. At this tiny scale, a motif that is even a little too large or small will not assemble neatly, so adjust your hook size before making the full set.
For smaller, daintier earrings, use size 20 thread with a size 10 or 11 steel hook. For larger statement earrings, use size 5 thread or light fingering cotton with a larger hook. The rounds and stitch counts stay exactly the same.
Hand wash gently in cool water with a little mild soap, press flat between towels, and reshape to dry. Store the earrings flat or hanging so the wings do not get crushed.
Sage Green Boho Butterfly Earrings Free Crochet Pattern
Materials
Steps
- Work 4 lower wing motifs through Round 4 with picot edge
- Work 4 upper wing motifs through Round 3
- Arrange the four motifs per earring in butterfly formation
- Whipstitch the wings together at the centre join
- Sew a wooden bead at the centre front as the body
- Make beaded wire antennae and anchor them at the top centre
- Attach the ear wire with a 4 mm jump ring and block lightly
- Measure your first wing motif against gauge before making the full set
- Open jump rings by twisting sideways, never by pulling apart
- Block with a light stiffener so the wings hold their shape in wear