Blush Pink Ruffle Crochet Romantic Top Free Pattern
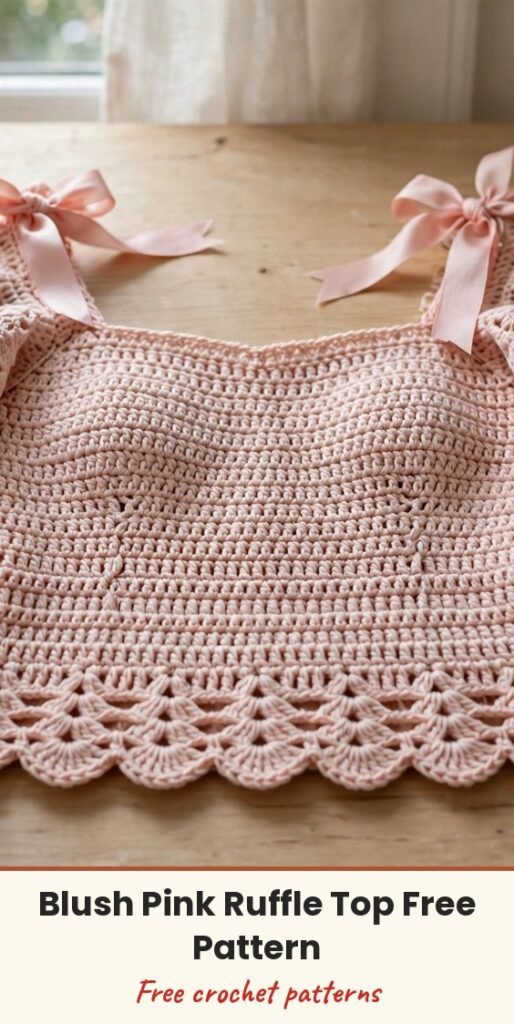
Table of Contents
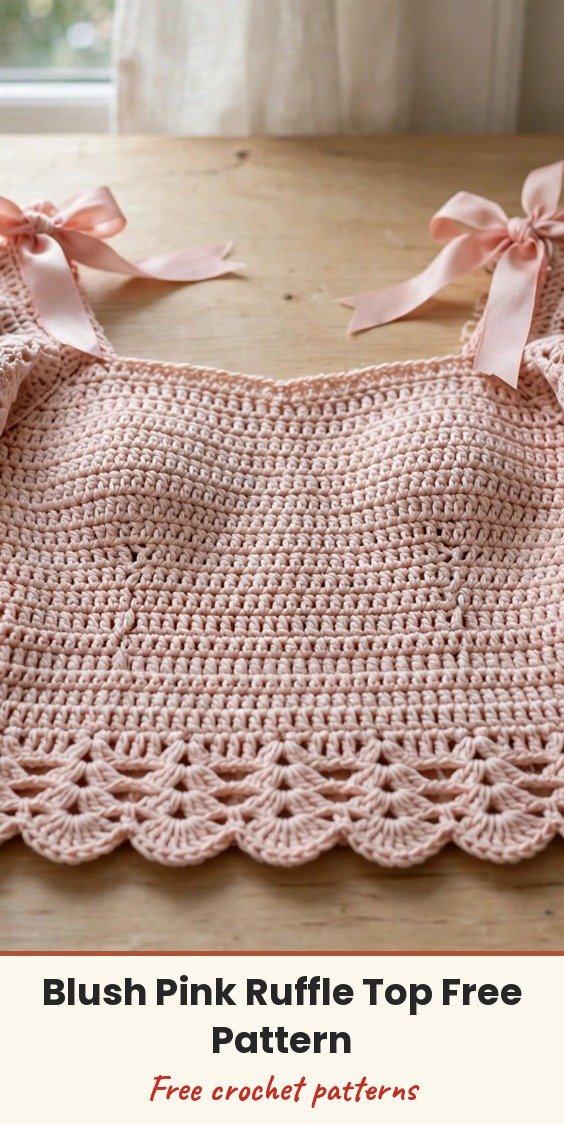
This blush pink ruffle top is the one I reach for when someone tells me crochet garments look complicated, because it honestly is not! The fitted bodice is just single crochet worked in continuous rounds, the pretty smocked look comes from a few back-loop-only rounds, and those dramatic ruffle sleeves are simple flat panels with easy increases.
We will start with the scalloped hem border, build the bodice upward, then make two ruffle sleeves, block them so the eyelets open up, and sew them on. Satin ribbon ties at each shoulder finish everything off with the sweetest bows.
I have kept the stitch count at the end of every round and row, plus measurement checkpoints along the way, so you always know you are on track before moving on. If you can single crochet in the round and follow a count, you can absolutely make this top.
Materials
- 750 to 900 yards DK weight yarn (CYCA 3) in blush pink, smooth cotton or cotton blend for clear stitch definition
- 4.0 mm (US G-6) crochet hook for the bodice
- 5.0 mm (US H-8) crochet hook for the ruffles
- 2 yards of 3/4 inch satin ribbon in blush pink, cut into two 1-yard lengths
- At least 6 stitch markers
- Tapestry needle for weaving ends and seaming
- Scissors
- Blocking mat and pins
Abbreviations
- ch: chain
- sc: single crochet
- hdc: half double crochet
- dc: double crochet
- sl st: slip stitch
- sk: skip
- inc: increase, work 2 stitches into the same stitch
- BLO: back loop only
- ch-sp: chain space
- RS: right side
- WS: wrong side
- st/sts: stitch / stitches
- rnd: round
Special Stitches
- Shell stitch: work 5 dc into the same stitch or space. This fan shape forms the scalloped edge at the hem and at the lower edge of each ruffle.
- V-stitch: work (1 dc, ch 1, 1 dc) into the same stitch or space. This open V forms the eyelet grid of the ruffle panels.
- Picot: ch 3, sl st into the first chain made. This creates a small decorative loop.
- Eyelet row: ch 3 (counts as first dc), then (sk 1 st, dc in next st, ch 1) across to the last st, dc in last st. Each repeat produces one eyelet hole.
Gauge & Size
- Finished size: bust 34 to 36 inches (86 to 91 cm); total length about 10 inches (25.5 cm) from scalloped hem to top edge
- Gauge: 18 stitches and 20 rows = 4 inches in single crochet in the round with the 4.0 mm hook; ruffle eyelet pattern 16 stitches and 8 rows = 4 inches, blocked, with the 5.0 mm hook
- Construction: scalloped hem border joined into a ring, bodice worked upward in continuous rounds, ruffle sleeves worked flat and sewn on, ribbon ties threaded through shoulder loops
- Skill level: Intermediate
Scalloped Hem Border
With the 4.0 mm hook, chain 162. Without twisting the chain, join with a sl st to the first chain to form a ring.
Round 1: Ch 1, sc in first ch, (sk 2 ch, 5 dc in next ch, sk 2 ch, sc in next ch) across, join the last sc to the first sc with a sl st. (27 shells and 27 sc, 162 sts total)
Round 2: Sl st to the center dc of the first shell (3rd dc), ch 1, sc in same st, ch 3, sl st in first ch of the ch-3 (picot made), (sc in center dc of next shell, picot) around, sl st to first sc to join. (27 sc with picots)
The scalloped border is complete. Your ring should measure approximately 36 inches (91 cm) in circumference. Do not cut the yarn, we continue straight up into the bodice.
Bodice
Round 3: Working into the back of the original foundation chain, below the scallop border, place 1 sc in each of the 162 chain spaces, sl st to the first sc to close. (162 sc)
Do not join the following rounds. Place a stitch marker in the first stitch of each round and move it up as you go.
Rounds 4 to 8: Sc in each st around. (162 sc each round)
Round 9: Sc in BLO of each st around. (162 sc)
Rounds 10 to 14: Sc in each st around. (162 sc each round)
Round 15: Sc in BLO of each st around. (162 sc)
Rounds 16 to 20: Sc in each st around. (162 sc each round)
Round 21: Sc in BLO of each st around. (162 sc)
Rounds 22 to 26: Sc in each st around. (162 sc each round)
Checkpoint: after Round 26 the bodice body should measure approximately 7 inches (18 cm) from the top of the scalloped hem border to the current round. If yours differs, add or remove sc rounds in groups of two, between BLO rounds, before you continue.
Upper Bodice Band
Rounds 27 to 29: Sc in each st around. (162 sc each round)
Round 30: We create four chain-space loops, one at each shoulder corner, for the ribbon ties. Mark four points: Point A at st 1 (left front shoulder corner), Point B at st 41 (right front shoulder corner), Point C at st 82 (left back shoulder corner), Point D at st 122 (right back shoulder corner). Work as follows: sc to st 1, (ch 5, sk 5 sts, sc in next st, sc in each st to next marked point) 4 times, sl st to first sc. (4 ch-5 loops, 142 sc between loops)
Round 31: Sc in each sc around and work 5 sc into each ch-5 space. (162 sc)
Round 32: Sl st in BLO of each st around, join with sl st. Fasten off and weave in the end. (162 sl sts)
Checkpoint: the full bodice should now measure approximately 10 inches (25.5 cm) from the bottom scallop edge to the top slip stitch edge.
Ruffle Sleeves
Make two identical panels. Switch to the 5.0 mm hook for all ruffle sections. Chain 29 to begin.
Row 1 (WS): Sc in 2nd ch from hook and in each ch across. Turn. (28 sc)
Row 2 (RS, eyelet setup): Ch 3 (counts as dc), (ch 1, sk 1 st, dc in next st) across to last st, dc in last st. Turn. (15 dc and 14 ch-1 spaces)
Row 3 (WS, increase row): Ch 1, sc in first st, 2 sc in next ch-1 sp, (sc in next dc, 2 sc in next ch-1 sp) across, sc in last dc. Turn. (44 sc)
Row 4 (RS, eyelet row): Ch 3 (counts as dc), (ch 1, sk 1 st, dc in next st) across to last st, dc in last st. Turn. (44 sts)
Row 5 (WS, increase row): Ch 1, sc in first dc, 2 sc in each ch-1 sp and sc in each dc across, sc in top of turning chain. Turn. (65 sc)
Row 6 (RS, eyelet row): Ch 3, (ch 1, sk 1 st, dc in next st) across, ending with a dc in the last st. Turn. (65 sts)
Row 7 (WS, increase row): Ch 1, sc in first dc, (sc in next ch-1 sp, sc in next dc) across, sc in top of turning chain. Turn. (66 sc)
Row 8 (RS, increase row): Ch 1, sc in first sc, 2 sc in next sc, (sc in next sc, 2 sc in next sc) across. Turn. (99 sc)
Row 9 (WS, eyelet row): Ch 3, (ch 1, sk 1 st, dc in next st) across, ending with a dc in the last sc. Turn. (99 sts)
Row 10 (RS, scalloped ruffle hem): Ch 1, sc in first dc, then continue across placing a 5 dc shell in every other dc and an sc in the dc between shells, skipping the chain spaces on both sides of each shell dc. (25 sc and 24 shells of 5 dc, 145 sts total)
Row 11 (picot edge): Sl st to the center dc of the first shell, ch 1, sc in same st, (ch 3, sl st in base of ch-3 for picot, sc in center dc of next shell) across, end with a picot. Fasten off, leaving a 12 inch (30 cm) tail for seaming. (25 sc with picots)
Checkpoint: each finished ruffle panel should measure approximately 5 inches (12.5 cm) tall and 9 inches (23 cm) wide at the ruffle hem edge after blocking. Block each panel before attaching, pinning the eyelets open so the ruffle lies flat and drapes correctly.
Finishing & Assembly
Lay the bodice flat and find the front and back shoulder strap opening loops from Round 30. Each sleeve panel attaches from one shoulder loop on the front to the matching loop on the back, draping over the upper arm.
Using your tapestry needle and the long tail from Row 11, sew the Row 1 edge of each ruffle panel to the upper edge of the bodice, spanning from just inside the front shoulder loop to just inside the back shoulder loop, about 6 inches (15 cm) of bodice edge per side. A whip stitch or mattress stitch both work nicely here.
Cut the satin ribbon into two 36 inch (90 cm) lengths. For each shoulder, thread one ribbon through the front shoulder loop from inside to outside, bring it over the top of the ruffle panel, and thread it through the back shoulder loop from outside to inside. Pull the ends even and tie a bow at the top of the shoulder.
Weave in all remaining ends, then give the finished top a final gentle block if it needs it.
Tips
For a different bust size, keep the stitch count divisible by 6 so the scallop repeat works out: 138 sts for a 30 to 32 inch bust, 186 sts for 38 to 40 inches, and 210 sts for 42 to 44 inches. Each 6-stitch change alters the circumference by about 1.3 inches (3.3 cm), and you divide the new total by 4 to place the shoulder loops.
Hand wash your top cold with a gentle detergent, press it flat between towels, reshape to measurements and lay flat to dry away from direct sunlight. Store it folded rather than hung so the bodice keeps its shape.
Gauge really matters on this one, so please swatch first. Even half a stitch per inch difference changes the fit a lot across a whole bodice circumference.
Blush Pink Ruffle Crochet Romantic Top Free Pattern
Materials
Steps
- Work the scalloped hem border and join it into a ring of 162 sts
- Work the bodice upward in continuous sc rounds with BLO texture rounds to Round 26
- Work the upper band and the four shoulder-loop round
- Close the top edge with a BLO slip stitch round
- Crochet two ruffle sleeve panels with eyelet rows and increases to 99 sts
- Finish each ruffle with a scalloped shell hem and picot edge
- Block the ruffle panels and sew them to the bodice shoulders
- Thread satin ribbon through the shoulder loops and tie bows
- Keep the bodice stitch count divisible by 6 when resizing so the scallop repeat works out
- Block each ruffle panel before sewing it on so the eyelets open and the ruffle drapes
- Use a stitch marker and move it up every round, since the bodice is worked in a continuous spiral


