Sage Green Boho Lace Choker Free Crochet Pattern
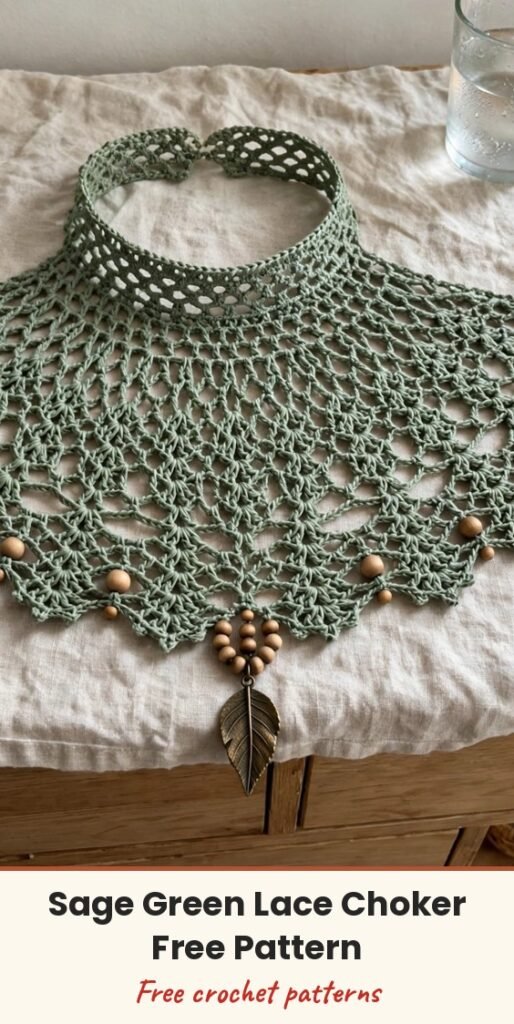
Table of Contents
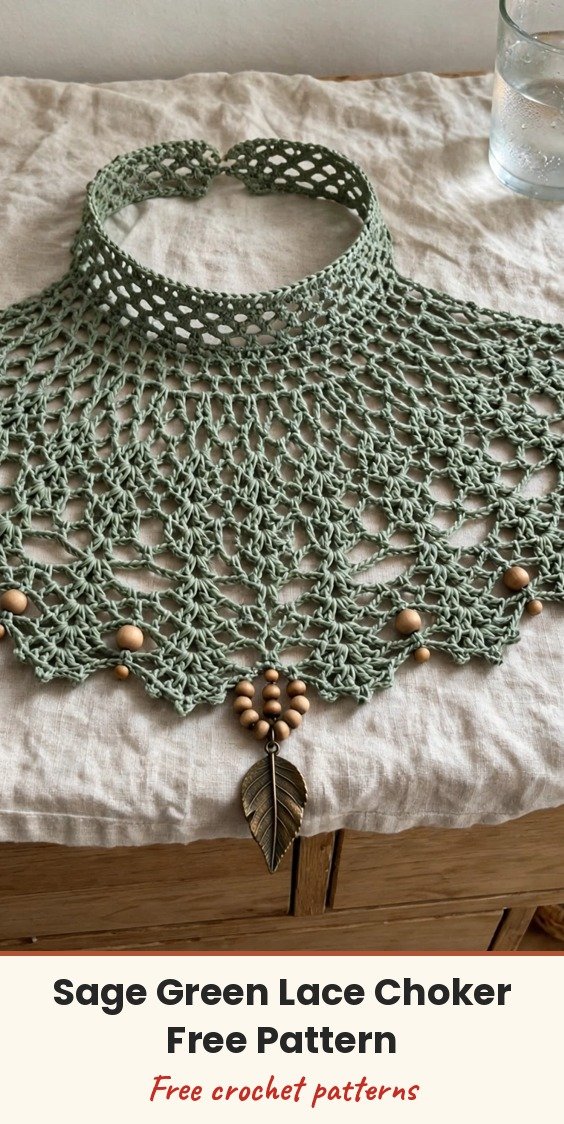
I love this sage green lace choker so much! It looks like it belongs in a boutique, with its delicate fan and diamond lace bib, wooden beads worked right into the fabric, and pretty bronze charms. If you love jewellery that shows off your handmade skills, this is the one for us.
We will make a structured neckband first from dense half double crochet that sits flat and comfortable, then work the lace bib downward from the lower edge of the band in rows. The beads are strung onto the yarn before we start and pushed into place as we crochet, so they sit perfectly positioned and secure. A bronze leaf charm dangles from the centre point of the bib, with a second matching charm on the extender chain at the back.
Plan for 3 to 5 hours including finishing and hardware attachment. The bead stringing takes about 15 minutes at the beginning. This makes a wonderful weekend project or a few evenings of relaxing crochet time.
Materials
- Size 3 light weight (DK) 100 percent cotton yarn in sage green, approximately 60 yards / 55 meters
- US size D-3 / 3.25 mm crochet hook
- 12 round wooden beads, 6 mm diameter
- 12 small bronze flower spacer beads, 4 to 5 mm diameter
- 2 bronze leaf charms (one for bib center, one for extender chain)
- 2 flat crimp bar ends with loop, sized for ribbon or cord approximately 0.75 inch / 2 cm wide
- 1 bronze lobster claw clasp, 12 to 14 mm
- 1 bronze extender chain, 2 inches / 5 cm
- 2 bronze jump rings, 6 mm
- Yarn needle
- Fabric glue or clear drying jewelry adhesive
- Flat nose jewelry pliers
Abbreviations
- beg: beginning
- ch: chain
- ch-sp: chain space
- cl: cluster (see Special Stitches)
- dc: double crochet
- hdc: half double crochet
- rep: repeat
- RS: right side
- sc: single crochet
- sk: skip
- sl st: slip stitch
- sp: space
- st(s): stitch(es)
- t-ch: turning chain
- WS: wrong side
- yo: yarn over
Special Stitches
- 3-dc Cluster (cl): Yarn over, insert hook into indicated stitch or space, yarn over and pull up a loop, yarn over and pull through 2 loops (2 loops remain on hook). Yarn over, insert hook into same stitch or space, yarn over and pull up a loop, yarn over and pull through 2 loops (3 loops remain on hook). Yarn over, insert hook into same stitch or space, yarn over and pull up a loop, yarn over and pull through 2 loops (4 loops remain on hook). Yarn over and pull through all 4 loops on hook.
- 5-dc Shell: Work 5 dc all into the same stitch or space. This creates a fan shape.
- Bead Push-Up: Before working the indicated stitch, slide one bead (the next bead on your yarn) up snugly against the hook so the bead sits on the front face of the work. Complete the stitch as normal. The bead is now locked in place on the RS of the fabric.
Gauge & Size
- Neckband length (before hardware): 12 inches / 30.5 cm
- Neckband width: 0.75 inch / 2 cm
- Bib depth at center (longest point): 2.75 inches / 7 cm
- Total choker length with clasp and 2 inch extender chain: 14 to 16 inches / 35.5 to 40.5 cm adjustable
- Gauge: 20 sc x 24 rows = 4 inches / 10 cm worked in single crochet with a US D-3 / 3.25 mm hook, blocked; one full fan and diamond repeat (10 stitches wide at foundation) = approximately 1.25 inches / 3.2 cm wide
- Construction: neckband worked first as a flat strip, lace bib worked downward from the lower edge of the neckband in rows; string all beads onto the yarn before beginning in alternating sequence (flower spacer, wooden bead) until all 12 wooden beads and 12 flower spacer beads are strung (24 beads total)
- Skill level: Intermediate
Neckband Pattern
The neckband is a narrow strip of half double crochet worked flat. It sits at the top of the choker. Ch 2 and turn at the end of each row. The ch-2 does not count as a stitch. Leave 0.75 inch / 2 cm tails at each end of the neckband for insertion into the crimp bars.
Foundation chain: Ch 63.
Row 1 (WS): Hdc in 3rd ch from hook and in each ch across. Turn. (61 hdc)
Row 2 (RS): Ch 2, hdc in each st across. Turn. (61 hdc)
Row 3: Ch 2, hdc in each st across. Turn. (61 hdc)
Row 4: Ch 2, hdc in each st across. Turn. (61 hdc)
Do not fasten off. The neckband strip should measure approximately 12 inches / 30.5 cm long and 0.75 inch / 2 cm wide at this point. Checkpoint: Count 61 hdc stitches along one long edge before proceeding.
Foundation Bib Row (RS, picking up along bottom edge): Rotate the work so the long bottom edge of the neckband faces you. Do not cut yarn. Ch 1, work 101 sc evenly along the bottom edge of the neckband. Turn. (101 sc)
Note on stitch count: 101 sc = 10 fan repeats x 10 stitches each, plus 1 extra stitch at the end to balance the final repeat. Work into every available post and add occasional additional stitches into the same post to reach 101 total. Distribute evenly across the edge.
Lace Bib Pattern
The lace bib is worked in rows downward from the Foundation Bib Row.
Row 1 (WS, establishes fan base points): Ch 3 (counts as dc here and throughout lace section), turn. Dc in same st as ch-3. (Ch 1, sk 3 sts, 5-dc shell in next st, ch 1, sk 3 sts, 2 dc in next st) rep across, ending last rep with 2 dc in last st. Turn. Stitch count check: You should have 10 shells and 11 pairs of 2-dc posts across the row. (10 shells, 11 two-dc groups, 20 ch-1 sps)
Row 2 (RS, creates diamond chain spaces): Ch 5 (counts as dc + ch 2), turn. Sc in top of first shell, (ch 5, cl in sp between shells, ch 5, sc in top of next shell) rep across to last shell, ch 5, sc in top of last shell, ch 2, dc in top of last st. Turn. (10 sc, 9 cl, 20 ch-5 sps, 2 edge ch-2 sps)
Row 3 (WS, bead row and re-establishment of shells): Ch 3 (counts as dc), turn. 4 dc in first ch-2 sp at edge (completing a half-shell at edge). (Bead push-up into next ch-5 sp, ch 2, sc in top of cl, ch 2, bead push-up, 5-dc shell in next ch-5 sp) rep across, ending with bead push-up into last ch-5 sp, ch 2, sc in top of last cl, ch 2, bead push-up, 5 dc in last ch-2 sp at edge. Turn. After Row 3: You should have 10 shells (including the two half-shells at each edge), 9 sc sitting atop clusters, and 24 beads placed (12 wooden beads and 12 flower spacers, alternating). (10 shells or equivalent, 9 sc, 18 ch-2 sps, 24 beads placed)
Row 4 (RS, drop to points): Ch 1, turn. Sc in first dc. (Ch 3, sk 2 dc, sc in 3rd dc of shell, ch 5, sc in 3rd dc of next shell, ch 3, sc in sc between shells) rep across, ending last rep with ch 3, sk 2 dc, sc in last dc. Turn. (10 sc atop shells, 9 sc atop between-shell sc from Row 3, 10 ch-3 sps, 9 ch-5 sps)
Row 5 (WS, scallop points with diamond fills): Ch 1, turn. Sc in first sc. (3 sc in ch-3 sp, sc in sc, 5 dc in ch-5 sp, sc in sc, 3 sc in ch-3 sp, sc in sc between shell groups) rep across, ending with 3 sc in last ch-3 sp, sc in last sc. Turn. (approximately 137 sts)
Checkpoint: After Row 5, the lace bib should be approximately 1.5 inches / 3.8 cm deep.
Row 6 (RS, defines scallop arches): Ch 3 (counts as dc), turn. Dc in same st. (Ch 1, sk 2 sts, sc in next st, ch 3, sk 3 sts (the 5-dc fan), sc in next st, ch 1, sk 2 sts, 5-dc shell in next st) rep across, ending last rep with 2 dc in last st instead of shell. Turn. (9 shells, 2 edge posts, 18 ch-1 sps, 9 ch-3 arches over fans, 18 sc)
Row 7 (WS, final scallop points): Ch 1, turn. Sc in first dc. (Ch 3, sc in ch-3 arch, ch 3, sc in center dc of next shell) rep across, ending ch 3, sc in ch-3 arch, ch 3, sc in top of t-ch. Turn. (20 ch-3 sps, 21 sc)
Row 8 (RS, final scallop edge): Ch 1, turn. Sc in first sc. (Work into ch-3 sp: hdc, 3 dc, hdc, sc in next sc) rep across, working the last sc into the final sc. Do not turn. Fasten off. Leave a 6 inch / 15 cm tail for weaving. Row 8 stitch count: Each ch-3 sp receives 5 sts (hdc, dc, dc, dc, hdc) plus 1 sc between each group. 20 ch-3 sps x 5 sts = 100 sts, plus 21 sc = 121 sts total. (121 sts)
Final checkpoint: The completed lace bib should measure approximately 2.75 inches / 7 cm from the Foundation Bib Row to the lowest point of the center scallop.
Finishing & Assembly
Weaving in Ends: Thread the yarn needle with each tail and weave in securely, running the tail through at least 4 stitches in alternating directions so the lace does not loosen over time.
Blocking: Wet block the choker by submerging in cool water for 10 minutes, pressing out excess water gently in a towel (do not wring), then pinning the lace bib to a foam blocking mat. Pin each scallop point outward to define it, and pin the upper neckband edge straight. Allow to dry completely, 12 to 24 hours.
Attaching Charms: Using a jump ring and flat nose pliers, attach one bronze leaf charm to the center lowest scallop point. Locate the center of Row 8, count to the lowest central point between scallop 10 and scallop 11, and attach the jump ring through the stitch at that point. Attach the second bronze leaf charm to the end link of the extender chain.
Attaching Hardware: Fold the left short end of the neckband (0.75 inch / 2 cm of fabric) and insert into one crimp bar end. Apply a small amount of fabric glue or clear jewelry adhesive inside the bar before inserting the yarn end, press closed with flat nose pliers. Repeat on the right short end. Allow glue to cure per manufacturer instructions (typically 30 minutes to 2 hours). Attach the lobster claw clasp to one crimp bar loop using a jump ring. Attach the extender chain to the other crimp bar loop using a jump ring.
Tips
The key skill here is maintaining your stitch count across the bib rows. Use the checkpoints after each row to catch any drift early, especially through the bead row.
To shorten the choker: Reduce the foundation chain and use 8 repeats = 81 foundation bib sts, or 9 repeats = 91 foundation bib sts. To lengthen: Add repeats in multiples of 10 foundation stitches; each additional repeat adds approximately 1.25 inches / 3.2 cm of bib width and requires an additional 2 wooden beads and 2 flower spacer beads.
Hand wash in cool water with a gentle soap. Do not wring. Lay flat to dry, reshaping the scallops by hand while damp. Remove the choker before swimming, showering, or applying perfume, hairspray, or lotions, as these can discolour the beads and tarnish the bronze hardware.
Sage Green Boho Lace Choker Free Crochet Pattern
Materials
Steps
- String all 24 beads onto the yarn in alternating order
- Work the neckband in half double crochet rows
- Pick up 101 sc along the neckband edge
- Work lace bib Rows 1 to 8 with the bead row
- Block the choker flat
- Attach charms, crimp bars, clasp and extender chain
- Use the stitch-count checkpoint after every bib row
- Pin each scallop point outward when blocking
- Keep beads in alternating order when stringing