Step-by-Step Pattern to Crochet a Stylish and Trendy Sweater Vest
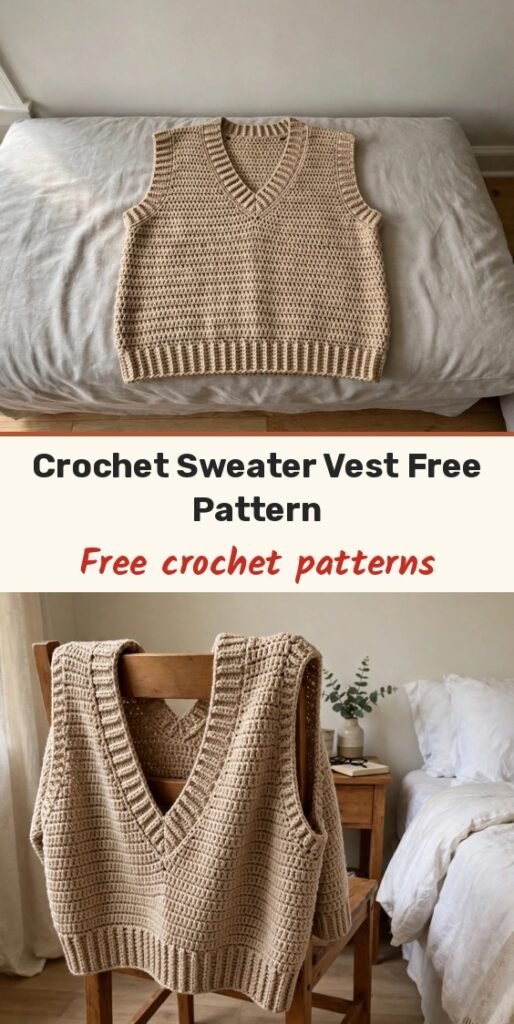
Table of Contents
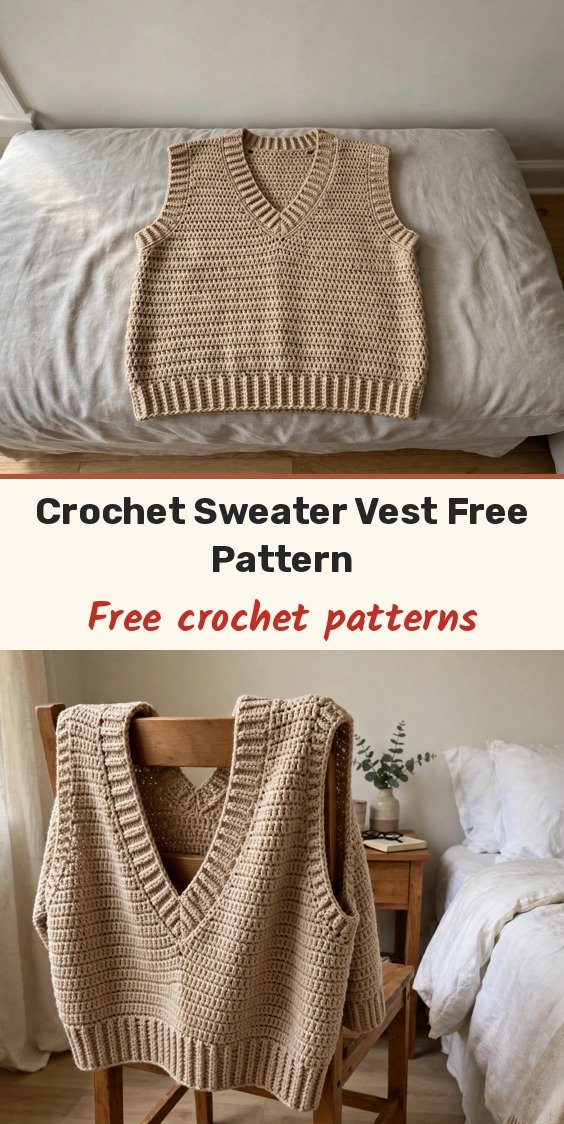
A crochet sweater vest is one of my favourite layering pieces, and this one is such a satisfying make! We will start with a narrow ribbed strip worked in back loop single crochet, turn and build the whole front panel up from its long edge in simple half double crochet, shape the armholes and the V-neck, then repeat a plainer back panel and finish with a ribbed neckline edging.
I love how adjustable this design is. The bottom ribbing decides the width, one ribbing row becomes one body stitch, and the length is yours to choose before the shaping begins. Following the stitch counts below gives a panel about 60 cm wide, but you can add or remove ribbing rows to make it your size.
We will work the front first, shape its armholes and V-neck, then make the back, join the shoulders and sides, and add the neckline ribbing last. Simple stitches, a clear order, and a vest you will reach for all season.
Materials
- About 350 g of 8-ply DK weight yarn
- 4.5mm crochet hook
- Tapestry or darning needle
- Scissors
Abbreviations
- ch: chain
- st/sts: stitch / stitches
- sl st: slip stitch
- sc: single crochet
- sc blo: single crochet in the back loop only
- hdc: half double crochet
- hdc dec: half double crochet decrease (hdc2tog)
Gauge & Size
- Finished size: front and back panels about 60 cm wide at the body, with a 5 cm deep bottom ribbing; width and length are adjustable as explained in the pattern
- Construction: ribbing worked first, body worked across the long edge of the ribbing, panels seamed at shoulders and sides, neckline ribbing added last
- Skill level: Easy
Front Panel Pattern
Bottom ribbing: the front panel begins with a narrow strip of single crochet worked through the back loops only.
Row 1: Make a slip knot and ch 10 (this creates the 5 cm ribbing depth). Skip the 1st ch, sc in the 2nd ch from the hook and in each ch across. (9 sts)
Row 2: Ch 1, turn. Sc blo in each st across. (9 sts)
Rows 3 to 86: Repeat Row 2, for 86 ribbing rows in total. At 86 rows the ribbing should measure about 60 cm long.
Main body Row 1: Hdc into the top edge of each ribbing row across. (86 sts)
Main body Rows 2 to 40: Ch 1, turn. Hdc in each st across. (86 sts)
To adjust the length, add or remove rows here, before the armhole shaping begins.
Row 41: Ch 1, turn. Hdc dec over the first 2 sts, hdc across until the last 2 sts, hdc dec in the last 2 sts. (84 sts)
Row 42: Ch 1, turn. Hdc dec over the first 2 sts, hdc across until the last 2 sts, hdc dec in the last 2 sts. (82 sts)
V-Neck Shaping
Mentally divide the 82 stitches into two halves of 41 stitches each. We shape the right side first, then the left.
Right side Row 43: Ch 1, turn. Hdc dec over the first 2 sts (armhole edge), hdc in the next 37 sts, hdc dec over the 40th and 41st sts (V-neck edge). (39 sts)
Right side Rows 44 to 45: Ch 1, turn. Work one hdc dec at the armhole edge and one hdc dec at the V-neck edge in each row, with plain hdc across the rest of the row.
Right side Row 46: Ch 1, turn. Hdc dec at the V-neck edge only, and work plain hdc across the rest of the row, including the armhole edge.
Right side Rows 47 to 60: Repeat Row 46, placing an hdc dec at the V-neck edge and working regular hdc stitches across to the armhole edge.
Fasten off and leave a long tail for sewing.
Left side: Attach your yarn at the centre division of the V-neck, at the 42nd stitch of Row 42, and work Rows 43 to 60 using the same decrease sequence as the right side: Rows 43 to 45 decrease at both the V-neck edge and the armhole edge, and Rows 46 to 60 decrease at the V-neck edge only. Fasten off, leaving a long tail.
Back Panel Pattern
The back panel uses the same ribbed beginning and main body width as the front, but only the armholes are shaped; there is no V-neck.
Bottom ribbing: Ch 10 and complete 86 rows of sc blo, just as for the front panel. (9 sts per row)
Main body: Work 40 rows of hdc along the long edge of the ribbing. (86 sts per row)
Armhole shaping Rows 41 to 45: Ch 1, turn. Work an hdc dec at the beginning and at the end of each row, for the armholes on both sides.
Rows 46 to 60: Ch 1, turn. Hdc in each st across with no more decreases.
Fasten off, leaving a long tail.
Neckline Ribbing
Turn the vest right side out so the seams sit on the inside, then finish the V-neck with this narrow ribbed edging worked around the neckline. Attach the yarn at any point around the V-neck opening.
Row 1: Ch 5. Skip the first ch, sc in the next 4 ch. Sl st into the next 2 stitches along the neckline edge.
Row 2: Ch 1, turn. Skip the 2 sl sts on the neckline edge. Sc blo in the 4 sc sts. (4 sts)
Row 3: Ch 1, turn. Sc blo in the 4 sc sts. Sl st into the next 2 stitches along the neckline edge.
Repeat Rows 2 and 3 all the way around the neckline. Fasten off, leaving a long tail, and use a darning needle to sew the first and last rows of the neckline ribbing together.
Finishing & Assembly
Lay the front and back panels together with the wrong sides facing out, so the seams stay on the inside when the vest is turned right side out. Thread the long shoulder tails onto your darning needle and sew the right shoulder of the front panel to the right side of the back panel, stitch by stitch, then repeat for the left shoulder and weave in the ends.
Sew both side seams from the bottom of the ribbing upward toward the armhole, using the starting tails or newly attached yarn. Weave in all ends and snip off the excess yarn, then give the shoulder seams, side seams, neckline ribbing and both ribbed edges one last check for loose tails. Your cozy, trendy sweater vest is ready to wear!
Tips
The ribbing is your sizing tool: each ribbing row becomes one body stitch, so work more rows for a wider vest or fewer rows for a narrower one.
Count your decreases as you shape. Both V-neck sides must mirror each other, so finish one side, lay it flat, and use it as your guide for the second.
Because the body is plain half double crochet, this vest is a lovely canvas for stripes. Just change colour at the start of a body row and carry on in pattern.
Step-by-Step Pattern to Crochet a Stylish and Trendy Sweater Vest
Materials
Steps
- Work the front bottom ribbing in sc blo for 86 rows
- Work the front body in hdc for 40 rows at 86 sts
- Shape the armholes in Rows 41 and 42
- Shape both sides of the V-neck through Row 60
- Work the back panel the same way, shaping only the armholes
- Sew the shoulder and side seams
- Work the ribbed edging all around the V-neck and join its ends
- Each ribbing row becomes one body stitch, add or remove rows to resize the width
- Add or remove plain body rows before the shaping to adjust the length
- Mirror the V-neck decreases carefully on the second side
- Check all seams and edges for loose tails before wearing