How to Crochet Bear Bag Free Pattern for Holding Items
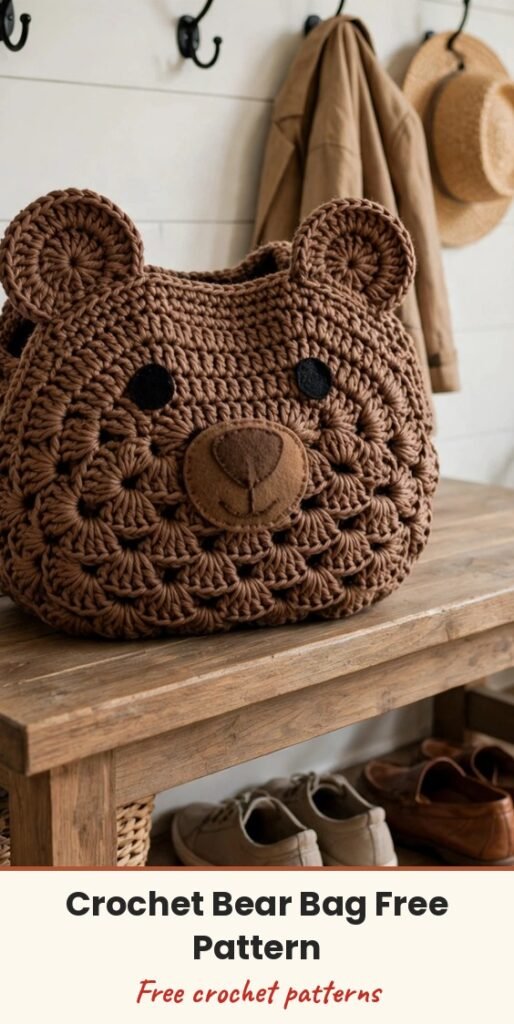
Table of Contents
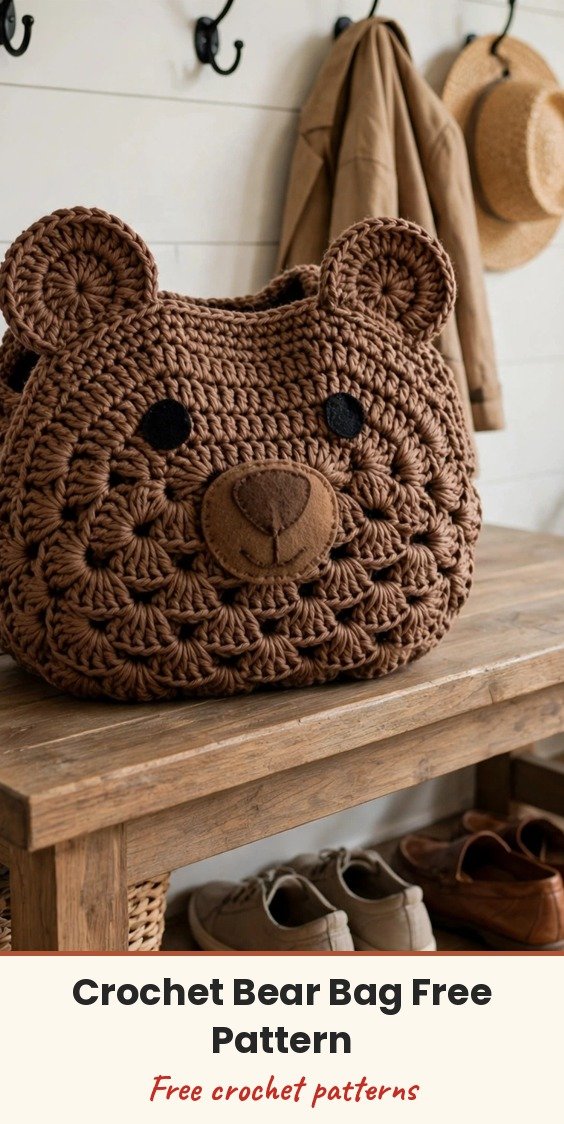
This little bear bag is so cute and useful that it grabs attention right away! It is shaped like a friendly bear, with round ears and a sweet felt face, and its compact size is just right for keys, coins, or a phone. I love that it feels warm and welcoming while still being a genuinely practical everyday pouch.
We will start with a flat single crochet base, then work a border round around all four sides to turn it into the bottom of the bag. The upper part grows in pretty shell cluster rounds, and we finish with a few sturdy single crochet rounds for the rim. The ears are quick little circles we sew on at the end.
The original is made with paper yarn for that lovely crisp texture, and you can substitute raffia or tape yarn for a similar look. Because paper yarn does not stretch, work loosely enough to avoid snapping it, but keep your tension even so the bag holds its structure.
Materials
- 1 ball paper yarn (1 cm width), in brown, for the bag (raffia or tape yarn can be substituted for a similar texture)
- Small amount of black and white felt, for the facial features (black or brown for the nose)
- 2.5 mm crochet hook
- Scissors
- Yarn or wool sewing needle
- Stitch markers or pins
- Hot glue gun, for attaching the eyes and nose
- Optional: 2 cm round rings (2), for strap attachment
Abbreviations
- ch: chain
- sc: single crochet
- sl st: slip stitch
- dc: double crochet
- st/sts: stitch / stitches
- inc: increase (2 sc in one st)
- rnd: round
- MC: magic circle (adjustable ring)
Gauge & Size
- Finished size: base approximately 6.5 x 17.5 cm (sizing and gauge may vary)
- Construction: flat base, border round, shell cluster rounds for the body, single crochet rim, sewn-on ears, felt face
- Skill level: Intermediate
Markers are essential for tracking rounds and shaping, so keep them handy. Always join rounds and rows with care for neat edges, and use strong glue for securely attaching the felt and other face parts.
Bag Base Pattern
Foundation chain: Ch 29.
Row 1: Skip the first ch, sc in the back loop of the 2nd ch from the hook and in each ch across. (28 sc)
Rows 2 to 10: Ch 1, turn, sc in each st across. (28 sc per row)
Border Round
After finishing Row 10, ch 1 and do not turn. Work 2 sc into the first st (corner) and place a marker in the first sc. Work 26 sc along the edge (one in each st), then 2 sc in the last st (corner).
Rotate the work to crochet along the short end: work 9 sc evenly along the short end (1 in each row edge).
On the next long side: 2 sc in corner, 26 sc, 2 sc in last st of this side. Then work 9 sc along the last short end.
Join with sl st to the first sc or the marked sc. Remove the marker and pull the tail to tighten if needed. The base should now measure approximately 6.5 x 17.5 cm.
Bag Body Pattern
The body is worked in a shell (cluster) pattern in joined rounds.
Round 1 (first shell round): Ch 3 (counts as first dc), 2 dc in same st (first shell made). (Skip next 2 sts, 3 dc in next st) repeat to end of round. At the end, join with a sl st into the 3rd ch of the initial ch-3.
Round 2: Sl st in each of the next 2 dcs, then sl st into the space between the next 2 shells. Ch 3 (counts as dc), 2 dc into the same space. (Skip 3 dcs, 3 dc into next space between shells) repeat around. At the end, sl st to the top of the initial ch-3.
Rounds 3 to 9: Repeat as in Round 2: sl st to the next space, ch 3, 2 dc in space, shell in each space around, sl st to start. At the end of Round 9, you should have 9 rounds of shells.
Round 10 (single crochet edge): Ch 1, sc in each st around (placing 1 sc in each dc), ending with sl st to first sc.
Rounds 11 to 15: Ch 1, sc in each st around. Repeat for a total of 5 rounds to form a sturdy rim and opening for the bag. At the final round, do not fasten off until making the closing stitch.
Bear Ear Pattern
Make 2.
Round 1: Create a MC, ch 1, 6 sc in ring, join with sl st to 1st sc.
Round 2: Ch 1, 2 sc in each st around, join with sl st. (12 sts)
Round 3: Ch 1, (sc in next st, inc in next st) repeat around, join with sl st. (18 sts)
Rounds 4 to 5: Ch 1, sc in each st around, join with sl st.
Leave a long tail for sewing to the bag.
Finishing & Assembly
To finish the body neatly, cut the yarn and pull it through the last loop. With a needle, make a false stitch for an invisible finish: insert the needle from top to bottom through the first st of the round, then back through the centre of the last st worked, and pull gently to create a faux V shape. Weave in the end securely on the wrong side.
Sew the ears to the upper edge of the bag with even spacing.
For the straps, attach D-rings or round rings (2 cm) at the bag opening, folding the edge over to secure them. The original design leaves the strap style open: if you need a quick strap, use a dense chain braid or a single crochet cord worked to the length you want. Attach the hardware firmly to prevent tearing the paper yarn.
For the face, cut small round or oval pieces of black and white felt for the eyes, and black or brown for the nose. Use hot glue to attach the eyes and nose to the front centre of the bag, between the ears, leaving 4 stitches unworked in the centre for symmetry. Position the face details evenly on either side, and sew the parts gently or glue them securely.
Tips
Keep your stitch count consistent at the turns, especially where the shells are formed, and double-check that the clusters are evenly spaced.
Work loosely with paper yarn to avoid breakage, and use strong glue for the felt face so nothing comes loose in daily use.
Use a tapestry needle and work from the inside to hide ends for a professional finish.
How to Crochet Bear Bag Free Pattern for Holding Items
Materials
Steps
- Work the flat base: ch 29, then 10 rows of 28 sc
- Work the border round around all four sides of the base
- Work 9 shell cluster rounds for the body
- Work 1 sc edge round and 5 sc rim rounds, then finish with a false stitch
- Make 2 ears (6, 12, 18 sts, then 2 even rounds) and sew them to the top edge
- Attach rings and a chain braid or sc cord strap if using one
- Cut felt eyes and nose and glue them to the front centre of the bag
- Work loosely with paper yarn so it does not snap, but keep tension even for structure
- Double-check shell spacing at the end of each round so clusters stay even
- Attach hardware firmly so it cannot tear the paper yarn


