Easy Crochet Mittens Free Pattern
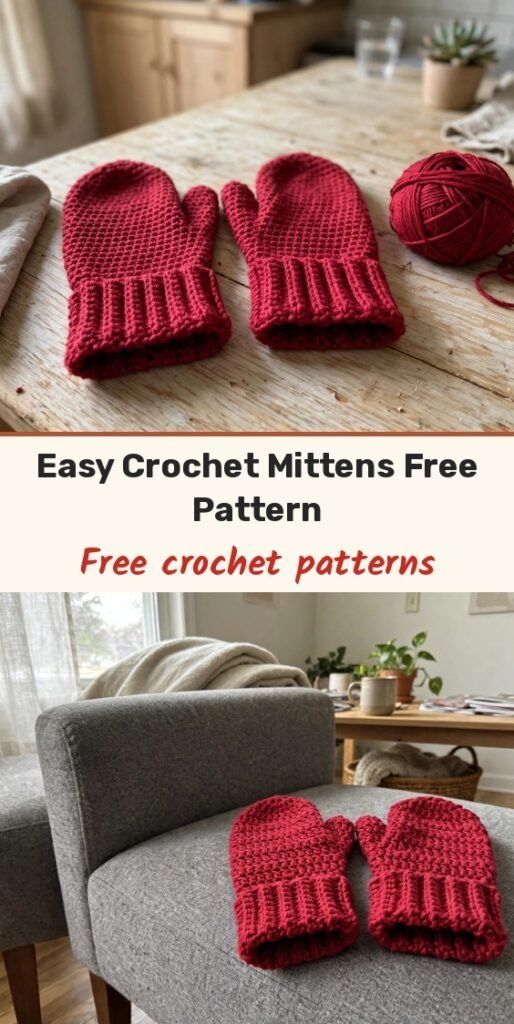
Table of Contents
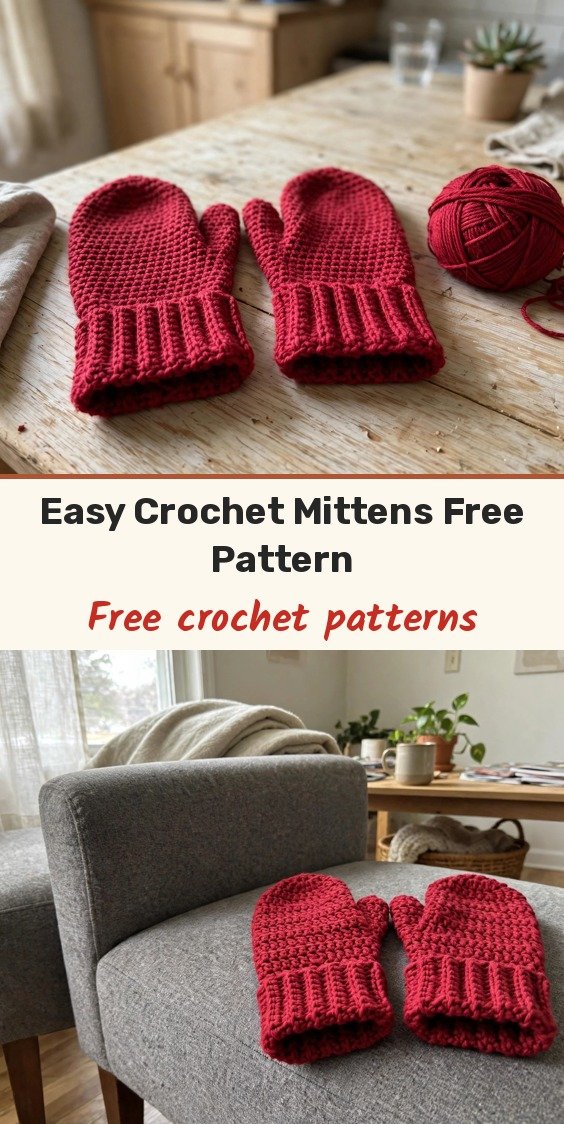
Every winter I make a fresh pair of these mittens, because they are fast, cosy and honestly the most satisfying small project on my hook! We work each mitten in rounds from the cuff to the fingertips, add the thumb afterwards, and mirror the thumb placement for a proper left and right pair.
The ribbed cuff is worked with front and back post double crochet, so it hugs the wrist and keeps the cold out. The body is plain single crochet, which makes these perfect evening television crochet.
One pair takes roughly 200 yards of worsted wool blend and an afternoon or two. The finished mittens fit an average adult hand, about 7.5 inches around the palm and 9 inches long.
Materials
- 200 yards worsted weight wool blend yarn (Weight 4) in cranberry red
- US H-8 / 5.0mm crochet hook (see Gauge note about using a 4.5mm hook)
- US G-6 / 4.0mm crochet hook (optional, for a snugger cuff)
- Yarn needle
- Stitch markers
- Scissors
- Measuring tape
Abbreviations
- ch: chain
- sl st: slip stitch
- sc: single crochet
- dc: double crochet
- fpdc: front post double crochet
- bpdc: back post double crochet
- sc2tog: single crochet 2 stitches together
- st(s): stitch or stitches
- rnd: round
- rep: repeat
Special Stitches
- Front post double crochet (fpdc): yarn over, insert your hook from front to back to front around the post of the stitch below, yarn over and pull up a loop, then complete the double crochet as normal. The stitch sits raised on the front of the work.
- Back post double crochet (bpdc): yarn over, insert your hook from back to front to back around the post of the stitch below, yarn over and pull up a loop, then complete the double crochet as normal. The stitch sits recessed behind the work. Alternating fpdc and bpdc around creates the stretchy ribbed cuff.
- Single crochet 2 together (sc2tog): insert hook into the first stitch, yarn over and pull up a loop; insert hook into the next stitch, yarn over and pull up a loop; yarn over and pull through all 3 loops on the hook.
Gauge & Size
- Finished size: adult medium; approximately 7.5 inches (19 cm) around the palm and 9 inches (23 cm) long from cuff to fingertip
- Gauge: 14 stitches and 15 rounds = 4 inches (10 cm) in single crochet worked in rounds with a 4.5mm crochet hook
- Construction: each mitten worked in joined rounds from cuff to fingertips, thumb worked into the skipped-stitch opening afterwards, left mitten mirrored
- Skill level: Easy
Right Mitten Pattern
Using cranberry yarn, ch 26. Join with sl st to first ch to form a ring, being careful not to twist the chain.
Rnd 1: Ch 1, sc in each ch around. Join with sl st to first sc. (26 sc)
Rnd 2: Ch 2 (does not count as a stitch), fpdc around first st, bpdc around next st, (fpdc around next st, bpdc around next st) rep around. Join with sl st to first fpdc. (26 sts)
Rnds 3 through 12: Ch 2, fpdc around each fpdc, bpdc around each bpdc around. Join with sl st to first fpdc. (26 sts)
After Rnd 12 the ribbed cuff measures approximately 2.5 to 3 inches. If you prefer a longer cuff, add more ribbing rounds here, keeping the fpdc and bpdc aligned.
Rnd 13: Ch 1, sc in each st around. Join with sl st to first sc. (26 sc)
Rnd 14: Ch 1, sc in each st around. Join with sl st. (26 sc)
Rnd 15: Ch 1, sc in each st around. Join with sl st. (26 sc)
Rnd 16 (thumb gap): Ch 1, sc in next 21 sts, skip next 5 sts (thumb opening), join with sl st to first sc. The 5 skipped stitches stay unworked for now and form the thumb base.
Rnd 17: Ch 1, sc in each of the 21 sc, then sc once into the joining area above the skipped stitches to close the gap, continuing around to keep 26 sts total. Join with sl st to first sc. (26 sc)
Rnds 18 through 27: Ch 1, sc in each st around. Join with sl st to first sc. (26 sc)
By the end of Rnd 27 the mitten body measures approximately 4 inches above the cuff.
Rnd 28: Ch 1, (sc in next 3 sts, sc2tog) rep around, sc in last st. Join with sl st. (21 sc)
Rnd 29: Ch 1, (sc in next 2 sts, sc2tog) rep around, sc in last st. Join with sl st. (16 sc)
Rnd 30: Ch 1, (sc in next st, sc2tog) rep around, sc in last st. Join with sl st. (11 sc)
Rnd 31: Ch 1, sc2tog around, sc in last st. Join with sl st. (6 sc)
Fasten off, leaving an 8 inch tail. Thread the tail through the front loops of the remaining 6 sts, pull tight to close the fingertip, and secure with a knot on the inside.
Left Mitten Pattern
Work Rnds 1 through 15 exactly as for the right mitten.
Rnd 16 (thumb gap, mirrored): Ch 1, skip first 5 sts (thumb opening), sc in remaining 21 sts. Join with sl st to first sc.
Rnd 17: Ch 1, sc in each st around, closing the gap above the skipped stitches as for the right mitten. (26 sc)
Rnds 18 through 31: Work exactly as Rnds 18 through 31 of the right mitten, finishing with the same fingertip closure.
Thumb Pattern (Both Mittens)
With the mitten cuff toward you, join yarn with sl st in the first skipped stitch of Rnd 16.
Rnd 1: Ch 1, sc in each of the 5 skipped sts, then work 2 sc into the side edges of the opening (1 sc on each side) to close the corners. Join with sl st to first sc. (7 sc)
Rnds 2 through 8: Ch 1, sc in each st around. Join with sl st to first sc. (7 sc)
Rnd 9: Ch 1, (sc2tog) 3 times, sc in last st. Join with sl st. (4 sc)
Fasten off, leaving a 6 inch tail. Thread the tail through the front loops of the remaining 4 sts, pull tight to close the thumb tip, and secure.
Use the remaining tail to stitch any small gaps at the base of the thumb closed from the inside.
Finishing & Assembly
Weave in all ends on the inside of each mitten, running tails through several stitches in two directions so they stay put through washing and wear. Turn each mitten right side out and gently shape the fingertip and thumb with your fingers.
If you like a firmer cuff, you can thread a short length of elastic thread through the inside of the ribbing rounds and knot it discreetly. Keep it loose enough to slip over the hand comfortably.
For a matching set, the same cranberry yarn makes a lovely simple beanie or cowl. And if you are gifting the pair, folding them together with the thumbs tucked in and tying with a short length of yarn makes a sweet, simple presentation.
Tips
Place a stitch marker in the first stitch of every round so your joins stay straight and your counts stay honest.
The thumb is added after the body is finished, which means no awkward shaping mid-mitten. Sew up any tiny corner gaps at the thumb base from the inside for a tidy, warm finish.
To adjust the size, change your hook: a 5.0mm hook gives a slightly roomier mitten, while a 4.0mm hook makes a smaller, denser pair. Add plain sc rounds in the body for longer hands, before the shaping rounds.
Hand wash in cool water and dry flat, reshaping the cuffs while damp so the ribbing keeps its spring.
Easy Crochet Mittens Free Pattern
Materials
Steps
- Work the ribbed cuff in fpdc and bpdc to Round 12
- Work the plain sc body and leave the 5 stitch thumb gap in Round 16
- Continue the body and shape the fingertip down to 6 sts
- Close the fingertip with the yarn tail
- Work the second mitten with a mirrored thumb gap
- Add both thumbs into the skipped stitch openings
- Sew any thumb base gaps closed from the inside
- Weave in all ends and shape the pair
- Mark the first stitch of every round to keep joins straight
- Keep fpdc over fpdc and bpdc over bpdc for crisp ribbing
- Adjust fit with hook size instead of changing the stitch count
- Dry flat and reshape the cuffs while damp