Mint Green Garden Party Crochet Dress Free Pattern
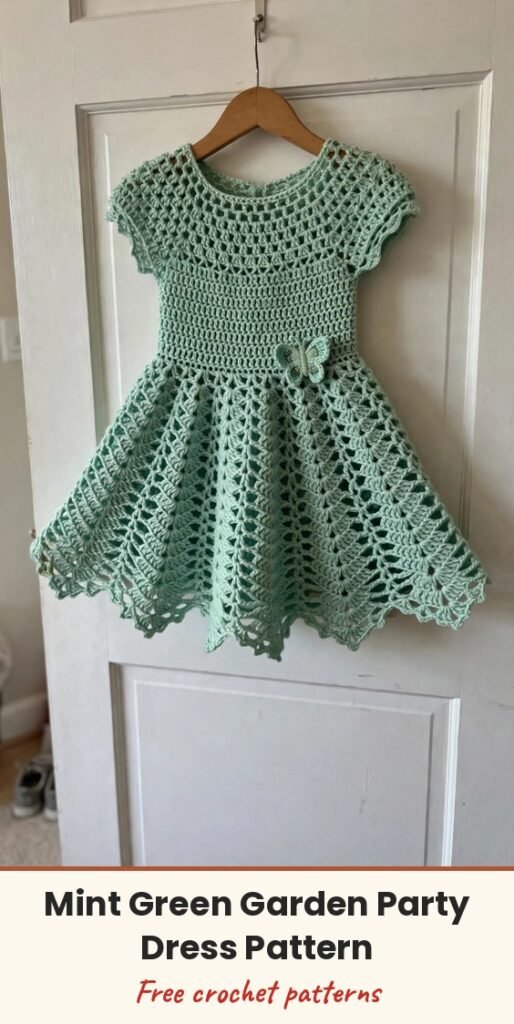
Table of Contents
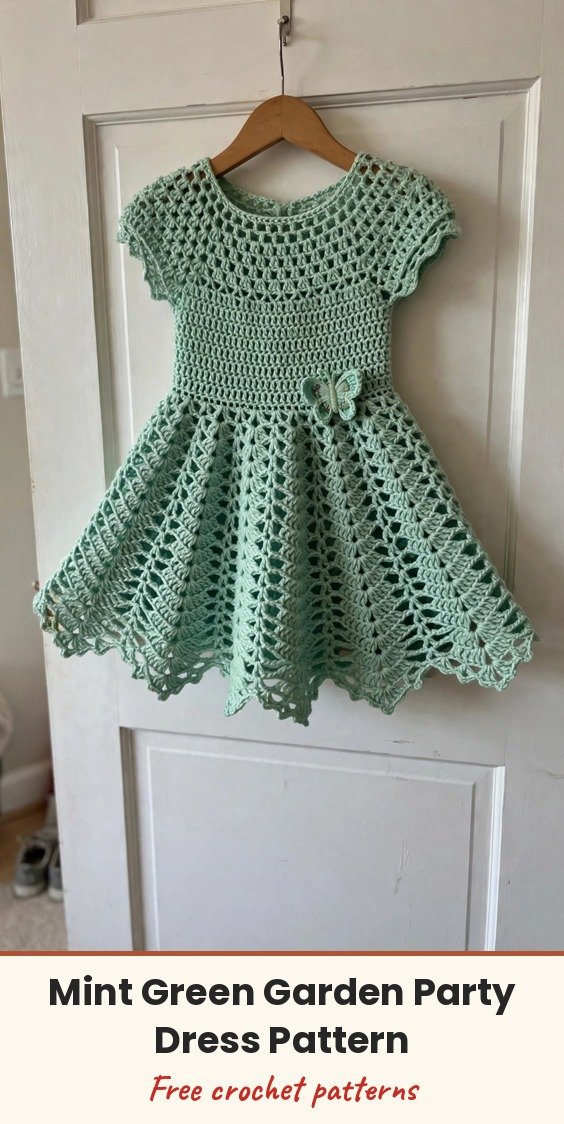
This sweet little dress is made for twirling in the garden! An airy mesh bodice, an empire-waist skirt that fans out into diamonds, and the prettiest scalloped hem make it a joy to crochet and even more fun to wear.
We will work the front bodice first, then the two back pieces with a button opening, join everything at the empire waist, and crochet the skirt in the round so there is almost no seaming. A tiny crocheted butterfly sits at the waist as the finishing touch.
The instructions below are written for size 12 months, with a chest of 18 inches and a total length of about 14 inches. The same construction also works for 6 months, 18 months and 24 months by scaling the yardage and stitch counts.
Materials
- 350 yards DK weight cotton yarn (Weight 3) in mint green
- US E-4 / 3.5mm crochet hook for the bodice
- US F-5 / 3.75mm crochet hook for the skirt
- 3 small buttons, 1/2 inch diameter, in white or mint
- Yarn needle
- Stitch markers
- Scissors
- Measuring tape
- Sewing needle and thread for the buttons
Abbreviations
- ch: chain
- sc: single crochet
- hdc: half double crochet
- dc: double crochet
- tr: treble crochet
- sl st: slip stitch
- st(s): stitch or stitches
- sp: space
- ch-sp: chain space
- rep: repeat
- sk: skip
- sc2tog: single crochet 2 stitches together (decrease)
- fsc: foundation single crochet
- RS: right side
- WS: wrong side
- yo: yarn over
Special Stitches
- Fan stitch (shell): work 5 dc in the same stitch.
- V-stitch: work (1 dc, ch 2, 1 dc) in the same stitch.
- Picot: work 1 sc, ch 3, then sl st into the first ch of the ch-3 to form a small loop.
- Single crochet 2 together (sc2tog): insert hook into first stitch, yarn over, pull up a loop; insert hook into second stitch, yarn over, pull up a loop; yarn over and pull through all 3 loops on hook.
Gauge & Size
- Finished size (12 months): chest 18 inches, bodice length (shoulder to empire waist) 5 inches, skirt length 7 inches, total length about 14 inches with the scalloped hem
- Gauge: 18 sc and 20 rows = 4 inches in single crochet with the 3.5mm hook, blocked
- Construction: front bodice and two back bodices worked flat, joined at the empire waist, skirt worked in the round, shoulder and side seams, button back
- Skill level: Intermediate
Front Bodice Pattern
Work flat with the 3.5mm hook. Chain 43.
Row 1 (WS): Sc in 2nd ch from hook and in each ch across. Turn. (42 sc)
Row 2 (RS): Ch 1, sc in each st across. Turn. (42 sc)
Row 3 (WS): Ch 1, sc in first 10 sts, (ch 2, sk 2 sts, sc in next 3 sts), repeat from * across to last 7 sts, ch 2, sk 2 sts, sc in last 5 sts. Turn. (42 sts including ch-sps)
Row 4 (RS): Ch 1, sc in first 10 sts, (2 sc in ch-2 sp, sc in next 3 sts), repeat from * across. Turn. (42 sc)
Rows 5 through 12: Repeat Rows 2 through 4 twice more, then work Row 2 once more. Your bodice should measure approximately 4 inches from the foundation chain.
Now shape the armholes and neckline.
Row 13: Ch 1, sc in first 4 sts, sc2tog, sc in next 30 sts, sc2tog, sc in last 4 sts. Turn. (40 sc)
Row 14: Ch 1, sc in first 3 sts, sc2tog, sc in next 30 sts, sc2tog, sc in last 3 sts. Turn. (38 sc)
Row 15: Ch 1, sc in first 2 sts, sc2tog, sc in next 30 sts, sc2tog, sc in last 2 sts. Turn. (36 sc)
Row 16: Ch 1, sc in each st across. Turn. (36 sc)
Row 17: Ch 1, sc in first 7 sts, ch 1, turn. Work on these 7 sts only for the right shoulder strap.
Row 18: Ch 1, sc in each of the 7 sts. Turn.
Row 19: Ch 1, sc in each of the 7 sts. Fasten off.
Skip the centre 22 sts of Row 16. Join yarn in the next st and ch 1, sc in remaining 7 sts. Turn.
Row 18 (left shoulder): Ch 1, sc in each of the 7 sts. Turn.
Row 19 (left shoulder): Ch 1, sc in each of the 7 sts. Fasten off, leaving a 12 inch tail for seaming.
Back Bodice Pattern (Make 2)
Work two identical halves for the button-back opening. Chain 23.
Row 1 (WS): Sc in 2nd ch from hook and in each ch across. Turn. (22 sc)
Row 2 (RS): Ch 1, sc in each st across. Turn. (22 sc)
Row 3 (WS): Ch 1, sc in first 5 sts, (ch 2, sk 2 sts, sc in next 3 sts) twice, ch 2, sk 2 sts, sc in last 2 sts. Turn. (22 sts)
Row 4 (RS): Ch 1, sc in first 5 sts, (2 sc in ch-2 sp, sc in next 3 sts) twice, 2 sc in last ch-2 sp, sc in last 2 sts. Turn. (22 sc)
Rows 5 through 12: Repeat Rows 2 through 4 pattern sequence to reach Row 12, matching the front bodice. Check that the back half measures approximately 4 inches.
Row 13: Ch 1, sc2tog, sc in next 18 sts, sc2tog. Turn. (20 sc)
Row 14: Ch 1, sc2tog, sc in next 16 sts, sc2tog. Turn. (18 sc)
Row 15: Ch 1, sc2tog, sc in next 14 sts, sc2tog. Turn. (16 sc)
Row 16: Ch 1, sc in each st across. Turn. (16 sc)
Row 17: Ch 1, sc in first 7 sts for the shoulder strap. Turn. (7 sc)
Row 18: Ch 1, sc in each of the 7 sts. Turn.
Row 19: Ch 1, sc in each of the 7 sts. Fasten off, leaving a 10 inch tail for seaming. All three bodice pieces are now complete.
Joining & Skirt Pattern
Lay the back left piece, front piece and back right piece side by side with right sides facing up, shoulder straps aligned at the top. Join yarn at the bottom edge of the back left piece, right side facing.
Joining Row: Sc evenly across the bottom edge of the back left piece, continue across the bottom edge of the front piece, then across the bottom edge of the back right piece. (84 sc total: 21 + 42 + 21)
Join with sl st to first sc to begin working in the round. Switch to the 3.75mm hook from here.
Round 1: Ch 3 (counts as dc), dc in each st around. Join with sl st to top of beg ch-3. (84 dc)
Round 2: Ch 1, sc in each st around. Join with sl st to first sc. (84 sc)
Round 3: Ch 3, 4 dc in same st (first fan made), sk 2 sts, sc in next st, (sk 2 sts, 5 dc in next st, sk 2 sts, sc in next st) around. Join with sl st. (14 fans, 14 sc)
Round 4: Sl st to centre dc of first fan (3rd dc), ch 1, sc in same st, ch 3, sc in centre dc of next fan, repeat from * around, ch 3, join with sl st to first sc.
Round 5: Ch 3, 4 dc in same ch-3 sp (first fan), sc in next sc, (5 dc in next ch-3 sp, sc in next sc) around. Join with sl st.
Round 6: Repeat Round 4.
Round 7: Repeat Round 5.
Round 8: Repeat Round 4.
Round 9: Repeat Round 5.
By the end of Round 9 your skirt should measure approximately 3 inches from the empire waist. The fan panel uses 12 stitches per full repeat measured across the waist, so for this 12 month size 7 complete fan repeats fit comfortably around the body as the skirt flows.
Round 10 (increase round): Ch 1, sc in each st around, working 2 sc in every 28th st. Join with sl st. (87 sc)
Round 11: Ch 4 (counts as tr), tr in next st, ch 1, sk 1 st, (tr in next 2 sts, ch 1, sk 1 st) around. Join with sl st to top of beg ch-4. This creates the diamond lattice base.
Round 12: Ch 1, sc in each tr and each ch-1 sp around. Join with sl st.
Round 13: Ch 3, dc in next st, ch 2, sk 2 sts, (dc in next 2 sts, ch 2, sk 2 sts) around. Join with sl st. This creates the cross-points of the diamonds.
Round 14: Ch 1, sc in each dc, 2 sc in each ch-2 sp around. Join with sl st. Your stitch count returns to approximately 87 sc.
Round 15: Repeat Round 11.
Round 16: Repeat Round 12.
Round 17 (transition round): Ch 1, (sc in next 7 sts, 2 sc in next st) around. Join with sl st. (108 sc approximately)
Rounds 18 through 27: Rotate between the following two pattern rounds. Odd rounds (fan round): Ch 3, 4 dc in same st, sk 2 sts, sc in next st, (sk 2 sts, 5 dc in next st, sk 2 sts, sc in next st) around. Even rounds (bridge round): Sl st to centre of first fan, ch 1, sc in same st, ch 3, sc in centre of next fan, repeat around. You will have 18 fans per fan round and 18 bridge arches per bridge round, and the skirt reaches approximately 5.5 inches from the empire waist.
Round 28: Ch 1, sc in each st around, working into fan centres and bridge arches evenly. Join with sl st. (108 sc)
Round 29 (scalloped hem): Ch 1, sc in first st, sk 2 sts, 5 dc in next st, sk 2 sts, (sc in next st, sk 2 sts, 5 dc in next st, sk 2 sts) around. Join with sl st to first sc. Fasten off. (18 scallops)
Finishing & Assembly
With right sides together, align the shoulder straps of the back pieces with the front straps. Whipstitch or slip stitch through both layers along the top edge of each strap for 7 stitches, then weave in the tails on the wrong side.
For the side seams, align the underarm edges front to back with right sides together. Using the 3.5mm hook, slip stitch or whipstitch from the empire waist join upward to the armhole decrease point on each side, then weave in ends.
For the back opening, overlap the two back pieces by approximately 1/2 inch at the centre back below the waist join. Sew 3 buttons evenly spaced along the right back piece, about 1/4 inch from the edge. Create button loops on the left back piece edge by working ch 4 loops at the corresponding positions and securing with a yarn needle, or simply use the natural spaces in the mesh pattern as buttonholes.
For the butterfly applique, chain 4 and join to form a ring. Round 1: (ch 3, 3 dc into ring, ch 3, sl st into ring) twice for the two large upper wings, then (ch 2, 2 dc into ring, ch 2, sl st into ring) twice for the two smaller lower wings. Fasten off. For the body, chain 6, sl st in 2nd ch from hook and in each ch across, and sew along the centre of the wings. Sew the finished butterfly to the front centre waist, over the empire join, and secure with a few stitches through all layers.
Block gently: lay the dress flat, pin the skirt hem scallops to open them, spray lightly with water and allow to dry completely.
Tips
The skirt is worked in the round, which eliminates side seams and gives a beautifully smooth drape. Use a stitch marker at the start of each round so you never lose your place.
For a special occasion version, work the bodice and skirt in a soft white or cream with a satin ribbon threaded through the empire waist. A small bow at the front centre adds a gorgeous finishing touch.
Wash the finished dress gently by hand or on a delicate cycle in cool water, reshape it flat and dry it flat to keep the fans and scallops looking crisp.
Mint Green Garden Party Crochet Dress Free Pattern
Materials
Steps
- Work the front bodice flat to Row 19 with shoulder straps
- Work two back bodice halves and shape the armholes
- Join all pieces at the empire waist with 84 sc
- Work the skirt fan panel in the round through Round 9
- Work the increase round and diamond band through Round 17
- Work the lower fan skirt and scalloped hem to Round 29
- Seam the shoulders and sides and sew on the buttons
- Add the butterfly applique at the waist and block gently
- Switch to the larger hook for the skirt so it drapes softly
- Mark the start of every round in the skirt
- Thread a ribbon through the empire waist for a special occasion look
- Dry flat to keep the fans and scallops crisp