Rose Garden Bracelet Free Crochet Pattern
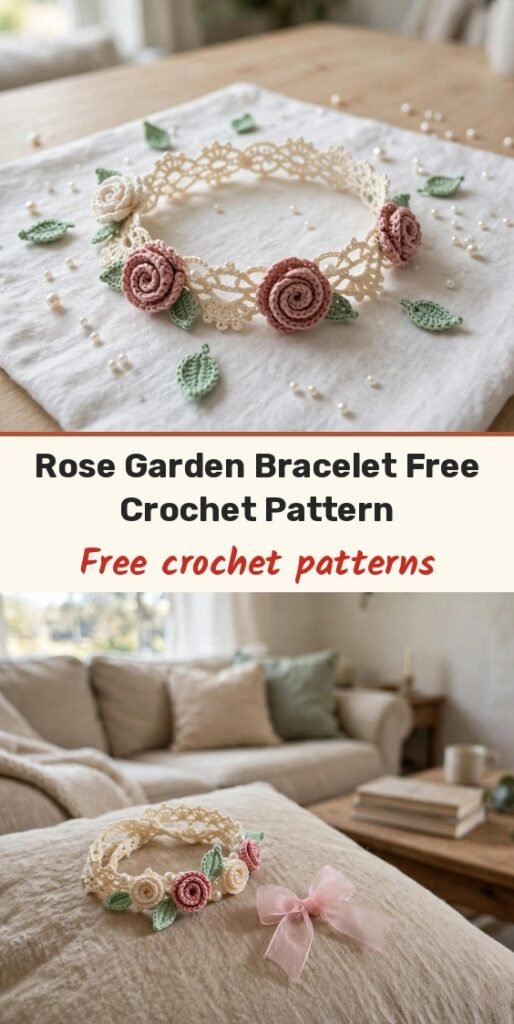
Table of Contents
This bracelet is such a romantic little make! We crochet a delicate filet mesh band in cream thread, then roll soft spiral roses, tuck in tiny leaves, and finish everything with pearl beads and a pink organza bow. It looks heirloom and intricate, but each piece is small and very manageable.
I love it as an alternative to a traditional corsage for weddings, proms, and garden parties. The finished band measures approximately 6.5 inches long including the clasp, fits wrists from 6 to 7 inches, and the extension chain makes it adjustable.
We will make the lace band first, then two large dusty rose roses, one small rose, one cream rose, and eight mint leaves, and then we will assemble the whole garden onto the band. This pattern uses US crochet terms.
Materials
- 40 yards of size 10 crochet thread in cream or natural white (Colour A)
- 25 yards of size 10 crochet thread in dusty rose or blush pink (Colour B)
- 20 yards of size 10 crochet thread in mint green or sage (Colour C)
- Steel crochet hook size 7 (1.65 mm)
- Approximately 30 round white pearl beads, 4 mm diameter
- 1 silver barrel or slide clasp with extension chain (approximately 2 inches, with pearl drop charm)
- 1 length of pink organza ribbon, 0.5 inch wide, approximately 20 inches long
- Sewing needle and white thread for bead attachment
- Tapestry needle, scissors, straight pins, and a foam blocking board
Abbreviations
- ch: chain
- sl st: slip stitch
- sc: single crochet
- hdc: half double crochet
- dc: double crochet
- tr: treble crochet
- sk: skip
- sp: space
- st/sts: stitch / stitches
- ch-sp: chain space
- rep: repeat
- RS/WS: right side / wrong side
- BLO/FLO: back loop only / front loop only
- yo: yarn over
- beg: beginning
- approx: approximately
Special Stitches
- Picot: chain 3, then slip stitch into the first chain made. This creates a small decorative loop used along the band edge.
- Shell: work 5 double crochet into the same stitch or space, used in the band border for a scalloped effect.
- Filet mesh open space: double crochet into the next stitch, chain 2, skip 1 stitch, double crochet into the following stitch. This creates an open square in the mesh.
- Spiral rose petal strip: the ruffled strip we roll into a rose. Its rows are given in full in the rose sections below: a single crochet row, a row doubling the single crochet count, a half double crochet wave row, and a double crochet ruffle row, then the strip is rolled from one short end and stitched through the base to secure it.
- Leaf: worked back and forth on a chain foundation and then around the opposite side of the chain, with a chain-1 tip. The full leaf rows are given in the leaf section below.
Gauge & Size
- Finished size: band approximately 6.5 inches long including clasp and 1.5 inches wide, fitting wrists from 6 to 7 inches
- Gauge: 20 dc = 2 inches and 10 rows = 2 inches in filet mesh pattern with size 10 thread and a size 7 (1.65 mm) hook, after blocking
- Large rose: approximately 1 inch diameter; small rose: approximately 0.6 inch diameter; leaf: approximately 0.75 inch long
- Skill level: Intermediate to Advanced
Lace Band Pattern
The band is worked in Colour A (cream), flat in rows from short end to short end, so the row count determines the band length and the stitch count determines the width.
Foundation chain: Using Colour A and a size 7 (1.65 mm) steel hook, chain 30.
Row 1 (RS): Dc in 4th ch from hook (counts as first dc plus ch-1), ch 1, sk 1 ch, dc in next ch. [Ch 1, sk 1 ch, dc in next ch] repeat across to last ch, dc in last ch. Turn. (15 dc, 13 ch-1 sps)
Row 2 (WS): Ch 4 (counts as dc plus ch 1), turn. Dc in first ch-1 sp, [ch 1, dc in next ch-1 sp] repeat across, ending dc in top of turning ch. Turn. (15 dc, 13 ch-1 sps)
Row 3: Repeat Row 2. (15 dc, 13 ch-1 sps)
Rows 4 through 25: Repeat Row 2 for each row, for a total of 25 rows from the foundation chain. (15 dc, 13 ch-1 sps each row)
After Row 25, the band should measure approximately 5.5 inches long and 1.5 inches wide when lightly blocked. If your band is shorter, add 2-row increments until you reach this measurement.
Band Edging
Do not fasten off after Row 25. Rotate your work 90 degrees to begin working along the long side edge.
Long side edge: Ch 1. Work 1 sc into each row-end dc post along the edge, placing picots evenly as follows: [sc in next 2 row-end posts, picot] repeat across the long edge, approximately 25 sc with 8 picots evenly spaced. Continue to the corner.
Short end (foundation chain end): At the corner, ch 1, sc in corner st, picot, [sc in next 2 sts, picot] 4 times, sc in last st.
Second long side edge: Mirror the first long side edge, working [sc in next 2 row-end posts, picot] across, approximately 25 sc with 8 picots.
Second short end (Row 25 end): At the corner, ch 1, sc in corner st, picot, [sc in next 2 sts, picot] 4 times, sc in last st.
Sl st to first sc to close the edging round. Fasten off and weave in ends.
Large Rose Pattern
Make 2 in Colour B (dusty rose). Each rose is a spiral petal strip that we roll into a bloom.
Foundation chain: Using Colour B, chain 26.
Row 1: Sc in 2nd ch from hook and in each ch across. Turn. (25 sc)
Row 2: Ch 1, turn. 2 sc in first st, [2 sc in next st] repeat across. Turn. (50 sc)
Row 3: Ch 2, turn. Hdc in first st, 2 hdc in next st, [1 hdc in next st, 2 hdc in next st] repeat across. Turn. (75 hdc)
Row 4: Ch 3, turn. Dc in first st, 2 dc in next st, 2 dc in next st, 1 dc in next st, [1 dc in next st, 2 dc in next st, 2 dc in next st, 1 dc in next st] repeat across. (approx 100 dc, strip is fully ruffled)
Fasten off, leaving a 12-inch tail. Roll the strip tightly from one short end, with the Row 4 edge facing outward as the outer petals and the Row 1 edge forming the base. Thread the tail onto a tapestry needle and stitch through the base layers in a spiral, catching every layer, to secure. Keep the tail for attaching the rose to the band. Finished diameter is approximately 1 inch.
Small Rose Pattern
Make 1 in Colour B (dusty rose).
Foundation chain: Using Colour B, chain 16.
Row 1: Sc in 2nd ch from hook and in each ch across. Turn. (15 sc)
Row 2: Ch 1, turn. 2 sc in first st, [2 sc in next st] repeat across. Turn. (30 sc)
Row 3: Ch 2, turn. Hdc in first st, 2 hdc in next st, [1 hdc in next st, 2 hdc in next st] repeat across. Turn. (45 hdc)
Row 4: Ch 3, turn. [1 dc, 2 dc, 1 dc, 2 dc] across in the same alternating pattern, allowing the strip to ruffle. (approx 56 dc)
Fasten off, leaving a 12-inch tail. Roll and secure the same as the large rose. This rose forms a tighter bud shape, approximately 0.6 inch in diameter.
Cream Rose Pattern
Make 1 in Colour A (cream), working exactly the same as the Large Rose instructions above. Finished diameter is approximately 1 inch.
Leaf Pattern
Make 8 in Colour C (mint green).
Foundation chain: Using Colour C, chain 9.
Row 1 (first half): Sc in 2nd ch from hook (1 sc), hdc in next ch (1 hdc), dc in next 3 ch (3 dc), hdc in next ch (1 hdc), sc in next ch (1 sc), ch 1 at tip. (7 sts plus ch-1 tip)
Row 1 (second half): Without turning, rotate your work and work along the opposite side of the foundation chain. Sc in first available ch loop (1 sc), hdc in next ch loop (1 hdc), dc in next 3 ch loops (3 dc), hdc in next ch loop (1 hdc), sc in next ch loop (1 sc). (7 sts)
Sl st to first sc of Row 1 to close the leaf. (14 sts around perimeter plus ch-1 tip)
Fasten off, leaving an 8-inch tail for attachment. Make 8 leaves total.
Finishing & Assembly
Step 1, blocking the band: Wet the lace band thoroughly and pin it to a foam blocking board at 5.5 inches long by 1.5 inches wide. Allow it to dry completely before removing the pins. Do not block the roses or leaves, so they keep their dimension.
Step 2, clasp attachment: Using a sewing needle and white thread, securely stitch one half of the barrel clasp to each short end of the blocked band at the centre of the edge, just inside the picot border. Attach the extension chain to one half of the clasp so the finished bracelet is adjustable between 6 and 7 inches.
Step 3, attach the roses: Place one large dusty rose at top centre, the cream rose at middle centre slightly below and to the right, and the small dusty rose bud at lower left, slightly tucked beneath the cream rose. Stitch each rose firmly to the band through its base and the lace mesh, using its attachment tail.
Step 4, attach the leaves: Tuck 2 leaves pointing upward behind the large pink rose, 2 leaves pointing left behind the cream rose, 2 leaves pointing right and slightly downward, and 2 leaves tucked at the front lower sides. Stitch each leaf base to the band with 3 to 4 stitches through the leaf base and band mesh, and weave in all ends on the wrong side.
Step 5, pearl beads: With a sewing needle and doubled white thread, scatter approximately 28 to 30 pearl beads among the roses and leaves, placing 2 to 3 beads between each flower and leaf group and approximately 6 beads along each long picot edge, spaced about 0.75 inch apart. Stitch each bead individually through the lace, knotting on the wrong side after each bead.
Step 6, ribbon bow: Cut the organza ribbon to 20 inches, thread it through the lace mesh at the lower front of the band, centre it, and tie a soft bow. Trim the ribbon ends at a diagonal to prevent fraying. The ribbon can be removed for washing.
Tips
To make the band longer, add 2-row repeats to the lace band. Each pair of rows adds approximately 0.4 inch. For a wider cuff, add foundation chains in multiples of 2; a chain of 38 gives a cuff approximately 2 inches wide.
Roll each rose tightly at the centre bud and let the outer ruffled rows drape loosely for a natural bloom, and secure generously through the base so the rose does not unwind during wear.
Work with a relaxed hand in thread crochet. If your stitches are too tight, move up to a 1.9 mm hook; if they are too loose, move down to 1.5 mm.
Hand wash gently in cool water, roll in a towel to remove excess water, and dry flat away from direct sunlight. Remove the organza ribbon before washing, and store the bracelet flat in a fabric pouch or jewellery box.
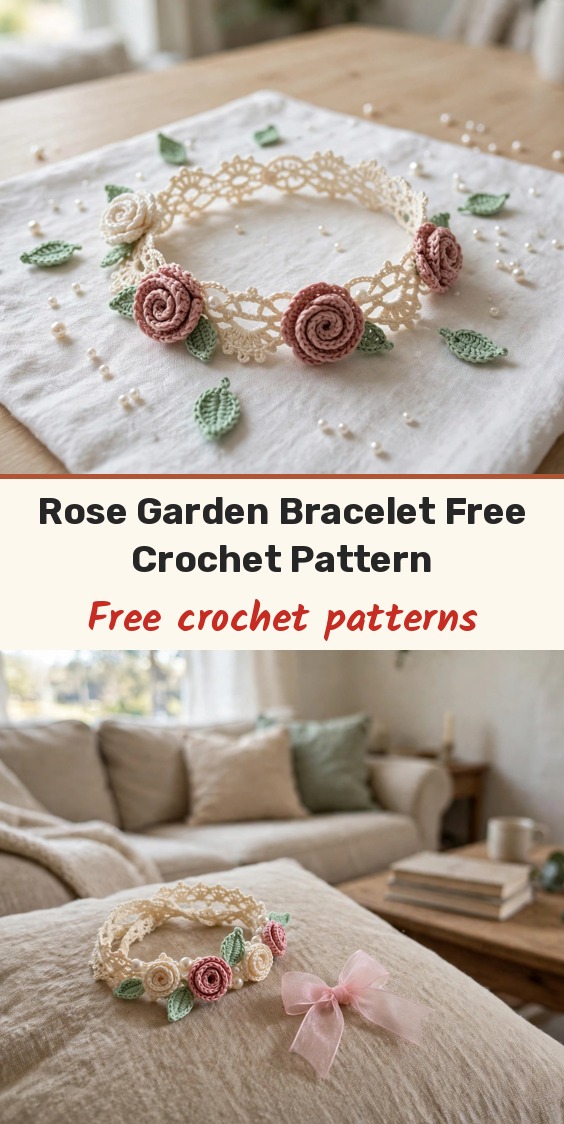
Rose Garden Bracelet Free Crochet Pattern
Materials
Steps
- Crochet the filet mesh lace band in 25 rows
- Work the picot and shell edging around the band
- Make 2 large dusty rose spiral roses
- Make 1 small rose and 1 cream rose
- Make 8 mint leaves
- Block the band and attach the clasp
- Arrange and stitch on roses, leaves, pearl beads, and the ribbon bow
- Block only the bare band before assembly, never the finished bracelet
- Roll roses tightly at the centre and loosely at the outer petals
- Add band rows in pairs to lengthen the bracelet evenly