Iconic Crochet Mini Lily Flower Pattern For Spring Garlands
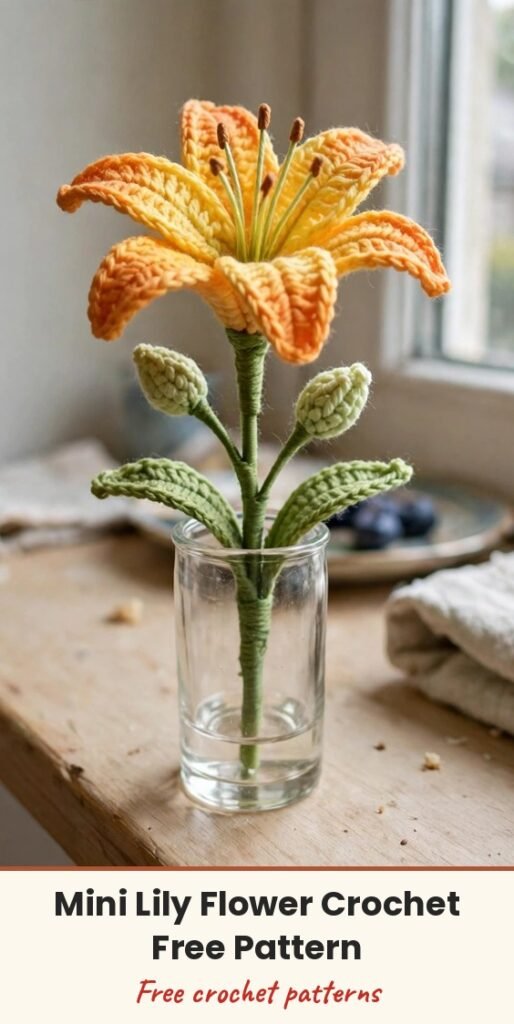
Table of Contents
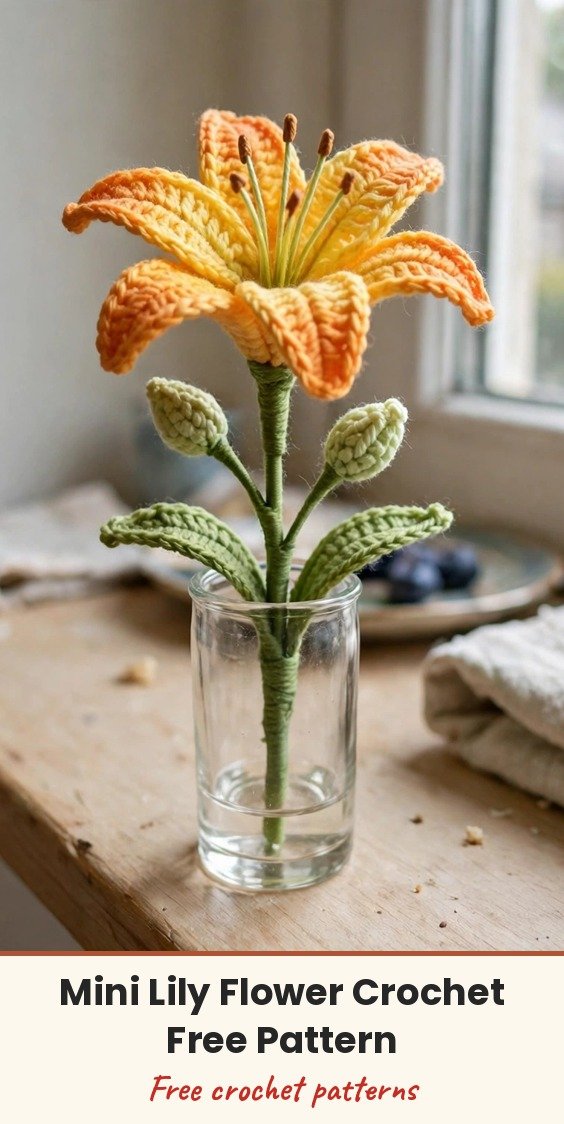
This tiny lily makes me smile every single time — it is only about 8 cm tall, but it looks like a real little bloom! We crochet six shaded petals around a wrapped-wire pistil centre, add two buds and two leaves, and wire everything onto a wrapped stem, so the finished flower can bend and pose just like a real one.
It is a lovely make for a small vase, a keychain, a hair accessory, or a whole spring garland of them strung together. We work small and tight with a tiny 1.10mm hook and lightweight cotton thread, and we lay thin wire along the petals and leaves as we crochet, which is what gives the flower its structure and that realistic, sculpted shape.
This is an intermediate project — not because the stitches are hard (they are just sc, hdc and dc), but because working with thin thread and wire asks for a little patience. Take it slowly and enjoy watching each tiny part come alive.
Materials
- Lightweight cotton yarn in yellow, for the petal centres and pistils
- Lightweight cotton yarn in orange, for the petals
- Lightweight cotton yarn in light green and dark green, for the buds, leaves and stem wrap
- Small amount of lightweight cotton yarn in brown, for the pistil tips
- 1.10mm crochet hook
- Thin metal wire, preferably crochet wire or 22-gauge galvanised wire
- Scissors or a yarn trimmer
- Yarn needle, for sewing parts together
- Cold silicone glue
- Optional: keyring, for making the flower into a keychain
Abbreviations
- ch: chain
- sc: single crochet
- hdc: half double crochet
- dc: double crochet
- sl st: slip stitch
Special Stitches
- Adding wire into crochet: position the wire along your work as you crochet, and let the stitches encase it securely. This reinforces the petals and leaves so they hold their shape and can be bent gently afterwards.
- Working with thin thread: crochet evenly and with firm tension throughout, so the fabric stays tight and the flower holds its structure.
Gauge & Size
- Finished size: approximately 7.5 to 8 cm (3 to 3.1 inches) tall, including the stem
- Gauge: exact gauge is not critical, but work tight stitches with the 1.10mm hook for the desired structure and shape
- Construction: 6 petals, 2 leaves, 2 buds and 5 wrapped-wire pistils, assembled and wrapped onto a wire stem
- Skill level: Intermediate
Petal Centre Strip
Foundation Chain: With yellow yarn, ch 7.
Row 1: Starting in the second chain from the hook, work 6 sc back across. Cut the yellow yarn. (6 sc)
Attach the orange yarn in the last stitch of Row 1 with a sl st, and work 1 sc in the same stitch to secure the colour change. The yellow chain forms the base structure of the petal, and the orange gives it its shaded texture.
Petals (Make 6)
Place the wire along the base of the petal and secure it as you stitch, so the stitches encase the wire.
Petal Row: In the next stitch work 1 sc, 1 hdc into the next stitch, 1 dc into the following two stitches, 1 hdc, and 1 sc in the last stitch. (7 sts)
Finish the Petal: Ch 2, working along the edge of the petal, work a sl st back to the corner and finish off the petal.
Each petal is symmetrical, so make sure your stitch counts match on both sides. Make 6 petals using this same pattern.
Small Leaves (Make 2)
Foundation Chain: With green yarn, ch 10.
Row 1: Starting in the second chain from the hook, work 1 sc, 2 hdc, 2 dc, 2 hdc, 2 sc. (9 sts)
Row 2: Turn to the opposite side of the chain and repeat the same stitch sequence on the other side, so the leaf is symmetrical. (9 sts)
Work a sl st back to the starting point, finish off the yarn, and weave in the loose ends. For added structure, lay wire into the leaf while you crochet, just as we did for the petals. Make 2 leaves in total.
Buds (Make 2)
Foundation Chain: With light green yarn, ch 5.
Round 1 / Row 1: Starting in the second chain from the hook, work 4 sc back across. (4 sc)
Repeat for a total of 5 rows of 4 sc each, to create a small rectangle. (4 sc per row)
Fold the rectangle in half and sew along the edges with a yarn needle to form a small cylindrical cocoon, or bud. Sew the bottom of the bud around a piece of galvanised wire to create its stem for attachment. Make 2 buds.
Pistils (Make 5)
Take a thin wire and apply cold silicone glue to one end. Wrap the tip with brown yarn and secure it with the glue, then wrap the remaining length of the wire with yellow yarn to create the pistil. You can adjust the length of the pistils as you like. Make 5 pistils in total.
Finishing & Assembly
Arrange the pistils at the centre and tie them together with crochet thread or wire.
Position the six petals evenly around the pistils and secure them in place with thread or with wraps of green yarn.
Fix the buds on either side of the flower stem, folding them gently downward for a natural effect.
Attach the two leaves below the buds, so they sit symmetrically on opposite sides of the stem.
Wrap the entire stem with green yarn, securing all the parts together as you go, and finish the stem by cutting the yarn and securing it with a dab of silicone glue.
Add a keyring at the back if you are making a keychain, or pop your lily straight into a tiny vase. Make a whole handful in different colours and you have the prettiest spring garland!
Tips
Keep your tension firm and even — with thin thread, loose stitches are the one thing that will make the petals flop instead of holding their sculpted shape.
Bend the wired petals and leaves gently after assembly rather than forcing them; small adjustments give the most lifelike result.
Sew and wrap each part securely before moving to the next. A flower assembled in calm layers stays together far better than one rushed at the end.
Try other colourways! The same little pattern makes beautiful lilies in white, pink or deep red, and the buds and leaves stay green in every version.
Iconic Crochet Mini Lily Flower Pattern For Spring Garlands
Materials
Steps
- Work the yellow petal centre strip of 6 sc and join the orange yarn
- Crochet 6 wired petals
- Crochet 2 wired leaves, 9 sts per side
- Make 2 buds from 5-row rectangles of 4 sc and sew them into shape
- Wrap 5 wire pistils with brown tips and yellow stems
- Assemble the petals around the pistils, add buds and leaves
- Wrap the stem in green yarn and secure with glue
- Work tight, even stitches so the tiny flower holds its shape
- Lay the wire along the work so the stitches encase it
- Bend petals and leaves gently after assembly for a lifelike look
- Adjust pistil length to suit your flower