Crochet Lavender Flower Baby Dress Free Pattern
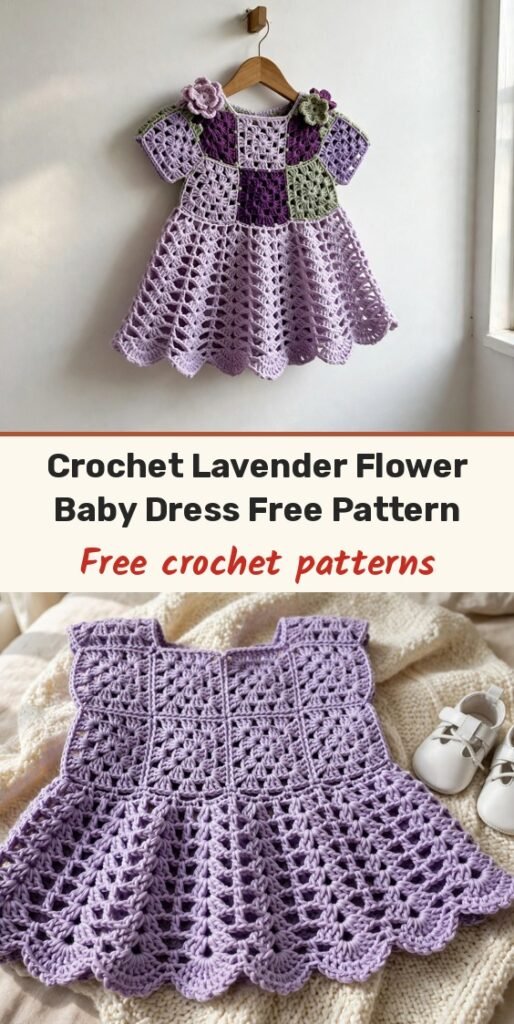
Table of Contents
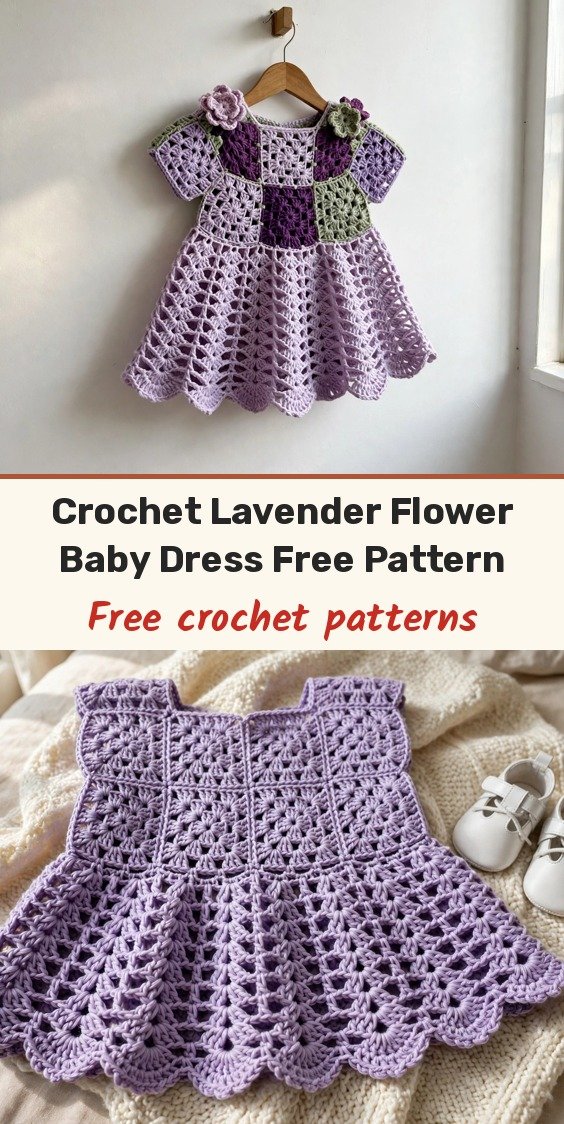
If you are looking for a handmade baby gift that will actually get worn and treasured, this lavender flower baby dress is such a sweet make. It combines classic granny square motifs with a flowing lace shell skirt, and the little flowers at the shoulders just melt my heart every time.
The construction uses techniques you probably already know — granny squares, basic shells, and simple joining — and they come together into an A-line dress that looks far more complicated than it really is. The yoke is built from joined squares, the skirt works downward in joined rounds, and a ring of granny squares finishes the hem.
It is sized for about 12 months, slips over the head with no buttons or closures, and works up beautifully in soft DK weight yarn. Let me walk you through it, section by section.
Materials
- 350 yards of DK weight yarn in lavender (main color)
- 40 yards of DK weight yarn in deep purple (color A)
- 40 yards of DK weight yarn in sage green (color B)
- 3.5mm (US E-4) crochet hook
- Tapestry needle for weaving in ends
- Scissors
- At least 6 stitch markers
- Rust-proof pins for blocking
Abbreviations
- ch: chain
- sl st: slip stitch
- sc: single crochet
- hdc: half double crochet
- dc: double crochet
- tr: treble crochet
- sp: space
- ch-sp: chain space
- sk: skip
- st/sts: stitch / stitches
- rep: repeat
- beg: beginning
- RS: right side
- WS: wrong side
- MC: main color (lavender)
- CA: color A (deep purple)
- CB: color B (sage green)
- yo: yarn over
Special Stitches
- Shell: work 5 dc all into the same stitch or space. Between shells, work 1 sc into the center stitch or designated space. This creates the lovely lace pattern in the skirt.
- Scallop Edging: working along an edge, work (sl st, ch 3, 4 dc) in the same stitch, skip 2 sts, sc in next st, skip 2 sts, and repeat across or around. This creates a gentle scalloped border at the hem and neckline.
- Flat Join (SC Join): hold two squares with right sides facing, insert your hook through both corresponding corner or side stitches, draw up a loop of MC, and sc through both layers across. This creates a visible seam on the WS.
Gauge & Size
- Finished size: 12 months — chest 18 in / 46 cm, length shoulder to hem 14 in / 35.5 cm, yoke depth 3.5 in / 9 cm, skirt length 10.5 in / 26.5 cm; fits babies approximately 18 to 22 pounds (8 to 10 kg)
- Gauge: 18 sc and 20 rows = 4 in / 10 cm with MC and a 3.5mm hook; granny square motif measures 2.75 in / 7 cm square after blocking
- Construction: granny square yoke panels joined at the shoulders, lace shell skirt worked downward in joined rounds, hem border of joined granny squares, scalloped edging
- Skill level: Intermediate
Granny Square Motif (Make 15)
You will make 15 squares in total: 3 for the front yoke panel, 3 for the back yoke panel, and 9 for the hem border. Block each square to 2.75 in / 7 cm as you finish it — it makes assembly so much easier.
Round 1 (CA): Make a magic ring. Ch 3 (counts as first dc). Work 2 dc into ring. Ch 2. (3 dc, ch 2) 3 times into ring. Sl st to top of beg ch-3 to join. Pull ring closed. You now have 4 clusters of 3 dc separated by ch-2 corner spaces.
Round 2 (CB): Sl st into corner ch-2 sp. Ch 3 (counts as dc). Work 2 dc in same sp. Ch 1. (3 dc, ch 2, 3 dc) in next corner ch-2 sp. Ch 1. Rep from ( to ) around all 4 corners. End with 3 dc in beg corner sp. Ch 2. Sl st to top of beg ch-3. (Eight 3-dc clusters, 4 ch-2 corner sps, 4 ch-1 side sps)
Round 3 (MC): Sl st into corner ch-2 sp. Ch 3 (counts as dc). Work 2 dc in same corner sp. Ch 1. 3 dc in ch-1 sp. Ch 1. (3 dc, ch 2, 3 dc) in next corner ch-2 sp. Ch 1. 3 dc in ch-1 sp. Ch 1. Rep from ( to ) around. End with 3 dc in beg corner sp. Ch 2. Sl st to top of beg ch-3. Fasten off. (Twelve 3-dc clusters total, 4 ch-2 corner sps, 8 ch-1 side sps)
Small Flower Embellishment (Make 3)
Round 1: With MC, make a magic ring. Ch 1. Work 10 sc into ring. Sl st to first sc to join. (10 sc)
Round 2: Ch 1. (Sc, ch 3, sl st back into same sc, sc in next sc) 5 times. Sl st to beg. Fasten off, leaving a tail for sewing. You will have 5 small petals. Two flowers are sewn to the shoulders, and the third is optional for a hair clip.
Yoke Assembly
Front Yoke Panel: lay 3 granny squares in a horizontal row. Using the flat sc join method and MC, join Square 1 to Square 2 along one side edge, then join Square 2 to Square 3 in the same manner. You now have a strip of 3 joined squares measuring approximately 8.25 in / 21 cm wide and 2.75 in / 7 cm tall.
Back Yoke Panel: repeat the joining process for 3 more squares.
Shoulder Joining: with RS facing out, hold the front and back yoke panels with top edges aligned. Using MC, sc join the left 1 square width (approximately the first 9 to 10 stitch groups from the left edge) at the top of the front and back panels together — this is your left shoulder seam. Leave the center 1 square width open for the neckline (approximately 2.75 in / 7 cm). Sc join the right shoulder. Fasten off.
The two side edges remain open to form the armholes, each measuring approximately 2.75 in / 7 cm wide.
Yoke Edge Preparation
With RS facing and MC, join yarn to the bottom right corner ch-2 space of the front yoke panel. Ch 1. Work 1 sc in each dc and 1 sc in each ch-1 sp across the bottom edge of the front yoke panel. Work 2 sc in each corner ch-2 sp.
The bottom edge of each square yields 18 sc. For 3 squares across, you get 54 sc per panel. Join the front and back into a continuous round by working across the back panel bottom edge in the same way. Total stitches in the first working round at the base of the yoke: (108 sts)
Skirt Pattern
The skirt uses a lace shell pattern and expands from 108 stitches to 162 stitches. All rounds are joined with a sl st and begun with a standing chain unless otherwise noted — do not turn.
Round 1 (increase round, MC): Ch 3 (counts as dc throughout). Dc in same st. Dc in next 4 sts. (2 dc in next st, dc in next 5 sts) rep around. Sl st to top of beg ch-3 to join. (126 sts)
Round 2 (lace shell round, MC): Ch 1. Sc in first st. Skip 2 sts. 5 dc (shell) in next st. Skip 2 sts. Sc in next st. Rep (skip 2, shell of 5 dc in next st, skip 2, sc in next st) around. Sl st to first sc to join. (126 sts)
Round 3 (MC): Ch 3 (counts as dc). 2 dc in same sc. Skip 2 dc. Sc in center (3rd) dc of shell. Skip 2 dc. 5 dc shell in next sc. Rep around, ending with 2 dc in same sc as beg ch-3. Sl st to top of beg ch-3 to join. (126 sts)
Round 4 (MC): Ch 1. Sc in top of beg ch-3. Shell of 5 dc in next sc. (Sc in center dc of next shell, shell of 5 dc in next sc) rep around. Sl st to first sc to join. (126 sts)
Round 5 (increase round, MC): Ch 1. Sc in each st around, placing 2 sc in every 7th st. (144 sts)
Round 6 (lace shell, MC): Ch 1. Sc in first st. (Skip 2, shell of 5 dc in next st, skip 2, sc in next st) rep around. Sl st to first sc. (144 sts)
Round 7 (MC): Ch 3. 2 dc in same sc. (Skip 2, sc in center dc of shell, skip 2, shell of 5 dc in sc) rep around, ending with 2 dc in beg sc. Sl st to top of ch-3. (144 sts)
Round 8 (MC): Ch 1. Sc in center of beg half shell. (Shell in next sc, sc in center dc of next shell) rep around. Sl st to first sc. (144 sts)
Round 9 (increase round, MC): Ch 1. Sc in each st around, placing 2 sc in every 8th st. (162 sts)
Round 10 (lace shell, MC): Ch 1. Sc in first st. (Skip 2, shell of 5 dc in next st, skip 2, sc in next st) rep around. Sl st to first sc. (162 sts)
Rounds 11 to 16: Continue alternating the shell pattern as established in Rounds 11 through 16, maintaining 162 sts throughout. (162 sts)
Round 17 (transition round, MC): Ch 1. Sc in each dc and sc around, working 1 sc in each of the 5 dc of each shell and 1 sc in each sc. (162 sts)
Hem Border
Join your 9 hem squares into a continuous ring using the flat sc join method. Connect square 1 to 2, 2 to 3, continuing through square 9, then join square 9 back to square 1.
With RS of the skirt and the square band both facing up, align the top edge of the square band with Round 17. Using MC, sc through corresponding stitches all the way around to attach. (162 sc joining round)
Scalloped Hem Edging
Round 1 (MC): With RS facing, join MC to any bottom corner ch-2 sp of the square ring. Ch 1. Work 1 sc in each dc, 1 sc in each ch-1 sp, and 2 sc in each corner ch-2 sp around. (162 sts)
Round 2 (Scallop Edging, MC): Ch 1. (Sl st in first sc, ch 3, 4 dc in same sc, skip 2 sc, sc in next sc, skip 2 sc) rep around. Sl st to first sl st to join. Fasten off. (27 scallops)
Neckline Edging
Round 1: With RS facing and MC, join yarn to any stitch along the neckline opening. Ch 1. Sc evenly around the neckline edge, working approximately 1 sc per dc and 1 sc per ch-sp. Aim for 54 sc around. (54 sts)
Round 2 (Scallop Neck Edging, MC): Ch 1. (Sl st in sc, ch 2, 2 dc in same sc, skip 2 sc, sc in next sc, skip 2 sc) rep around. Sl st to join. Fasten off. (9 mini scallops)
Cap Sleeve Edging
Left Armhole — Round 1: With RS facing and MC, join yarn at the underarm point. Ch 1. Sc evenly around the armhole opening. Estimated 24 sc around. (24 sts)
Round 2 (flutter edge, MC): Ch 3 (counts as dc). 2 dc in same sc. Dc in next sc. (3 dc in next sc, dc in next sc) rep around. Sl st to top of beg ch-3. (36 sts)
Round 3 (MC): Ch 1. Sc in each dc around. Sl st to first sc. Fasten off. (36 sts)
Repeat for the right armhole.
Finishing & Assembly
Sew one small flower firmly to the left shoulder seam area, centered over the seam on the RS. Sew the second flower to the right shoulder in the same position, using the MC yarn tail and your tapestry needle.
Weave in all remaining yarn ends securely on the WS.
For wet blocking, soak the finished dress in cool water with a small amount of gentle wool wash or baby detergent for 20 minutes. Gently squeeze out excess water without wringing, roll it in a clean towel to remove more moisture, then lay it flat on a blocking mat and pin to the finished measurements, gently stretching the lace sections to show the shell pattern clearly. Allow to dry completely. If using acrylic yarn, you can steam block instead: hover a steam iron above the garment without pressing down, pin to measurements, and allow to cool completely.
Tips
For larger sizes (18 months, 24 months), increase the number of granny squares by one per yoke panel row — 4 across instead of 3. This adds approximately 2.75 in / 7 cm to the chest width. Add proportionally more hem squares and 2 to 4 additional lace shell rounds for length.
For a smaller size (6 months), reduce to 2 squares across the yoke panels, use a US D-3 / 3.25 mm hook, and work 2 fewer skirt increase rounds. Whichever size you make, always verify that stitch counts remain divisible by 6 for the lace shell pattern after adjustments.
Block all granny squares before assembly — even, accurate squares make the yoke and hem ring join up so much more neatly.
For care, machine wash cold on a gentle cycle if using acrylic or cotton yarn, and lay flat to dry to preserve the shape of the lace and granny squares. Do not tumble dry or wring.
Crochet Lavender Flower Baby Dress Free Pattern
Materials
Steps
- Crochet 15 granny square motifs in 3 rounds each and block them to 2.75 inches
- Join 3 squares each into front and back yoke panels and seam the shoulders
- Work the yoke edge preparation round of 108 sc
- Work the lace shell skirt, increasing from 108 to 162 sts over 17 rounds
- Join the 9 hem squares into a ring and attach it to the skirt
- Add the scalloped hem edging with 27 scallops
- Finish the neckline with scallop edging and the armholes with flutter cap sleeve edging
- Sew a small flower to each shoulder and block the finished dress
- Block every granny square before assembly for even, accurate sizing
- Keep skirt stitch counts divisible by 6 so the lace shell pattern stays aligned
- The dress slips over the head with no closures, so check the neckline opening as you edge it
- Choose smooth DK yarn with good stitch definition so the lace sections show clearly


