Daisy Bloom Baby Romper Free Crochet Pattern
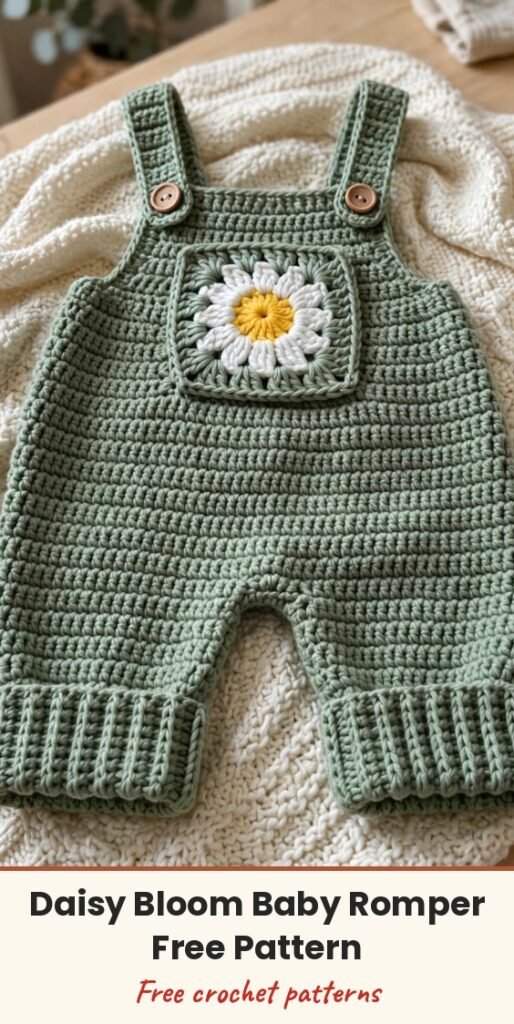
Table of Contents
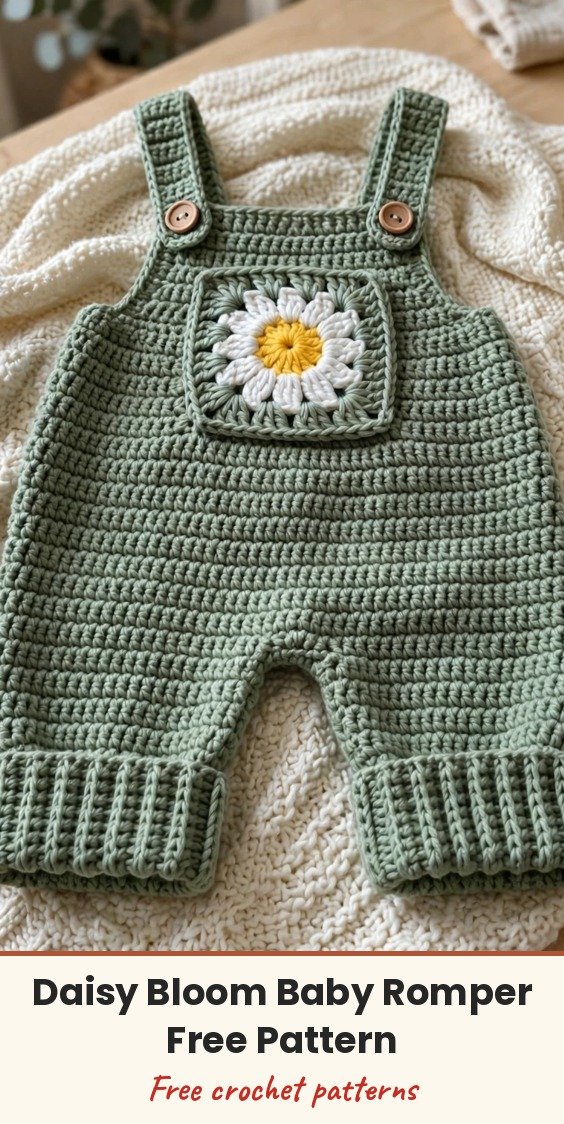
This little romper with a daisy on the front is sweet but not fussy, impressive-looking but totally doable — and it is one of my absolute favorite baby gifts to give! I think you are going to love making it too.
The construction is smarter than it looks. We work two flat leg panels first, join them at the crotch with a simple chain bridge, then continue upward in the round for the body. The bib and back yoke are worked flat after we divide, and the charming daisy granny square gets sewn on as an applique at the end.
The finished piece fits babies 3 to 6 months old, with customization tips included for sizing up or down. Half double crochet forms the main fabric, giving a dense but slightly stretchy texture that holds its shape beautifully in cotton yarn.
Materials
- 300 to 350 yards worsted weight (category 4) cotton or cotton blend yarn in sage green (Main Color)
- 20 yards yarn in white for the daisy petals (Color A)
- 8 yards yarn in golden yellow for the daisy center (Color B)
- US size J-10 / 6.0 mm crochet hook for the main body and legs
- US size I-9 / 5.5 mm crochet hook for ribbed leg cuffs and shoulder straps
- US size H-8 / 5.0 mm crochet hook for the daisy motif
- Yarn needle for seaming and weaving ends
- 4 wood tone buttons, approximately 15 mm diameter
- At least 4 stitch markers
- Scissors
- Blocking mat and pins
- Optional: 2 small snaps for extra gusset security
Abbreviations
- ch: chain
- sl st: slip stitch
- sc: single crochet
- hdc: half double crochet
- dc: double crochet
- hdc2tog: half double crochet two together (a decrease)
- FpHdc: front post half double crochet
- BpHdc: back post half double crochet
- t-ch: turning chain
- st(s): stitch(es)
- RS: right side
- WS: wrong side
- pm: place marker
- rep: repeat
- rnd: round
Special Stitches
- Half Double Crochet Two Together (hdc2tog): insert hook into next stitch, yarn over, pull up a loop (3 loops on hook). Insert hook into following stitch, yarn over, pull up a loop (5 loops on hook). Yarn over and pull through all 5 loops.
- Front Post Half Double Crochet (FpHdc): yarn over, insert hook from front to back to front around the post of the indicated stitch below, yarn over, pull up a loop, yarn over, pull through all 3 loops.
- Back Post Half Double Crochet (BpHdc): yarn over, insert hook from back to front to back around the post of the indicated stitch below, yarn over, pull up a loop, yarn over, pull through all 3 loops.
Gauge & Size
- Finished size: 3 to 6 months; chest laid flat 8.5 inches / 21.5 cm (17 inches / 43 cm circumference), length from shoulder to crotch approximately 14 inches / 35.5 cm, leg opening circumference approximately 7 inches / 18 cm, bib panel 4.5 inches wide x 3.5 inches tall / 11.5 x 9 cm
- Gauge: with Main Color and J-10 hook in half double crochet rows, 14 stitches and 10 rows = 4 inches / 10 cm
- Construction: two flat leg panels joined with chain gusset bridges, body worked in the round, bib and back yoke worked flat, daisy granny square sewn on as applique
- Skill level: Intermediate
Pattern Notes
The turning chain at the beginning of each flat row counts as the first hdc throughout this pattern. When working the body in the round, the chain 1 at the start of each round does NOT count as a stitch.
Place stitch markers at the beginning of each round and at center front and center back to help track your place. Keep your tension consistent but not too tight; the fabric needs gentle stretch for diaper comfort.
The daisy motif is sewn on top of the finished bib as an applique. You do not work it into the bib fabric.
Right Leg
Foundation: With MC and J-10 hook, ch 27. Hdc in 3rd ch from hook and in each ch across. (25 hdc)
The skipped 2 chains at the start count as your first turning chain. From Row 2 onward, chain 2 and turn.
Row 1: Ch 2, turn. Hdc in each st across. (25 hdc)
Rows 2 through 10: Ch 2, turn. Hdc in each st across. (25 hdc)
Your leg tube before the cuff should measure approximately 4 inches / 10 cm tall. Set this piece aside but do not fasten off. Leave your working yarn attached.
Left Leg
Foundation: With MC and J-10 hook, ch 27. Hdc in 3rd ch from hook and in each ch across. (25 hdc)
Rows 1 through 10: Ch 2, turn. Hdc in each st across. (25 hdc)
Do not fasten off. You will join the legs next.
Joining the Legs & Body
With your working yarn still attached to the left leg and the right side facing you:
Joining Round: Ch 4 (this forms the front gusset bridge). With RS facing, sl st to the last stitch of the right leg. Continue across the right leg by working hdc in each of the 25 stitches. At the end of the right leg, ch 4 (this forms the back gusset bridge). Sl st to the first stitch of the left leg. Hdc in each of the 25 stitches of the left leg, then hdc in each of the 4 gusset chain stitches on the front to create a continuous loop. Place stitch marker at beginning of round. Sl st to first hdc to join. (58 hdc)
Those chain bridges create the crotch area. You will reinforce them and add button closures during finishing.
Body Rounds 1 through 15: Ch 1, hdc in each st around. Sl st to join. (58 hdc)
After Round 15, your body tube should measure approximately 6 inches / 15 cm from the joining round.
Dividing for Front Bib and Back Yoke
At the end of Round 15, divide the work into sections: Front bib: 16 stitches (centered front). Right side panel: 13 stitches. Back yoke: 16 stitches (centered back). Left side panel: 13 stitches. Mark these sections clearly before continuing.
Back Yoke
Turn so the wrong side faces you. Attach MC at the first stitch of your designated back 16-stitch section.
Row 1 (WS): Ch 2, turn. Hdc in each of the 16 back sts. (16 hdc)
Rows 2 through 9: Ch 2, turn. Hdc in each st across. (16 hdc)
Fasten off. Your back yoke measures approximately 3.5 inches / 9 cm tall.
Front Bib
Attach MC at the first stitch of the front 16-stitch section with right side facing.
Row 1 (RS): Ch 2, turn. Hdc in each of the 16 front sts. (16 hdc)
Rows 2 through 9: Ch 2, turn. Hdc in each st across. (16 hdc)
Do not fasten off. Your bib panel should measure approximately 4.5 inches wide by 3.5 inches tall.
Daisy Granny Square Motif
This is the showstopper of the whole romper! Work it separately with your H-8 hook, then sew it onto the bib.
Round 1 (Color B, golden yellow): Make a magic ring. Ch 2 (counts as first dc), 11 dc into ring. Sl st to top of ch-2 to join. (12 dc)
Round 2 (Color B): Ch 1, 2 sc in each st around. Sl st to first sc to join. Fasten off Color B. (24 sc)
Round 3 (Color A, white): Join Color A with sl st in any st. (Ch 10, sl st into same st, sl st into next st) repeat 12 times total, working one petal into every other stitch. After the last petal, sl st to the first sl st. Fasten off Color A but leave a long tail for seaming. (12 petals)
Round 4 (MC, sage green): Join MC with sl st in any skipped sc between petal bases from Round 2. Ch 3 (counts as dc), 2 dc in same st. (Ch 2, 3 dc in next skipped sc) 3 times, ch 3 (corner), 3 dc in next skipped sc. Repeat 3 more times, ending with ch 3. Sl st to top of ch-3. (12 groups of 3 dc, 4 corner ch-3 spaces, 8 side ch-2 spaces)
Fasten off. Weave ends. Block flat to approximately 3 inches / 7.5 cm square.
Shoulder Straps
Make 2 straps. Switch to your I-9 hook and MC.
Foundation: Ch 6. Hdc in 3rd ch from hook and in each ch across. (4 hdc)
Row 1: Ch 2, turn. FpHdc in first post, BpHdc in next, FpHdc in next, BpHdc in last. (4 sts)
Row 2: Ch 2, turn. BpHdc in first post, FpHdc in next, BpHdc in next, FpHdc in last. (4 sts)
Repeat Rows 1 and 2 alternately until strap measures 9 inches / 23 cm total, or your desired adjustable length.
Final Row (Button Loop Row): Ch 2, turn. Work 1 FpHdc, ch 3, sk 2, FpHdc in last st.
Fasten off, leaving a 12-inch tail for seaming. Make the second strap identically.
Leg Cuffs
Make 2 cuffs. Switch to your I-9 hook. You will work the cuff directly onto the foundation edge of each leg after seaming the leg sides closed.
Round 1: Join MC to the foundation chain edge. Ch 1, sc in each foundation chain st around the leg opening. Sl st to join. (25 sc)
Round 2 (Begin Ribbing): Ch 2. (FpHdc in first post, BpHdc in next, FpHdc in next) repeat to end. Sl st to join. (25 sts)
Rounds 3 through 5: Continue alternating BpHdc over FpHdc and FpHdc over BpHdc to create the rib texture. Sl st to join each round. (25 sts)
Fasten off. Weave ends. Repeat for second leg.
Gusset Finishing
Work on the inside (wrong side) of the crotch. Join MC at the right end of the front 4-chain bridge. Sc in each of the 4 chain spaces. Fasten off. Repeat for back bridge.
Front Gusset Button Loops: Join MC at the right edge of the front crotch bridge. Ch 1, sc in first st, (ch 3, sc in next st) 2 more times, sc in last st. Fasten off.
Sew 2 wood buttons onto the back crotch reinforcement strip to line up with the outer button loops.
Finishing & Assembly
Seaming the Legs: each leg was worked flat. Using MC and your yarn needle, whip stitch or mattress stitch the short side edges together to form a tube. The seam sits at the inside leg position.
Attaching Straps: sew the plain end of each strap to the top front corners of the bib using whip stitch, about 2 stitches in from each corner. Sew the button loop end of each strap to the top back corners of the back yoke. Attach wood buttons to the back yoke corners to match the button loops.
Attaching the Daisy Motif: pin your blocked daisy square centered on the front bib, approximately 0.5 inches from the top edge. Using MC and your yarn needle, whip stitch around all four sides of the outer MC granny square border. Catch only the back of the bib fabric so stitches stay invisible on the wrong side.
Weaving Ends: weave all ends securely, at least 1.5 inches, splitting yarn plies when possible for extra security with cotton.
Blocking: wet block your finished romper by submerging in cool water. Gently press out excess water in a towel. Pin flat to blocking mat to finished dimensions. Allow to dry completely. Cotton yarn really benefits from wet blocking.
Tips
For 6 to 9 months: add 4 stitches to each leg foundation (ch 31, work 29 hdc per leg). Increase joining round to 66 stitches with 5-stitch gusset bridges. Work body rounds to Round 18. Increase bib and back yoke to 18 stitches each, 10 rows. Extend straps to 10 inches.
For 9 to 12 months: add 6 stitches to each leg foundation (ch 33, work 31 hdc per leg). Increase to 74 stitches in the round. Work 20 body rounds. Bib and back yoke 20 stitches wide, 11 rows each. Straps 11 inches long.
For newborn size: reduce each leg foundation to ch 23 (21 hdc per leg). Joining round will be 50 stitches. Work 12 body rounds. Bib and back yoke 14 stitches wide, 8 rows each. Straps 8 inches long.
Care: machine wash cold on gentle cycle, inside out. Lay flat to dry. Do not tumble dry. Avoid ironing directly over the daisy motif. Store folded flat.
Daisy Bloom Baby Romper Free Crochet Pattern
Materials
Steps
- Work both leg panels in hdc rows (25 hdc each)
- Join the legs with chain gusset bridges and work the body in the round to Round 15
- Divide and work the back yoke and front bib flat
- Make the daisy granny square motif
- Work 2 ribbed shoulder straps with button loops
- Work the ribbed leg cuffs and gusset button loops
- Seam the legs, attach straps and buttons, and sew the daisy onto the bib
- Wet block the finished romper
- Cotton yarn holds structure best for a fitted baby garment and washes beautifully
- Mark center front and center back before dividing for the bib and yoke
- Sew the daisy on catching only the back of the bib fabric so stitches stay invisible
- Weave ends at least 1.5 inches and split yarn plies for extra security


