Woodland Fox Ear Baby Beanie Free Crochet Pattern
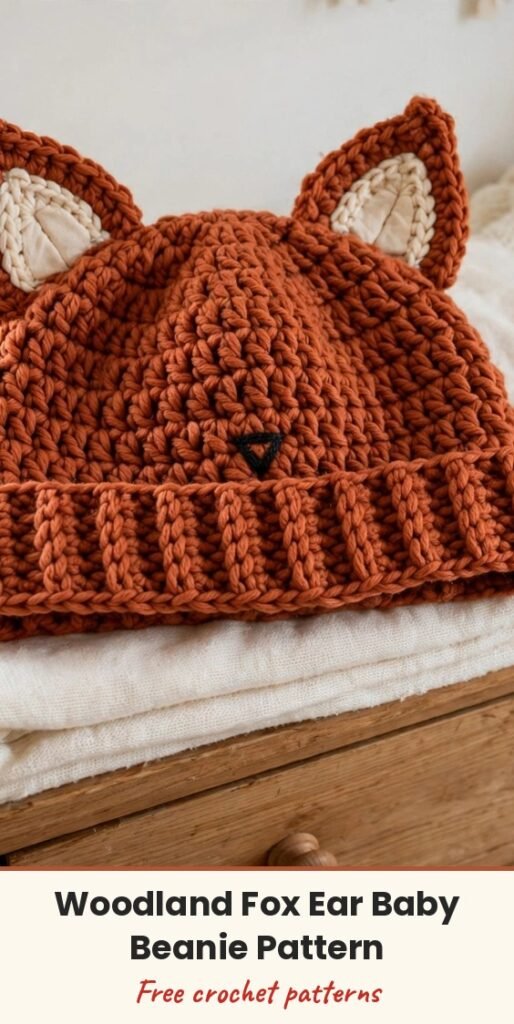
Table of Contents
Go dig through your yarn stash right now! That skein of super soft bulky yarn you have been saving for something special? This adorable fox ear baby beanie is the project. It works up in just a few hours and the squishy half double crochet fabric feels like a little cloud on a baby’s head.
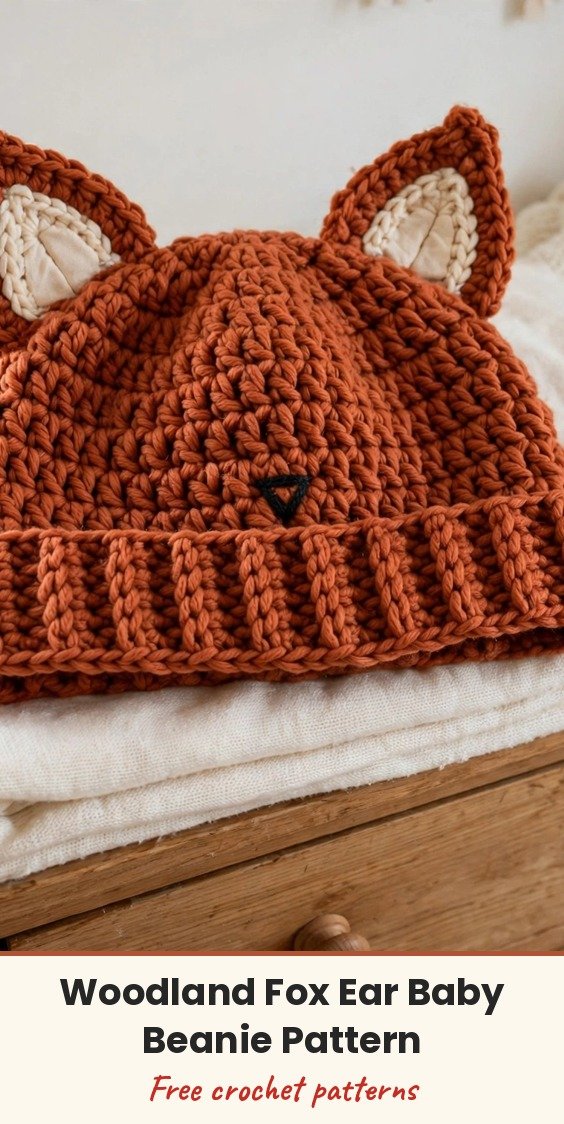
We will start with a magic ring at the crown and work down in continuous rounds, then make a separate ribbed brim worked flat, and finish with pointed ears that have a contrasting liner peeking out for that classic fox look. Rust orange with cream liners is the classic colourway, cream with rust liners gives you a sweet arctic fox, and warm tan with rust accents is perfect for fall photos.
The pattern is written for 0 to 3 months, with changes for 3 to 6 months and 6 to 12 months in parentheses. It is rated intermediate, but if you have made at least one hat before and are comfortable in continuous rounds, you can absolutely handle it. The trickiest parts are the brim attachment and getting the ears symmetrical, and I will walk you through both.
Materials
- Bulky weight yarn (CYCA 6), main colour: approximately 80 yards for 0 to 3 months, 90 yards for 3 to 6 months, 100 yards for 6 to 12 months
- Approximately 15 yards bulky weight yarn in a contrast colour for the ear liners (all sizes)
- Small amount of black yarn or embroidery floss for the nose
- 6.5 mm (US K-10.5) crochet hook for the hat body and ears
- 6.0 mm (US J-10) crochet hook for the ribbed brim
- Stitch marker
- Yarn needle
- Scissors
- Pins for blocking the ears
Abbreviations
- ch: chain
- sc: single crochet
- hdc: half double crochet
- sl st: slip stitch
- BLO: back loop only
- hdc2tog: half double crochet two together (decrease)
- pm: place marker
- st(s): stitch(es)
- RS: right side
- WS: wrong side
- MC: main colour
- CC: contrast colour
Special Stitches
- Magic ring: make a loop with the yarn tail crossing over the working yarn, insert your hook through the loop, yarn over and pull up a loop, then chain as directed and work your stitches into the ring. Pull the tail firmly afterwards to close the center hole completely.
- hdc2tog: yarn over, insert hook into the next stitch, yarn over and pull up a loop (3 loops on hook). Without completing the stitch, yarn over, insert hook into the following stitch, yarn over and pull up a loop (5 loops on hook). Yarn over and pull through all 5 loops.
Gauge & Size
- Finished sizes: 0 to 3 months fits head circumference 13 to 14 inches, hat height 5.5 inches; 3 to 6 months fits 14 to 16 inches, height 6 inches; 6 to 12 months fits 16 to 17 inches, height 6.5 inches (heights exclude ears)
- Gauge: 10 stitches by 8 rounds = 4 inches in half double crochet worked in the round with the 6.5 mm hook. Please swatch, at least 20 stitches by 16 rounds, because meeting gauge is essential for the head circumference
- Construction: hat body worked top-down in continuous rounds, ribbed brim worked flat and seamed into a tube, then joined to the body; ears worked flat and sewn on
- Skill level: Intermediate
Hat Body
Using MC and the larger hook (6.5 mm), start with a magic ring. The ch 2 at the start does not count as a stitch throughout, and we do not join rounds: place a marker in the first stitch and move it up each round.
Round 1: Ch 2, work 8 hdc into the magic ring, pull the ring closed tight. Do not join. Pm in first stitch. (8 hdc)
Round 2: Work 2 hdc in each stitch around. (16 hdc)
Round 3: (2 hdc in next st, hdc in next st) 8 times. (24 hdc)
Round 4: (2 hdc in next st, hdc in each of next 2 sts) 8 times. (32 hdc)
Round 5: (2 hdc in next st, hdc in each of next 3 sts) 8 times. (40 hdc)
For 0 to 3 months: skip straight to Round 6 below.
For 3 to 6 months: work one additional round: (2 hdc in next st, hdc in each of next 4 sts) 8 times. (48 hdc) Then skip Round 6.
For 6 to 12 months: work two additional rounds. First extra round: (2 hdc in next st, hdc in each of next 4 sts) 8 times. (48 hdc) Second extra round: (2 hdc in next st, hdc in each of next 5 sts) 8 times. (56 hdc) Then skip Round 6.
Round 6 (0 to 3 months only): (2 hdc in next st, hdc in each of next 4 sts) 8 times. (48 hdc)
Stitch counts after all increase rounds: 48 hdc for 0 to 3 months, 48 hdc for 3 to 6 months, 56 hdc for 6 to 12 months. Checkpoint: laid flat, the crown should measure approximately 4.75 inches in diameter for the smaller sizes or 5.5 inches for 6 to 12 months.
Even rounds: work hdc in every stitch around with no increases or decreases. For 0 to 3 months, work Rounds 7 through 14 (8 even rounds, 48 hdc each). For 3 to 6 months, work Rounds 7 through 15 (9 even rounds, 48 hdc each). For 6 to 12 months, work Rounds 7 through 16 (10 even rounds, 56 hdc each).
Checkpoint: from the magic ring to the current row, the hat should measure approximately 3.5 inches (0 to 3 months), 4 inches (3 to 6 months), or 4.5 inches (6 to 12 months). Do not fasten off or bind off: set the body aside and make the brim.
Ribbed Brim
Using MC and the smaller hook (6.0 mm), chain 9 (all sizes).
Row 1 (RS): Sc in 2nd ch from hook and in each ch across. Turn. (8 sc)
Row 2 (WS): Ch 1, sc in BLO of each st across. Turn. (8 sc)
Repeat Row 2 until you have 48 rows total (0 to 3 months), 52 rows total (3 to 6 months), or 56 rows total (6 to 12 months). After the final row, do not fasten off.
To seam the brim: fold the strip with right sides together, aligning the first and last rows. Sl st or sc through both layers across the 8 stitches to seam. Fasten off, weave in ends, and turn right side out. You now have a ribbed tube.
To attach the brim: hold the hat body with the crown at the top and the open edge at the bottom, and the brim tube with its seam at the back. With MC and the larger hook, working through the top long edge of the brim, join yarn and sl st the brim to the body, inserting your hook into one brim stitch and one body stitch at the same time, all the way around: 48 (48, 56) sl sts total. Fasten off and weave in ends.
Checkpoint: the finished hat with brim should measure approximately 5.5 inches (0 to 3 months), 6 inches (3 to 6 months), or 6.5 inches (6 to 12 months) from brim bottom to crown.
Outer Ears
Make 2 in MC with the larger hook. Chain 2 to begin.
Row 1 (RS): Work 3 sc in 2nd ch from hook. Turn. (3 sc)
Row 2 (WS): Ch 1, 2 sc in first st, sc in next st, 2 sc in last st. Turn. (5 sc)
Row 3: Ch 1, 2 sc in first st, sc in each of next 3 sts, 2 sc in last st. Turn. (7 sc)
Row 4: Ch 1, 2 sc in first st, sc in each of next 5 sts, 2 sc in last st. Turn. (9 sc)
Row 5: Ch 1, sc in each st across. Turn. (9 sc)
Row 6: Ch 1, sc in each st across. Turn. (9 sc)
Do not fasten off. Set aside and make the ear liner.
Ear Liners
Make 2 in CC with the larger hook. Chain 2 to begin.
Row 1 (RS): Work 3 sc in 2nd ch from hook. Turn. (3 sc)
Row 2 (WS): Ch 1, 2 sc in first st, sc in next st, 2 sc in last st. Turn. (5 sc)
Row 3: Ch 1, 2 sc in first st, sc in each of next 3 sts, 2 sc in last st. Turn. (7 sc)
Row 4: Ch 1, sc in each st across. Turn. (7 sc)
Row 5: Ch 1, sc in each st across. Turn. (7 sc)
Fasten off, leaving a long tail for sewing. The liner is narrower and shorter than the outer ear, which creates the visible MC border. That is correct!
Finishing & Assembly
Assemble each ear: hold one outer ear with RS facing you and place one liner on top, also RS facing, centered so one stitch of MC shows on each side and one row of MC shows at the bottom edge. Pin the liner in place, then sl st the two pieces together along the outer edge through both layers, up one side, across the top, and down the other side, leaving the bottom edge open. Do not stuff: the ear should stay flat and pointed at the tip. Repeat for the second ear.
Attach the ears: lay the finished hat flat with RS up and the brim at the bottom. Find the center front (where the nose will go) and place the ears symmetrically, approximately 1.5 inches to the left and right of the center top, each ear base spanning about 5 to 6 stitches. Pin each ear with its open bottom edge flush against the hat, angled outward about 5 to 10 degrees from vertical. Whipstitch the bottom edge of each ear securely to the hat with MC, pulling firmly so the ears stand upright, and weave in all ends inside the hat.
Nose, embroidered option (recommended): thread a yarn needle with black bulky yarn or 6 strands of black embroidery floss. At the center front, approximately 1 inch above the top of the brim ribbing, embroider a small inverted triangle about 0.5 inch wide and 0.4 inch tall, filled with satin stitches placed side by side. Knot securely on the inside and weave in the ends.
Nose, crocheted option: with black yarn and the smaller hook, make a magic ring, ch 1, work 6 sc into the ring, pull tight, sl st to join. (6 sc) Fasten off with a long sewing tail and sew the little circle on in the same position.
Final finish: weave in all remaining ends. Turn the hat inside out and block by misting lightly with water, shaping it on a balloon or hat form at the correct head circumference, easing the ears into upright pointed shapes. Let it dry completely, at least 4 to 6 hours. If you used a chenille-style yarn, hover a steam iron 1 inch above the surface instead of wet blocking.
Tips
Keep that stitch marker moving round by round. In continuous rounds it is so easy to lose track of where a round begins, and counting back is no fun at all.
When attaching the brim to the body, take your time lining everything up. This join is visible, so neat slip stitches make a big difference to the finished look.
Pinning the ears before sewing is not optional, trust me! Symmetrical ear placement is what turns a cute hat into a professional-looking one.
Care: machine wash on a gentle cycle in cold water inside a mesh laundry bag, tumble dry low or air dry flat. Do not iron directly on chenille or velvet-style yarns, and do not bleach.
Woodland Fox Ear Baby Beanie Free Crochet Pattern
Materials
Steps
- Work the hat body top-down in continuous hdc rounds to 48 (48, 56) sts
- Work the even rounds to full body height for your size
- Crochet the ribbed brim flat in BLO sc, 48 (52, 56) rows, and seam it into a tube
- Slip stitch the brim to the body all the way around
- Make two outer ears and two smaller liners and join each pair
- Pin and sew the ears symmetrically to the crown
- Embroider or crochet the little black nose at the center front
- Move your stitch marker up every round, continuous rounds are easy to lose
- Pin the ears before sewing, symmetry makes the finished hat look professional
- Line up the brim join carefully, neat slip stitches show on this seam


